It hit me one morning—the terrible, gut-wrenching sound of my dishwasher tripping the circuit breaker during a busy dinner party. There I was, mid-wash cycle, when everything suddenly went dark. It was a simple task turned complicated, and I realized I was underestimating the electrical needs of my appliance. That lightbulb moment led me down a rabbit hole of research, where I uncovered a crucial fact: a standard kitchen outlet often isn’t enough to handle a dishwasher’s power draw, especially when it’s working hard or upgraded with modern features.
Why Your Dishwasher Needs Its Own Dedicated Circuit
It’s tempting to rely on the same outlet as your microwave or toaster, but here’s the thing—dishwashers can draw a significant amount of current, particularly during start-up or heavy use. This can cause circuit overloads, leading to inconvenient shutdowns or even potential electrical hazards. Early on, I made the mistake of sharing a circuit with other high-power appliances, which caused my dishwasher to malfunction and voided part of my warranty. Want to avoid the same pitfalls? Keep reading, and I’ll guide you through the why and how of installing a dedicated 20-amp circuit for your dishwasher, ensuring safety and optimal performance.
Could a Simple Power Upgrade Really Make That Much Difference?
Many homeowners overlook the importance of proper circuit capacity, thinking it’s a minor detail. But according to electrical standards and expert advice, appliances like dishwashers often require specific circuits to function safely and efficiently. Neglecting this can lead to frequent breaker trips, damage to your appliance, or voided warranties. I learned this through firsthand experience and later verified it by consulting professional sources, like the appliance experts at Appliance Doctorz, who emphasize the importance of correct wiring for appliance longevity and warranty compliance. If you’re worried about whether your current setup can handle your dishwasher’s demands, consider reviewing your circuit configuration. For reliable information, check out their detailed guide on selecting the right parts for dishwasher installation, which spells out exactly why dedicated circuits matter.
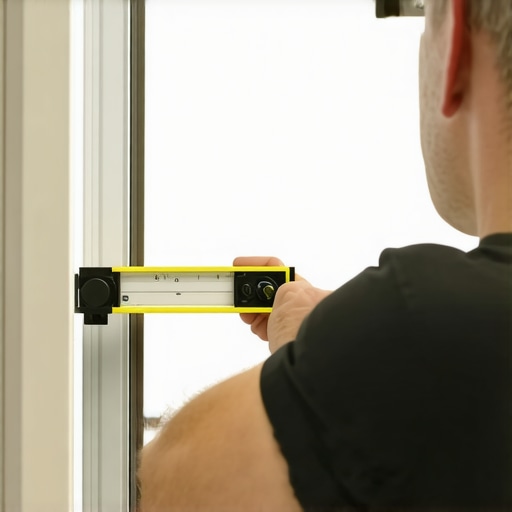
Run the Right Wires to Your Dishwasher
During my own upgrade, I replaced the cheap, shared outlet cable with a heavy-duty 12-gauge wire. This choice is like upgrading from a tricycle chain to a racing bike—more strength and reliability. Use a conduit or proper cable to reach the dishwasher location, ensuring minimal bends to avoid damaging the wire. Always turn off the main power before starting, and verify with a tester that the circuit is dead. For detailed wiring specs, check this guide.
Locate Your Breaker and Prepare for the Connection
Find the dedicated 20-amp circuit breaker in your panel, typically labeled for kitchen outlets. Switch it off to prevent shorts or shocks. Use a voltage tester to double-check no current flows. Then, strip the wire insulation carefully, about 3/4 inch, to expose the conductors. Think of this as preparing your tools for a precision job—attention to detail counts.
Create a New Outlet and Secure Connections
Install a ground-fault circuit interrupter (GFCI) outlet rated for a dishwasher. Set it in an accessible location near the sink but away from direct water splash zones. Connect the hot (black), neutral (white), and ground (green or bare copper) wires to the corresponding terminals. Tighten all screws firmly to prevent future arcing or loose connections. Use wire nuts and electrical tape where necessary, following local code standards.
Ensure Proper Grounding and Code Compliance
Grounding is like your appliance’s safety net—fail to connect it properly, and you risk electric shock. Verify the ground wire attaches securely to the outlet’s grounding terminal and the panel’s grounding bus. Use a multimeter to check continuity before powering on. For more nuanced details, see tips for selecting installation parts.
Testing and Final Checks
Once wired and mounted, switch the breaker back on. Use a voltage tester at the outlet to confirm power presence and proper wiring. Run the dishwasher empty on a cycle to observe performance—listen for smooth operation and check for leaks or errors. Remember, a well-implemented dedicated circuit not only boosts efficiency but also protects your warranty—more on that later in this resource.
Keep Records and Document the Installation
Take photos of your work, note the breaker number and wiring details. These records are invaluable if you need to troubleshoot or validate warranty claims later. Proper documentation supports your warranty rights, especially when claims involve warranty-eligible parts, as discussed in this article.Many homeowners assume that following basic installation steps is enough to ensure their dishwasher functions properly and remains covered under warranty. However, there are nuanced pitfalls that even experienced DIYers often overlook, leading to costly repairs or warranty denials. One common misconception is that using generic parts during installation doesn’t affect warranty coverage. In reality, most manufacturers specify using certain high-quality, compatible components—like non-stainless steel braided supply hoses or non-specified drain fittings—that can void warranty protections if not adhered to. For example, a study by appliance experts indicates that incorrect parts can hinder warranty claims, especially if failure occurs due to incompatible or subpar components—that’s why comprehensive knowledge of approved parts is essential.
Another overlooked nuance involves the wiring and grounding specifics. Many installers underestimate the importance of proper grounding—using inadequate grounding connections or bypassing GFCIs can pose safety risks and lead to warranty rejection. Proper grounding not only ensures safety but also aligns with electrical codes, which are often strict in warranty evaluations. Be sure to consult professional guidelines or expert resources like this guide for detailed installation standards.
What most people miss is the significance of maintaining documented, detailed records of the installation process. Equipment manufacturers increasingly verify warranty claims with photographic evidence, logs, and records of part serial numbers or configuration. Failing to keep thorough records can make it difficult to prove that proper procedures were followed if a dispute arises, resulting in claim denial. As highlighted by warranty specialists, consistent documentation acts as your safeguard against technical or procedural rejection, especially in complex or high-value installations.
Can Leaving Out Small Details Lead to Big Problems
Many assume that small mistakes, like neglecting to secure a high loop drain or failing to properly seal connections, are trivial. But such oversights can cause significant issues—backflow, leaks, or electrical faults—that compromise not only performance but also warranty validity. For instance, improper drain loops can lead to water siphoning back into the dishwasher, a common source of early component failure. To avoid these pitfalls, it’s crucial to understand the advanced nuances of installation standards. For insights on proper part selection, check this resource.Maintaining your dishwasher’s optimal function over time requires more than just routine cleaning; it involves investing in precise tools and following methodical procedures. I personally recommend using a high-quality multimeter with a digital display, such as the Fluke 117, because it provides accurate voltage and continuity readings essential for diagnosing electrical issues without guesswork. Additionally, a set of insulated screwdrivers becomes invaluable when handling live wiring, ensuring safety while performing upgrades or repairs. For checking water pressure and flow, a specialized pressure gauge connected to the inlet valve helps confirm that your dishwasher receives adequate water supply, which is critical for long-term efficiency. Regular use of a calibration kit designed for dishwasher sensors can help maintain accurate temperature and turbidity readings, preventing false error codes and unnecessary service calls.
In terms of software, I utilize diagnostic apps compatible with smart dishwashers to monitor error logs remotely. These tools often connect via Wi-Fi, giving insights into performance trends and early warnings before catastrophic failures. Trend analysis through these apps enables proactive maintenance, saving time and money. As manufacturers increasingly incorporate IoT features, keeping your app updated ensures compatibility and access to new troubleshooting routines, aligning with the future of appliance care.
Looking ahead, the trend points toward more integrated diagnostic tools that combine physical equipment with AI-driven diagnostics. These systems will likely predict failures before they occur, allowing for preemptive servicing. Embracing these advances now can set the foundation for even more reliable maintenance routines.
Over the years, I’ve learned that installing a dishwasher isn’t just about connecting hoses and plugging it in; it’s about understanding the nuanced details that safeguard your investment and ensure long-term performance. From my firsthand experience, the hardest lesson was realizing how a small oversight—like skipping proper grounding or using incompatible parts—could void an entire warranty and lead to costly repairs. These insights might seem minor at first, but they have profound implications for DIY enthusiasts and homeowners alike. Remember, the devil is in the details, and paying close attention to each step can make all the difference in maintaining appliance longevity and warranty validity.
What I Wish I Knew About Installation and Warranty Before Wading In
- Proper Part Selection Matters Deeply: Using recommended, high-quality components ensures your warranty remains intact. An overlooked detail like choosing the wrong drain hose or fittings can void your coverage. Trust in official guides like this resource to steer you right.
- Grounding Isn’t Optional—It’s Lifesaving: Neglecting correct grounding can not only jeopardize safety but also invalidate your warranty. Always double-check with a multimeter and adhere to code standards—as explained in this guide.
- Documentation Is Your Partnership with Warranty: Keep detailed records, photographs of your installation, serial numbers, and receipts. These documents are your best defense against claim denial, as emphasized in this article.
- Small Oversights Can Lead to Big Woes: Missing high loop drain, improper sealing, or neglecting to test wiring thoroughly can cause leaks or electrical faults. Paying attention during each step reduces future hassles.
Tools and Resources That Elevate My Installation Game
- Digital Multimeter: A Fluke 117 has saved me countless times diagnosing electrical issues without guesswork. Accurate measurement is critical for safety and warranty compliance.
- Professional Wiring Guides: The comprehensive articles at this site provide step-by-step instructions that build confidence and ensure correctness.
- Calibration and Maintenance Apps: Using IoT-compatible tools helps monitor performance trends, catch issues early, and document maintenance routines, aligning with the future of smart appliances.
- Quality Installation Parts: Investing in stainless steel supply hoses and correct fittings, as discussed in this article, pays dividends in durability and warranty protection.
Rise to the Challenge and Secure Your Dishwasher’s Future
The path to a reliable, warrantied dishwasher begins with meticulous installation, ongoing maintenance, and awareness of the critical details that matter. You’re now equipped with the knowledge to handle complex wiring, select the right parts, and keep thorough records—steps that safeguard your investment and give you peace of mind. Remember, every detail you attend to today builds a stronger foundation for many trouble-free years ahead. Embrace the process, and don’t shy away from taking control of your appliance’s health; the payoff is well worth it.
What specific step in your installation process do you find most challenging? Share your experiences below, and let’s learn together!
Related Posts
Why Professional Leveling Is Critical for Door Seal Integrity
It was a quiet Saturday morning when I first experienced…
Why Professional Installers Use Constant-Tension Clamps
It was an ordinary Tuesday when I finally experienced what…

The Hidden Costs of Skipping Professional Installation Services
It was a morning like any other, until I opened…