
I was standing in a puddle of cold, greasy water when I realized my dishwasher had finally given up the ghost. No lights, no sounds, just a very expensive metal box taking up space in my kitchen. My first instinct was to panic and start browsing for a diy dishwasher installation step-by-step guide, thinking I needed a whole new unit. I’ve been a DIY enthusiast for years, but in that moment, I felt like a total novice. I almost called a repair tech for a $200 service visit just to tell me what was wrong. Luckily, I remembered a similar headache I had years ago where I replaced a perfectly good control board because I didn’t know how to diagnose dishwasher parts during warranty periods correctly. Today, I’m going to show you how to avoid that wallet-draining mistake by testing the most common culprit: the thermal fuse.
The Tiny Gatekeeper of Your Machine’s Power
Before you start maximizing your dishwashers warranty coverage today or tearing out the motor, you need to understand the thermal fuse’s job. It is essentially a safety switch. If your dishwasher’s internal temperature spikes too high—perhaps due to a failing heating element or a clogged pump—this fuse blows to prevent a house fire. It is often the common part that causes a dishwasher to hum but not start or simply prevents it from powering up at all. A surprising fact from the National Fire Protection Association is that electrical malfunctions remain a top cause of home fires, making this tiny, one-time-use fuse your home’s best friend. Have you ever had your machine just go completely dark in the middle of a cycle?
Is DIY Electrical Testing Actually Safe for Beginners?
I get the skepticism. Electricity is intimidating. However, testing a thermal fuse doesn’t involve working with live wires if you follow basic safety steps. All we are looking for is continuity. In my early days, I used to just swap parts blindly, which is a great way to waste money. Now I know that knowing which essential parts every dishwasher owner should know about can save you hundreds. If you can use a basic multimeter, you can handle this. We aren’t reinventing the wheel; we’re just checking if a bridge is still standing or if it has collapsed.
Why Continuity Is the Gold Standard for Fuse Testing
Testing for continuity is the only way to be 100% sure your fuse is dead. Visual inspections are useless here; a fuse can look pristine on the outside while being totally fried on the inside. By using a multimeter, you are sending a tiny, harmless pulse through the part to see if it makes it to the other side. This is the exact same method professionals use. It cuts out the guesswork and ensures you aren’t replacing parts that still have life in them. Let’s grab our tools and dive into the door panel to find that elusive fuse.
Cut the Power Before You Do Anything Else
Before you even think about how to diagnose dishwasher parts during warranty periods, you must eliminate the risk of shock. Head to your circuit breaker and flip the switch for the dishwasher. I cannot stress this enough; I once skipped this step during a late-night repair and ended up with a singed knuckle and a very angry spouse. Once the power is dead, verify it by trying to turn the display on. If it’s truly dead, you are ready to start common dishwasher parts and how to replace them effectively by accessing the inner door.
Access the Control Board Hidden in the Door
Open the dishwasher door fully and locate the screws around the inner perimeter. You will typically need a Torx T15 screwdriver for this. As you remove the last few screws, keep one hand on the outer door panel so it doesn’t drop onto your feet. I once let a heavy stainless panel slide off, and it left a nasty dent in my floor that cost more to fix than the dishwasher itself. Once the panel is loose, you’ll see the essential parts every dishwasher owner should know about, including the main control board and the wiring harness. 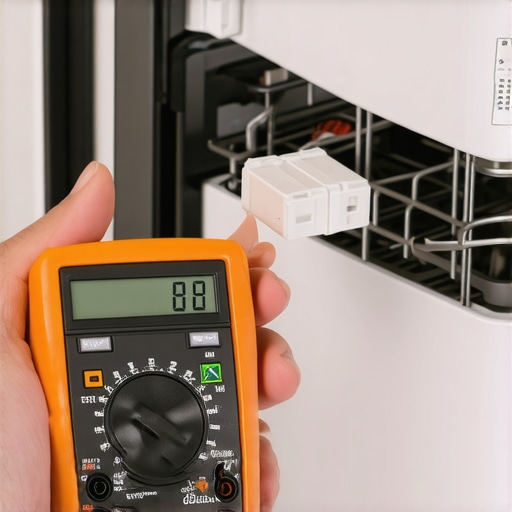
Find the Little White Component Near the Wiring
The thermal fuse is usually a small, white or black plastic cylinder clipped directly to the control board housing. It is the gatekeeper for the electricity entering the board. You will see two wires—often tan or grey—plugged into it via spade connectors. To get an accurate reading, you must disconnect at least one of these wires. Use needle-nose pliers to gently pull the connector off the terminal. If the fuse is original, it might be stuck tight, so wiggle it side-to-side rather than pulling straight back with force. This is a critical step in understanding dishwasher parts a key to effective maintenance.
Read Your Multimeter Like a Seasoned Technician
Set your multimeter to the lowest setting for Ohms (resistance) or the continuity setting that beeps. Touch one probe to each of the two metal terminals on the fuse. If the meter beeps or shows a reading close to 0.000, your fuse is perfectly fine, and your problem lies elsewhere—perhaps with the how to replace a faulty heating element by yourself process. However, if the screen shows “OL” or “1,” the internal link has melted. This simple test is the difference between a $15 fix and an unnecessary $800 replacement. It is the ultimate way of when to replace dishwasher parts for optimal performance without wasting a dime.
Swap the Part and Check for Heat Issues
If the fuse is blown, don’t just replace it and walk away. A fuse blows for a reason, often because the wire harness is loose or the heating element is drawing too much current. I remember a Whirlpool I fixed where the fuse kept blowing every three months because I didn’t realize the wiring harness itself was slightly melted. Always check the connectors for signs of browning or heat damage. If you’ve had to how to reset your dishwasher control board after a power cut frequently, it might have been a sign that the fuse was on its last legs. Secure the new fuse, reattach the wires, and screw the door panel back on before restoring power.
Now that you’ve mastered the thermal fuse, let’s talk about the elephant in the room: the warranty. Most people think that simply hiring a licensed technician is a ‘get out of jail free’ card if the unit fails. I used to think the same until a manufacturer denied my claim because my installer didn’t document the water pressure. The common belief is that a pro-install is bulletproof, but the reality is that how to verify your professional installation receipt for insurance matters more than the signature itself. If your receipt doesn’t explicitly mention that the unit was leveled and tested for leaks, the manufacturer can blame a future motor failure on ‘improper installation’ rather than a part defect.
The Professional Installation Myth That Costs You Money
When you are maximizing your dishwashers warranty coverage today, you aren’t just paying for labor; you are paying for a paper trail. A major ‘oops’ factor I see with DIYers and even some ‘pro’ handymen is using the cheap plastic water lines that come in the box. I’ve seen these crack after just two years. This is why professional installers refuse to use plastic water lines and insist on braided steel instead. If your machine floods and you used a plastic line, the manufacturer often walks away from the damage claim entirely. 
Does a Non-OEM Part Actually Kill Your Coverage?
This is where the nuance gets interesting. Many technicians will tell you that using anything other than the brand-name part voids everything. However, according to the Federal Trade Commission (FTC) and the Magnuson-Moss Warranty Act, it is actually illegal for a company to void your warranty simply because you used an aftermarket part, unless they can prove that specific part caused the damage. This means you can often save 50% on components while the parts you can swap yourself without voiding your protection stay within legal bounds. The trap is failing to document the swap. Always photograph the old part and the new one installed.
The Supply Line Mistake Most DIYers Make
Beyond the fuse, the most critical point of failure in any new setup is the connection to the water inlet valve. People tend to over-tighten these, thinking ‘more is better.’ In reality, over-tightening crushes the rubber gasket and causes a slow, hidden drip that will rot your floor before you ever see a puddle. Using the most durable braided steel hoses for long term safety is non-negotiable for anyone who values their kitchen cabinets. It’s a tiny investment that prevents a $5,000 insurance claim later. Have you ever fallen into this trap or had a warranty claim denied for a tiny technicality? Let me know in the comments.
I’m a firm believer that your repair is only as good as your tools. Whenever I crack open a cabinet, my Klein MM400 multimeter is the first thing out of the bag. You don’t need a $500 lab-grade unit, but you need something that won’t give you a ghost reading when you are trying to figure out how to test your water inlet valve for failure. A cheap $5 meter might tell you there is continuity when there isn’t, leading you to keep a faulty part and waste time on the wrong fix. I also keep a small telescoping mirror handy; it is the best way to test for a slow leak behind the kickplate without having to lie flat on your face in potentially dirty floor water. Having the right kit means you stop guessing and start diagnosing like a pro.
How do I maintain my dishwasher’s performance over time?
The secret isn’t just running a cleaning cycle once a year with a store-bought tablet. It is about the understanding dishwasher parts a key to effective maintenance. Every three months, I pull the lower spray arm and check the holes. Even with modern filtration, seeds and calcium bits get through the screen. Use a toothpick or a small dental pick—it’s the secret to getting gunk out of your lower spray arm without damaging the plastic. According to the Association of Home Appliance Manufacturers (AHAM), mineral buildup can reduce water flow efficiency by up to 15% before you even notice the dishes are staying dirty. If you ignore this, the circulation motor has to work harder against the backpressure, significantly shortening its lifespan. 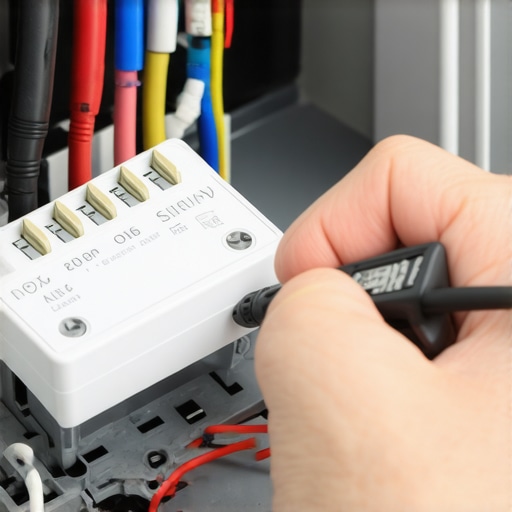
Why Your Smart App is Lying to You
We are moving into an era where every machine has a Wi-Fi module, but why your smart machines energy report is always wrong is a question I get constantly. These apps estimate usage based on cycle time averages, not actual on-board flow meters. Don’t rely on a push notification to tell you when a part is failing. If you hear a high-pitched whine, you need to know how to identify a failing circulation motor by sound rather than waiting for an error code that might come too late. In the next five years, I predict we will see true AI-driven vibration analysis built into control boards, but until then, your ears and a good multimeter are your best defenses.
Stock These Two Parts Before You Need Them
I always tell my friends to keep a spare thermal fuse and a door gasket in their “junk drawer.” These are the replacement parts every dishwasher owner should keep on hand because they inevitably fail on a Friday night before a big holiday dinner. Finding top tips for selecting the right parts for dishwasher installation now means you won’t be paying 4x the price for emergency shipping later. My pro tip: if you ever notice the door feels “loose” or drops faster than usual, check the springs immediately. Learning why your door springs are squeaking and how to fix them can prevent the heavy panel from slamming down and cracking the plastic inner liner. Take five minutes this weekend to pull your lower spray arm and clear the jets with a toothpick—you’ll be shocked at the difference in your glassware’s shine.
The Hard Lessons That Saved My Kitchen Floor
Through years of fixing my own appliances, I’ve realized that the biggest mistakes don’t happen during the repair itself, but in the documentation. I always keep a digital folder of my receipts because I’ve had to learn how to negotiate a denied warranty claim over water damage after a technician claimed I used the wrong parts. Another lightbulb moment was realizing that ‘hand-tight’ isn’t just a suggestion; it’s a rule to prevent gasket failure. Finally, never ignore a slow drain; it’s usually the precursor to a blown thermal fuse. These small habits are what differentiate a weekend warrior from someone with expert advice on dishwasher installation troubleshooting at their fingertips.
The Three Tools I Never Repair Without
#IMAGE_PLACEHOLDER_E# If you’re serious about keeping your machine running, skip the cheap hardware store kits. First, get a reliable multimeter; it’s the only way to be sure about your electrical components. Second, always replace your stock lines with the most durable braided steel hoses for long term safety. Third, keep a bag of citric acid in your pantry. It is the eco-friendly way to descale your machine with citric acid and keep the heating element from burning out prematurely. I trust these items because they’ve saved me from thousands of dollars in water damage over the last decade.
Stop Fearing the Machine and Take Control
You don’t need a degree in engineering to keep your kitchen running smoothly. By checking the parts to check when installing a dishwasher for long-term performance, you are already ahead of 90% of homeowners. Every time you fix a fuse or clear a spray arm, you are building the confidence to handle bigger home projects. Your dishwasher is a tool, not a mystery box—treat it with a little maintenance, and it will serve you for years. Have you ever successfully fixed an appliance only to have the warranty company try to fight you on it? Let me know your stories in the comments below.
Related Posts
Why Modern Control Boards Fry Without a Dedicated Surge Protector
I'll never forget the moment my dishwasher stopped mid-cycle, and…
Why You Should Never Use Teflon Tape on a Compression Fitting
It was a frustrating Saturday morning after yet another leaky…
Why Your Hard Water is Killing Your Heating Element
Ever kicked on your dishwasher only to be greeted by…