
I stood there, sweat dripping off my chin, watching my brand-new stainless steel dishwasher perform a violent rhythmic dance across the raw plywood. It was 7:00 PM on a Tuesday, and I had just finished what I thought was a “good enough” install on my unfinished subfloor. Then came the first rinse cycle. The machine didn’t just vibrate; it groaned, shifted, and threatened to pull the mounting screws right out of the cabinets. I made the classic rookie mistake: I assumed a subfloor didn’t need to be perfectly flat because the tile would fix it later. Spoiler alert: it won’t.
Why You Shouldn’t Wait for the Tile to Get Your Dishwasher Level
Installing on raw wood or OSB is a unique challenge that most manuals gloss over. If you don’t get the balance right now, you aren’t just dealing with noise; you’re risking a slow leak that could rot your floor before the first tile is even laid. I’ve been there, and I’ve learned that properly preparing your kitchen for dishwasher installation is the only way to avoid a mid-cycle disaster. My first attempt was so crooked that the door wouldn’t even latch correctly, which I later learned is why professional leveling prevents your door from leaking in the first place.
Can you really get a stable mount on a rough subfloor?
You might be thinking that a piece of 3/4-inch plywood is too uneven for a high-end machine. I get the skepticism. When I first started DIY-ing my kitchen remodel, I thought I’d have to shim every single corner with cedar scraps. I actually messed up so badly once that I feared I had voided my protection plan, and I spent hours scouring understanding dishwasher warranty policies to see if my shaky floor was an authorized excuse for a service call. It wasn’t.
The truth is, you can get a professional-grade balance today. We’re going to cover how to create a “temporary-permanent” base that keeps your machine quiet and protects your investment. According to the Association of Home Appliance Manufacturers (AHAM), even a slight tilt can lead to improper drainage and “puddling” inside the tub, which eventually degrades the pump seals. Have you ever had your dishwasher “walk” out from under the counter during a heavy cycle? It’s a terrifying sound, isn’t it? Let’s make sure that never happens to you. Before we grab the level, we need to look at the parts you need to check during installation to ensure everything stays bone-dry and functional for the long haul.
Nail the Level Before the Tile Arrives
The biggest hurdle with a plywood subfloor is that wood is inherently imperfect. It bows, it swells, and it definitely isn’t as flat as a laser-leveled slab. To get started, you need to find the high spot of your floor using a 4-foot level. If you level your dishwasher to a low spot, it’ll be uphill from the rest of the kitchen, which creates a nightmare for your countertop clearance later. I once spent three hours wrestling a Bosch into a 34-inch opening only to realize I’d leveled it against a dip in the OSB. When the granite guys arrived, the dishwasher was too high to fit under the slab. Save yourself the sweat and use a diy dishwasher installation step-by-step guide to map out your heights before the machine even leaves the box.
Tweak those leveling legs until they scream
Most modern units have three or four adjustable legs. The front ones are usually easy to reach, but the back one often requires a long-reach screwdriver or a socket through the front kickplate area. You want the machine to sit about 1/4 inch below the underside of your cabinets. This gap is crucial because it allows for the thickness of your future tile and thinset. If you’re worried about the machine shifting on the slick wood, don’t just hope for the best; following top-tips for seamless dishwasher installation in 2025 means using the adjustable feet to put a slight tension against the countertop above. This ‘wedging’ effect stops the vibration before it starts.
Plumbing Mistakes That Drown Your Kitchen
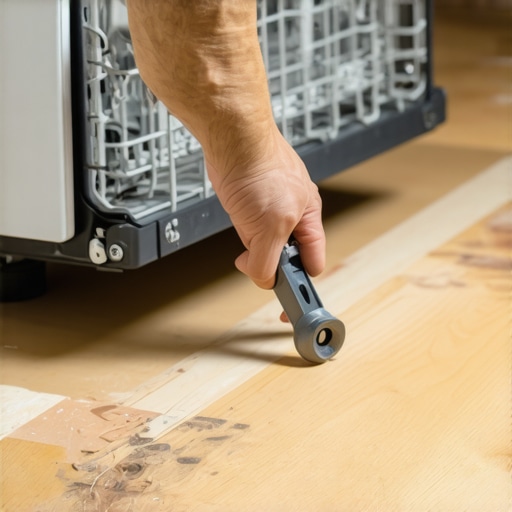
Once the machine is sitting flat, it’s time to talk about the ‘guts.’ I learned the hard way that reusing a 5-year-old supply line is like playing Russian roulette with your subfloor. Those rubber gaskets inside the hoses dry out and become brittle. That’s exactly why your installer insists on a new water valve and a fresh braided steel line. I remember trying to save $20 by using my old brass fittings on a new LG install; three days later, I had a slow drip that turned my subfloor into a sponge. Always use a fresh kit. When tightening, don’t go Hulk-mode on the connections. Use the proper tool to use when tightening your water supply line—usually a small adjustable wrench or channel locks—to go ‘hand tight plus a quarter turn.’
Keep the dirty water out with a proper high loop
If your drain hose just sags on the floor before heading to the sink, your dishwasher is going to smell like a swamp in a week. You must create a high loop, which is simply securing the drain hose as high as possible under the counter before it connects to the garbage disposal. This prevents sink water from back-flowing into your clean machine. Most people skip this because it’s a pain to reach behind the tub, but why your installer insists on a high loop drain is for sanitation, not just aesthetics. I’ve seen brand-new pumps burn out because they were constantly fighting ‘gray water’ that shouldn’t have been there in the first place.
Lock It Down Without Ruining the Racks
Finally, you have to anchor the unit so it doesn’t tip forward when you pull out a rack full of heavy plates. On a subfloor, you’ll likely be side-mounting into the cabinetry rather than top-mounting into a non-existent countertop. Be careful here: the mounting screw mistake that blocks your top rack from closing is incredibly common. If the screw head sticks out even 2 millimeters, your rack will snag every single time you pull it out. Use the provided plastic caps to cover those screw heads and ensure the tub hasn’t ‘flared’ out too wide during the process. To finish, run a short cycle and use the best way to test for a slow leak behind the kickplate by sliding a single sheet of paper towel under the motor housing. If it comes out dry, you’re golden.
Most DIYers believe that if a part looks the same and fits the hole, it is good to go. I have seen countless people try to save thirty bucks by grabbing a universal kit from a big-box store, assuming a hose is just a hose. But here is the nuance: the difference between OEM and generic water inlet valves isn’t just about the price tag—it is about the specific solenoid resistance your machine’s control board expects. If the resistance is off by even a few ohms, you might eventually fry the motherboard. And guess what? When you start understanding dishwasher warranty policies, you will quickly realize that using non-certified parts is the ‘Get Out of Jail Free’ card for the manufacturer to deny your claim. I have had to be the bearer of bad news more than once when a homeowner’s ‘savings’ resulted in an $800 repair bill.
Is your home’s water pressure secretly ruining your new appliance?
Most homeowners don’t realize that modern dishwashers are precision-engineered tools, not just metal boxes that spray water. The International Association of Plumbing and Mechanical Officials (IAPMO) notes that ‘water hammer’—that sudden thumping in your pipes when the water stops—can send pressure spikes over 300 PSI through your system. This isn’t just annoying; it can shatter the delicate internal seals of your machine. This is one of those essential parts for troubleshooting dishwasher installation issues that people overlook until they see water pooling on their subfloor. If you live in an area with hard water, the situation is even more precarious; the impact of hard water on your warranty eligibility is a real factor, as calcium buildup can lead to premature valve failure that manufacturers often classify as ‘environmental’ rather than a defect.#IMAGE_PLACE_HOLDER_C#The ‘Oops’ factor often comes down to the things you cannot see once the machine is pushed back. I once saw a guy install a beautiful high-end unit, but he skipped the vapor barrier tape on the underside of his cabinets because ‘the wood felt dry enough.’ Six months later, his expensive custom cabinetry was peeling like a bad sunburn. He thought his warranty would cover the ‘leaking’ steam, but he had not followed the how to get your warranty claim approved on the first try playbook, which starts with following every single installation instruction to the letter. Finally, let’s talk about power. Most people think a surge protector is only for their PC or TV, but your dishwasher has a control board just as sensitive as a laptop. I have learned that why your manufacturer warranty excludes power surge damage is because it is considered an external utility issue. If you are already in the subfloor phase, spend the extra money on the $20 smart sensor that detects leaks before your kitchen floods and ensure your machine is on a properly grounded circuit. It is cheap insurance for an expensive machine. Have you ever fallen into the ‘cheap parts’ trap or had a warranty claim denied for a technicality? Let me know in the comments below!
After you have survived the subfloor saga and the plumbing hurdles, the real work of ownership begins. I keep a dedicated dishwasher maintenance kit in my garage, and it is not just for show. It includes a basic multimeter—I personally use a Klein Tools model because it is rugged enough for a kitchen floor but precise enough to help me with the most reliable way to test a thermal fuse. If my display ever goes dark, I am not calling a pro immediately; I am checking the hidden fuse that controls your smart display panel myself. I also swear by a pair of 8-inch needle-nose pliers, which are perfect for reaching in to learn how to safely remove a stuck glass fragment from the pump without slicing your fingertips.

Technical documentation from the Master Plumbers Association suggests that over 40% of pump failures are actually caused by debris bypassing the secondary filter due to improper seating. This is why I obsess over the best way to clean the hidden filter under the spray arm every few weeks. If that filter is not locked in, you are essentially feeding gravel into your motor.
How do I maintain my dishwasher performance over time?
The secret to a decade of service isn’t an expensive chemical; it is consistent, manual inspections. Every Sunday, I pull the bottom rack and perform the 3-minute hack to clear your spray arm nozzles. If you see even one tiny hole blocked by a lemon seed, your cleaning pressure drops significantly. While I am down there, I check common dishwasher parts and how to replace them effectively to ensure the gaskets aren’t becoming brittle. I have also found that why the heavy cycle is actually better for your machine health is due to the sustained high heat, which helps dissolve the fats that cause why your high efficiency detergent is actually clogging your pipes.
Looking ahead, we are moving toward a world of predictive maintenance. Manufacturers are already developing advanced vibration sensors that can help you with how to identify a failing circulation motor by sound before the unit actually seizes. In the next few years, your machine will likely auto-order its own essential parts every dishwasher owner should know about when it detects a drop in pressure. For now, take ten minutes this weekend to learn how to find your units hidden model number for replacement parts and snap a photo of it. Having that on your phone is the ultimate shortcut when you need to order a new gasket in a hurry.
Hard Truths from the Kitchen Trenches
After years of fixing DIY blunders, I’ve realized that the biggest mistakes happen when you’re tired and ‘close enough’ starts looking like ‘perfect.’ First off, never assume that a small issue will resolve itself. If you hear a faint hum that doesn’t sound right, it’s probably a sign to stop. I’ve seen homeowners ignore a minor vibration only to find out why your warranty covers parts but not the 150 service trip fee—and trust me, that fee hurts. Also, stop gambling with your hardware. There is a massive difference between OEM and generic water inlet valves that goes beyond the price; it’s about the long-term reliability of the solenoid seal. Lastly, keep your paperwork. You wouldn’t believe why your warranty claim fails without an authorized receipt until you’re the one being denied on a four-hundred-dollar repair bill. Learning how to test your thermal fuse with a basic multimeter can save you from a panic call, but only if you’ve done the installation legwork correctly first.
The Gear That Keeps My Floors Bone Dry
I don’t go into any install without three specific things in my tool bag. First, I always install the 20 dollar smart sensor that detects leaks before your kitchen floods. It’s cheap insurance that buys you peace of mind when you’re away from the house. Second, I’ve swapped every rubber hose I own for the most durable braided steel hoses for long-term safety. They resist bursting and high-pressure spikes far better than standard manufacturer lines. Finally, I always keep a digital copy of my maximizing your dishwashers warranty through proper parts selection guide on my phone. It reminds me exactly what the manufacturer expects so I don’t accidentally void my coverage before the first load is even dry.
#IMAGE_PLACEHOLDER_E#
Go Ahead and Start That First Cycle
Installing a dishwasher is about more than just hooking up tubes and wires; it’s about claiming control over your kitchen’s most hardworking appliance. By taking the time to level that machine on your raw subfloor today, you are preventing years of floor rot, structural damage, and mechanical stress. Your future self—the one enjoying a quiet, leak-free kitchen three years from now—is already thanking you for the effort you put in today. Don’t let the fear of a complex dishwasher installation keep you from getting the job done right. You’ve got the tools, you’ve got the knowledge, and now you’ve got the plan. Did your first subfloor attempt feel like a ‘rhythmic dance’ too, or did you get it level on the very first try? Let me know in the comments below!
Related Posts

The Proper Way to Secure Your Machine in a Mobile Home
It was a morning like any other, except I discovered…
The Correct Way to Tighten a Compression Fitting Without Stripping It
I'll never forget the moment I watched a seemingly simple…
Stop Over-Tightening Your Brass Water Line Connections
I remember the first time I tried installing a new…