
I’ll never forget the Tuesday night I realized my “clean” plates smelled like a damp basement. I’d spent hours on a DIY dishwasher installation, patting myself on the back for a job well done. But three weeks later, a sluggish drain turned my kitchen into a swamp. The culprit? That little chrome “hat” sitting on the corner of my sink. I’d ignored it, thinking it was just a cosmetic requirement. Boy, was I wrong. If you’ve ever wondered why your unit refuses to drain properly, the answer is often hiding in plain sight.
Why This Tiny Part is Your Kitchen’s Secret Bodyguard
The sink air gap is more than just a weird plumbing artifact. It’s a literal break in the line that prevents dirty sink water from siphoning back into your dishwasher. I learned the hard way that gunk builds up in there faster than you’d think. Tiny bits of food, grease, and mystery sludge love to settle in that narrow passage. If you don’t clear it out, you’re basically inviting bacteria to a party on your silverware. Understanding dishwasher parts like this is the difference between a machine that lasts ten years and one that dies in three. It is one of those essential parts every dishwasher owner should know because it guards the health of your family.
Is checking it every month actually necessary?
You might think “once a month” sounds like something a person with way too much free time would say. But consider this: it takes sixty seconds to pop the cap and peek inside. I once let mine go for six months, and the resulting backup was so gross I nearly replaced the whole unit out of sheer frustration. Plus, did you know that many warranty policies won’t cover damage caused by preventable drainage issues? It’s true. According to the International Association of Plumbing and Mechanical Officials (IAPMO), physical air gaps remain the gold standard for preventing backflow because they cannot mechanically fail like valves can—unless they are physically blocked by debris. Have you ever noticed water leaking out of that little chrome cap during a drain cycle? If so, you’re already overdue for a look inside! Let’s get you ahead of the curve so you never have to deal with a flooded floor or a voided parts warranty.
Pop the Hood Before You Start Scrubbing
Cleaning an air gap is like detailing a car engine; you can’t see the real grime until you take the covers off. Start by lifting the decorative metal cylinder—that’s the chrome hat I mentioned earlier. Most of the time, it just slides straight up, but some models require a tiny twist to unlock. Underneath, you’ll find a plastic inner cap, often held in place by two small tabs. This is the heart of the drainage system. I remember a DIY dishwasher installation where I forgot to tighten this inner cap properly after checking it. The second the drain pump kicked on, it sprayed water across the counter like a miniature fountain. You usually have to pinch the plastic tabs or unscrew the assembly to see the actual bypass where the water flows.
Once that inner cap is off, look for the ‘diverter’—a small plastic wall that separates the incoming water from the dishwasher from the drain line leading to your disposal. This is where the magic happens and where the clogs live. If you see a thick layer of grey slime or food particles, don’t panic. That’s just a cocktail of soap scum and grease. This is one of the most important parts to check when installing a dishwasher for long-term performance, yet it is frequently the most neglected step in a home maintenance routine.
The Secret Weapon for Clearing Stubborn Sludge
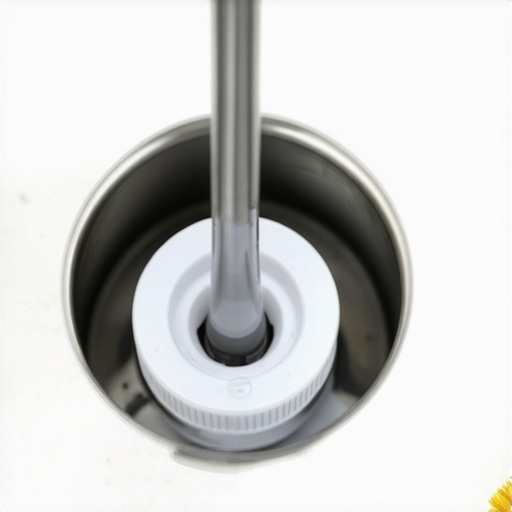
You don’t need a degree in fluid dynamics to clear this out, but you do need the right strategy. I used to use a long toothpick or a bottle brush, which works fine for light maintenance, but for a heavy-duty clog, you need suction. I once helped a neighbor whose dishwasher wouldn’t drain, and after three hours of expert advice on dishwasher installation troubleshooting, we found a single cherry pit wedged perfectly in the air gap’s narrowest point. The brush just pushed it deeper. That’s when the logic of why a shop vac is the best way to clear a clog became incredibly clear. By placing the vacuum hose over the top of the air gap and sealing the connection with a wet rag, you can suck the obstruction upward and out of the line entirely. It’s far more effective than trying to push debris down into the garbage disposal where it might just get stuck again in a different bend.
How to Tell if Your Drain Line is Actually Kinked
Sometimes the problem isn’t gunk; it’s the physical path of the hose. During a deep dive into common dishwasher parts and how to replace them effectively, I noticed that the hose connecting the air gap to the disposal often sags like a heavy clothesline under the weight of the water. Water hates traveling uphill. If that hose has a ‘belly’ in it, food bits will settle there, rot, and eventually create a wall of sludge that backs up into the air gap. You want a straight, consistent downward slope from the air gap to the disposal inlet. If the hose is too long, don’t be afraid to trim it. A sharp utility knife and a stainless steel worm-gear clamp are all you need to ensure gravity stays on your side. If you are worried about parts, remember that your guide to dishwasher parts warranty usually covers the unit itself, but proper external plumbing connections are your responsibility to maintain.
Most people think that if their dishes aren’t coming out sparkling, they just need more soap. I used to be a ‘double-tab’ believer myself until I learned why your high-efficiency detergent is actually clogging your pipes. Modern machines use significantly less water, meaning that extra soap doesn’t just vanish—it turns into a crystalline sludge that coats your internal sensors. It is a classic mistake: treating a 2025 appliance like a 1995 powerhouse. If your smart sensors start giving you ‘dirty’ readings even when the filter is clear, you have likely over-sudsed the system.
Does soft water actually damage your machine’s interior?
It sounds counterintuitive, right? We are told hard water is the enemy because of scale buildup. However, there is a nuance most professionals will not mention unless you ask. According to research from the Water Quality Association (WQA), ‘soft water etching’ occurs when water is too soft and lacks the minerals to react with the detergent. The detergent then turns its chemical aggression toward your glass and even the stainless steel tub. This is why soft water is ruining your dishwasher interior faster than hard water in some homes. It is about balance; if you have a whole-home softener, you may actually need less detergent and a lower temperature setting to keep your plates from looking cloudy.
The One Tiny Fitting That Voids Your Peace of Mind
Here is the ‘Oops’ factor that ruins more DIY jobs than anything else: the brass elbow. When you are doing a swap, it is so tempting to look at the old fitting and think, ‘It looks fine, why waste the money?’ But why your installer refuses to reuse your old brass fittings is not about padding the bill. Brass becomes brittle after years of heat cycles. A microscopic hairline crack might not leak today, but under a high-pressure rinse cycle next month, it can burst and flood your kitchen while you are at work. #IMAGE_PLACE_HOLDER_C# When you are choosing between the difference between OEM and generic water inlet valves, always lean toward the manufacturer’s recommendation for the core mechanical parts. A generic part might save you twenty dollars, but it can be the reason how to get your warranty claim approved on the first try becomes a nightmare. Manufacturers are looking for any excuse to deny a claim, and a non-spec valve is the easiest target. Remember, why your warranty covers parts but not the 150-service-trip-fee—even a ‘covered’ repair can cost you a fortune in labor. By maximizing your dishwashers warranty through proper parts selection from day one, you are protecting your investment. Have you ever fallen into this trap? Let me know in the comments.
Stop Stripping Screws and Start Using the Right Torque
I’ve seen too many DIYers treat their dishwasher like a piece of rough framing. They grab the biggest adjustable wrench they own and crank down on the brass elbow until the threads scream. If you want to avoid a catastrophe, you need the proper tool to use when tightening your water supply line—specifically a small 6-inch adjustable wrench or a dedicated basin wrench for those tight spots under the sink. I also never start a job without my digital multimeter. Being able to verify power or knowing how to test your thermal fuse with a basic multimeter can save you a $150 service call just to find out a $15 part blew during a power surge. It’s about having the precision to diagnose before you start parts-swapping blindly.
How do I maintain my dishwasher’s performance over the long haul?
Maintenance isn’t a one-and-done event; it’s a rhythm. Every six months, I do a deep dive into the cabinet. Most people ignore the rubber seals until they see a puddle, but I swear by the one maintenance task that doubles the life of your gasket: wiping it down with a damp microfiber cloth and a tiny bit of food-grade silicone lubricant. This keeps the rubber supple and prevents the drying and cracking that leads to slow, hidden leaks. While you’re down there, pull the bottom rack and find the filter. If you’ve been running heavy loads, you’ll likely find the best way to clean a filter that is coated in grease is a soak in warm, soapy water and a soft-bristled brush. According to technical bulletins from the Association of Home Appliance Manufacturers (AHAM), a 30% blockage in the filter can increase energy consumption by nearly 15% because the pump has to work twice as hard to circulate water.
#IMAGE_PLACE_HOLDER_D#
The Future is Smart and Occasionally Needs a Reboot
We are entering the era of the ‘software-defined’ kitchen. It’s weird to think about, but I’ve had to explain to neighbors why your new machine requires a firmware update before the first wash. Looking ahead, I predict we’ll see machines that can self-diagnose mechanical wear before a part actually fails. We’re already seeing the 20 dollar smart sensor that detects leaks before your kitchen floods becoming standard in high-end models. This shift means that knowing when to replace dishwasher parts for optimal performance will eventually be handled by an app on your phone, but until then, you have to trust your eyes and ears. If you hear a high-pitched whine, don’t wait for the motor to seize; it’s time to learn how to find a hidden leak under the motor housing before the moisture fries the control board. My best advice? Grab a multimeter this weekend and test your outlet’s grounding—it’s the easiest way to ensure your smart tech doesn’t get fried by a simple ghost in the machine.
Three Hard-Earned Lessons from a Flooded Kitchen
I’ve realized that the most expensive repairs usually start with the smallest oversights. One major lightbulb moment was the realization that the debate between the benefit of using a high loop vs an air gap for drainage is less about preference and more about local building codes; ignoring this can lead to immediate drainage failure. I also discovered that understanding dishwasher warranty policies for peace of mind isn’t just about reading the fine print—it’s about keeping a simple maintenance log. If you can prove you’ve cleared your filters and checked your valves, manufacturers are much less likely to push back on a claim. Finally, remember that silence isn’t always golden; a dishwasher that runs too quietly might actually be struggling with low water pressure, so trust your eyes over your ears when checking the spray arm action.
The Survival Kit for Modern Dishwashers
To move beyond simple troubleshooting, you need a curated set of tools that handle the specific demands of high-efficiency machines. I personally never start a repair without a digital multimeter; it is the only way to master how to test your thermal fuse with a basic multimeter without wasting money on unneeded parts. I also recommend keeping a small stash of common dishwasher parts and their role in proper installation, specifically stainless steel worm-gear clamps, as the plastic ones included in many kits tend to fail under heat stress. For the exterior, high-quality microfiber cloths are my go-to for the one maintenance task that doubles the life of your gasket. Finally, always follow top tips for selecting the right parts for dishwasher installation by opting for OEM components to ensure your machine’s sensors communicate correctly with the control board.
#IMAGE_PLACEHOLDER_E#
Ready to Own Your Appliance Maintenance?
Taking ownership of your appliance maintenance transforms a chore into a source of confidence. By applying top tips for seamless dishwasher installation in 2025, you aren’t just hooking up a machine; you’re engineering a decade of reliability. Don’t be afraid to get your hands a little dirty this weekend—your future self will thank you for the saved repair bills and the peace of mind that comes with a perfectly functioning kitchen. Have you ever discovered a strange object blocking your air gap or found a hidden leak during a routine check? Let me know in the comments below!
Related Posts
Why some detergent packs never fully dissolve in your machine
I’ll never forget the Tuesday night I stood over my…
The Most Ignored Maintenance Step for Hard Water Regions
It was a morning like any other, and I reached…

How Hard Water Destroys Your Heating Element Over Time
It happened unexpectedly one morning—I opened my dishwasher after what…