
I remember standing in my kitchen last Tuesday, staring at a plate that looked like it had been through a sandstorm rather than a high-end dishwasher. I’d spent three hours “saving the planet” with the Eco mode, only to find a grey slurry sitting at the bottom of the tub. It was the third time that week. I felt like I was failing at adulting. I had followed every rule, used the fancy pods, and yet, the machine seemed to be choking. That’s when I realized that my high-efficiency settings were actually the culprit behind my recurring drainage nightmares. It is a frustrating cycle of trying to do the right thing and getting punished with a kitchen full of dirty dishes. [IMAGE_PLACEHOLDER]
Stop Letting Your Eco Mode Ruin Your Kitchen
We buy these modern machines thinking they’ll solve our bills and our conscience, but the reality is often grittier. If you’ve ever wondered why the eco mode might be leaving grit on your plates, you aren’t alone. I used to think I was doing the right thing, but I was actually building up a wall of grease in my pipes. It turns out that those low-temp cycles aren’t powerful enough to break down the heavy fats from a Sunday roast. Today, I’m going to show you how to actually get the performance you paid for without burning through your warranty coverage or your patience. Most of us just want things to work, but high-efficiency tech requires a bit more hands-on knowledge than the old tank-like machines our parents had. When I first started troubleshooting, I was terrified I’d break something and void my peace of mind warranty, but ignoring the problem only makes the eventual repair bill higher.
Is high-efficiency tech actually a scam?
It’s not a scam, but it is a misunderstanding. Most people don’t realize that these cycles use significantly less water—sometimes as little as 3 gallons per load according to the Energy Star standards. That sounds great until you realize that three gallons isn’t always enough to flush away heavy proteins or fats. Early on, I made the mistake of thinking “less water” meant “better cleaning,” but I quickly learned why the heavy cycle is actually better for your machine health in the long run. It helps clear out the biological films that grow in the dark, damp corners of your unit. My filters were constantly clogged because the water never got hot enough or stayed plentiful enough to melt the gunk. You have to know the best way to clean a filter that is coated in grease before that sludge migrates into your drain pump. Have you ever opened your dishwasher only to find a puddle of stinky water at the bottom? Drop a comment below if you’ve been there—I want to know if I’m the only one who has fought the “drainage battle” and lost. Finding the drain pump filter you didn’t know existed is usually the first step to reclaiming your kitchen’s sanity and ensuring you don’t need a diy dishwasher installation way before its time.
Clear the Path for Your Drain Pump
To get that factory-fresh clean again, you have to stop treating your dishwasher like a magical disappearing act for leftovers. It’s a plumbing system, not a black hole. I learned this the hard way when I ignored a slight hum in the motor, thinking it was just the sound of high-efficiency tech. Spoiler alert: it was a cherry pit stuck in the impeller. First, you need to look at the drain pump filter. Most people don’t even know it’s there until a foul smell hits them. This isn’t just about rinsing the mesh; it’s about checking the housing itself. If you’ve found the drain pump filter you didn’t know existed, take it out and look for glass shards or fruit seeds. Last summer, I spent an hour scrubbing the mesh, only to realize a tiny plastic bread tie was jammed in the pump impeller, stopping the whole show. You should also learn how to clear a blocked impeller without disassembling the pump because it can save you a two-hundred-dollar service call for a five-minute fix.

Give Your Machine Enough Water to Work
If the machine isn’t getting enough water, those detergent pods won’t dissolve properly, leaving a film of soap and grit. It’s like trying to shower with a squirt gun—you’re just getting wet without getting clean. This often happens because of the critical reason to flush your water lines before hooking up a new machine. Construction debris or hard water deposits can quickly choke the inlet valve. Before you blame the electronics, see how to tell if your water pressure is too low for your unit. I once thought my control board was fried, but it turned out the previous owner had used a cheap, narrow supply line that was literally starving the machine of the pressure it needed to spin the arms at full speed.
Stop Sink Water from Backflowing Into Your Plates
Check your sink connection immediately. A common rookie mistake is letting the drain hose sag under the sink. This allows dirty water to backflow into your clean machine—which is exactly as gross as it sounds. Knowing the benefit of using a high loop vs an air gap for drainage is the difference between sparkling plates and a persistent wet-dog smell. I fixed mine by simply zip-tying the hose to the top of the cabinet, creating a high loop that uses gravity to keep the nasty stuff out of my dishwasher tub.
Protect Your Warranty While Swapping Parts
If you have to open the machine, be smart. You need to know how to find your units hidden model number for replacement parts before ordering anything off the internet. Using the wrong part is the fastest way to void your manufacturer protection. I’ve seen people use generic screws in metal-lined cabinets, which is a disaster; you have to stop using standard wood screws for metal-lined cabinets or you’ll deal with leaks and rust later. Proper understanding-dishwasher-parts-a-key-to-effective-maintenance means knowing what you can touch and what requires a certified pro to keep your maximizing your dishwashers warranty coverage today intact while you troubleshoot.
Most homeowners think they’ve won the appliance lottery if they have a whole-home water softener. I used to think the same until I noticed my wine glasses looked perpetually foggy and scratched. Most people assume it is hard water scale, but it is actually the opposite: etching. It turns out that why soft water is ruining your dishwasher interior faster than hard water is a real phenomenon that many experts overlook. Without enough minerals to react with, the detergent becomes hyper-aggressive and starts physically eating away at the glass and the stainless steel tub itself. It is a delicate balance; you need just enough mineral content for the chemical reaction to occur properly, otherwise, you might find yourself questioning the impact of hard water on your warranty eligibility when the interior of your machine starts to pit and corrode. 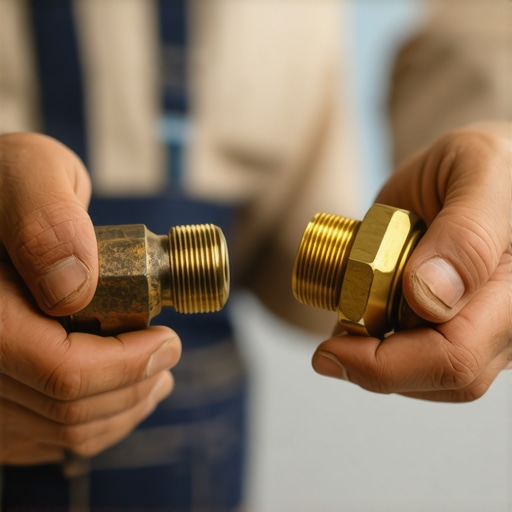
The Invisible Trap in Your Old Plumbing
Then there is the “Oops” factor that almost every DIYer falls into: the temptation to save five bucks by reusing an old connector. When you are in the middle of a diy dishwasher installation step-by-step guide, those old brass fittings often look perfectly fine to the naked eye. But they aren’t. There is a specific why your installer refuses to reuse your old brass fittings—brass becomes brittle over time due to a chemical process called dezincification. One small turn of a wrench can create a microscopic hairline fracture. It might not leak today, but it will certainly flood your kitchen three months from now when the metal finally gives way under constant heat cycles. I have seen too many people lose their how-to-get-your-warranty-claim-approved-on-the-first-try status because they used a non-rated third-party supply line that could not handle modern water pressure surges. If you want to sleep at night, do not skimp on the essential parts for troubleshooting dishwasher installation issues.
Why is your brand-new unit demanding a firmware update before the first wash?
It sounds like a tech-support joke, but why your new machine requires a firmware update before the first wash is becoming the standard for modern high-end models. These updates recalibrate the turbidity sensors which, according to data from the Association of Home Appliance Manufacturers (AHAM), are more sensitive than ever to ensure the machine hits strict Energy Star targets. If you skip this step, your sensors might provide “dirty” readings, causing the computer to truncate cycles prematurely or skip the final rinse. Furthermore, you must learn how to spot a fake replacement part before it fries your control board. Counterfeit heating elements found on discount sites are a massive fire hazard and the primary reason why your dishwasher trips the breaker only during the heat cycle. Using genuine components is the only way to ensure maximizing your dishwashers warranty coverage today stays an option for you if things go south. Have you ever fallen into this trap of trying to save a few pennies only for it to cost you a fortune? Let me know in the comments below.
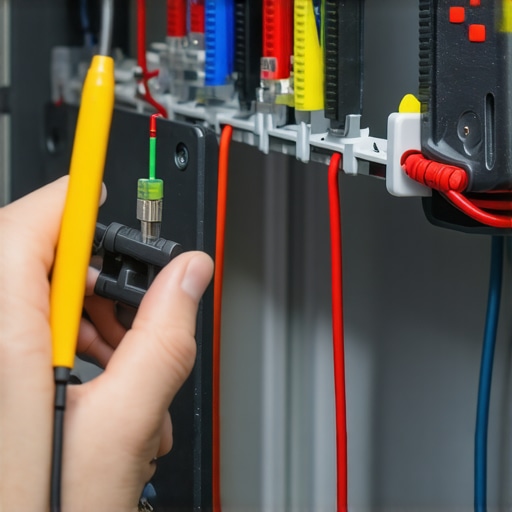
After years of tinkering, I’ve realized that owning a high-end dishwasher is less about the initial purchase and more about the precision of your toolkit. You don’t need a professional-grade workshop, but there are a few non-negotiables if you want to avoid the $150 service call fee. For instance, I never start a repair without my basic multimeter. If your machine suddenly goes dark, don’t panic and assume the control board is fried. Knowing how to test your thermal fuse with a basic multimeter can save you hundreds. It’s a simple continuity test that takes thirty seconds but provides absolute clarity on whether you’re dealing with a blown fuse or a dead appliance.
Why a Shop Vac Beats a Plumber’s Snake Every Time
When you’re staring at a pool of grey, stagnant water, your first instinct might be to grab a chemical drain cleaner—please, for the love of your pipes, don’t do that. I’ve found that why a shop-vac is the best way to clear a clog is a secret most pros keep to themselves. By creating a sealed vacuum over the drain hose or the sump area, you can pull out the hair ties, bone fragments, and glass shards that a snake would simply push deeper into the system. According to technical guides from the Association of Home Appliance Manufacturers (AHAM), specifically standard DW-1, maintaining clear pathways for water flow is the single most important factor in energy efficiency. If the pump has to fight against a partial blockage, it draws more amperage, runs hotter, and eventually burns out its windings.
How do I maintain my dishwasher over time?
The secret isn’t a deep clean once a year; it’s a series of small, tactical wins every month. I make it a habit to perform the 3-minute hack to clear your spray arm nozzles every time I finish a container of detergent. I use a simple toothpick to ensure the tiny holes aren’t scaled up with calcium. Furthermore, you should never ignore your door seals. Performing the one maintenance task that doubles the life of your gasket—which is a simple wipe-down with a damp microfiber cloth to remove acidic food residue—prevents the rubber from becoming brittle and leaking. Most people wait for a puddle to appear before they look at the gasket, but by then, the damage to your subfloor is already done. Learning when to replace dishwasher parts for optimal performance is about being proactive, not reactive.
The Future of Kitchen Maintenance is Self-Diagnosing
Looking ahead, the trend is moving toward “predictive maintenance.” I suspect that within the next five years, smart dishwashers won’t just ask for a firmware update; they will use internal conductivity sensors to tell you exactly which part of your filter is clogged before the cycle even begins. Until then, we have to be the brains of the operation. You need to be comfortable with how to diagnose dishwasher parts during warranty periods so you can speak the technician’s language and get your parts covered without the runaround. If you really want to level up your kitchen game, I challenge you to pull your bottom rack out today, remove the spray arm, and check for any trapped debris—you’ll be shocked at what’s been ‘cleaning’ your plates.
Hard-Won Secrets from My Kitchen Trenches
After years of trial and error, I have realized that the biggest mistake most homeowners make is treating their appliance like a static box rather than a living system. One of my biggest lightbulb moments was realizing that knowing the parts to check when installing a dishwasher for long term performance is actually more important than the brand name on the door. I used to assume a technician would handle the details, but now I know that double-checking the drain loop height myself is the only way to ensure the machine lasts a decade. Another hard lesson? Always keep a physical folder in the cabinet above the machine containing the complete list of dishwasher parts covered by warranty. Digital receipts are great, but when your kitchen is flooding and the Wi-Fi is down, you need that paper trail to avoid massive out-of-pocket costs. Finally, I’ve learned that the ‘Eco’ cycle is a tool, not a lifestyle. Using it exclusively is a recipe for grease buildup; you must run a high-heat cycle at least once a week to maintain the health of your internal seals.
My Non-Negotiable Maintenance Arsenal
If you want to stop paying for service calls, you need a specialized toolkit. I don’t mean a massive workbench, just a few targeted items that I trust implicitly. First, a basic multimeter is essential for checking continuity; it is the only way to know if you have a dead motor or just a blown fuse. Second, I always keep a dedicated Shop-Vac in the garage specifically for the kitchen. It is the single most effective tool for clearing a stubborn drain line without spilling a drop of dirty water on your floor. Third, I recommend keeping a small pack of wooden toothpicks near your detergent. They are the perfect size for clearing out the common dishwasher parts and how to replace them effectively like spray arm nozzles that get clogged with mineral scale. These simple tools have saved me thousands of dollars in labor fees by allowing me to handle expert advice on dishwasher installation troubleshooting on my own terms.
Reclaim Your Time and Sparkling Plates
The journey to a perfectly functioning kitchen doesn’t have to be a source of stress. When you take the time to how to prepare your kitchen for dishwasher installation properly, you are setting yourself up for years of quiet, efficient service. Don’t let the fear of technical jargon stop you from opening up the manual or checking a filter. Every time you fix a small issue yourself, you gain a little more confidence and a lot more peace of mind. Remember to stay vigilant about what your dishwasher warranty doesnt cover and how to avoid fees so you never get hit with a surprise bill. Your dishwasher is there to serve you, not the other way around. With the right parts, a bit of maintenance, and the willingness to troubleshoot, you can keep your plates sparkling and your kitchen running like a well-oiled machine. Have you ever found a weird object like a cherry pit or a piece of glass in your drain pump? Let me know in the comments below!
Related Posts
How to Save Water by Adjusting Your Loading Patterns
I still remember the moment it hit me—standing in my…

How to Save Energy by Disabling the Heated Dry Cycle
It was a morning like any other, until I opened…
The $20 Kit That Makes Any Dishwasher Energy Efficient
The first time my dishwasher flooded my kitchen, I felt…