
The steam hit my face, smelling of oregano and regret. I had just finished the heavy cycle, expecting sparkling white plastic, but instead, the interior of my machine looked like it had been spray-painted by a disgruntled tomato. That neon-orange tint on the door and the floor of the unit wasn’t just ugly; it felt like a personal failure of my cleaning skills. I spent forty-five minutes scrubbing with a scouring pad, which was a massive mistake. I ended up creating tiny scratches in the plastic that actually made future stains stick even worse. It turns out, understanding dishwasher parts and the way plastic reacts to heat is the only way to win this battle. If you have ever felt that sinking feeling after a spaghetti night, wondering if your appliance is permanently discolored, I am here to tell you it isn’t. Today, I am going to show you the weird, oil-based trick that actually pulls those pigments out of the pores of the plastic without ruining your machine.
Your Plastic Tub Does Not Have to Stay Orange Forever
I used to think that the environmental impact of choosing plastic vs stainless steel interiors was the only trade-off I had to worry about. But the real-world struggle is the porosity. Plastic is porous, especially when it gets hot during a sanitize cycle. When that lycopene—the red stuff in tomatoes—gets heated up, it basically dyes the plastic. Early in my DIY journey, I thought the solution was more bleach. I was wrong. Bleach can actually dry out your one maintenance task that doubles the life of your gasket, leading to leaks down the road. According to the cleaning experts at the American Cleaning Institute, many food stains are oil-soluble, meaning water and soap alone often won’t cut it once the stain has ‘set’ in the heat. Have you ever tried to scrub a stain for an hour only to realize it didn’t move a single millimeter? It is incredibly frustrating. We are going to solve that today with a simple household item you probably have in your pantry.
Is my dishwasher tub actually ruined for good?
The short answer is no, but you have to stop using abrasives immediately. When you see why your dishes are coming out cloudy after every wash, it’s usually a mineral issue, but red stains are a chemical bond. I once made the mistake of using a magic eraser on the interior tub. Sure, it took the stain off, but it also took the finished ‘skin’ off the plastic. Now, that spot catches every piece of grit that passes through the wash. The trick I’m sharing involves breaking the bond between the tomato oil and the plastic wall using a specific application of vegetable oil and a very specific temperature setting. It sounds counterintuitive to put oil *into* a machine designed to remove it, but it’s the only way to ‘lift’ the pigment out of the plastic pores. Before we get into the step-by-step, let’s talk about why the heat cycle is actually your worst enemy during a sauce-heavy load.
Clear the Surface Gunk Before You Treat the Plastic
The first thing you need to do is ensure the plastic isn’t fighting a layer of grease. If there is a film of old food on the walls, your treatment won’t reach the actual pores of the plastic. I start by doing a quick wipe-down with a damp microfiber cloth. You don’t need soap yet; you just want to remove the physical residue. This is also a great time to identify essential parts every dishwasher owner should know about, like the spray arms and the filter assembly. I remember the first time I tried this; I was so focused on the orange door that I didn’t realize my filter was also stained orange. If you leave the filter dirty, you’re just recirculating tomato-tinted water back onto the walls you are trying to clean. Take the filter out, rinse it under the tap, and put it back in before moving to the oil stage.
Apply Kitchen Oil to Break the Molecular Bond
Here is the weird part that actually works. Because the lycopene in tomatoes is fat-soluble, it wants to bond with oil more than it wants to stay stuck in your plastic tub. Grab a bottle of standard vegetable oil or mineral oil and a paper towel. Rub a generous layer of oil directly onto the orange-stained areas. I once stood in my kitchen with a tub of Crisco like a mad scientist, rubbing it onto the door while my wife looked on in total confusion. I had accidentally made the floor a bit of a slippery mess, but as the oil sat on the plastic for about 15 minutes, I could literally see the orange tint beginning to ‘bleed’ into the oil. This is the proper way to clean your unit without harsh chemicals that would otherwise dry out and crack the plastic. Let the oil sit for at least 20 minutes to give it time to penetrate the pores.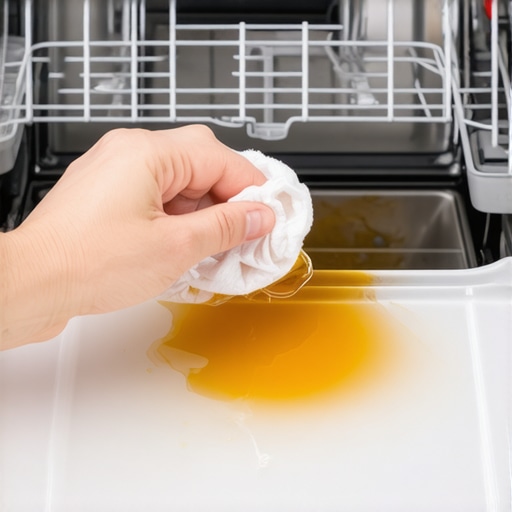
Run a Low-Heat Cycle to Wash Away the Residue
Now that the oil has pulled the pigment out of the plastic, you have to get the oil out of the machine. This is where most people fail because they think high heat is better for cleaning. In reality, the reason your energy bill spikes when you use the sanitize cycle isn’t the only downside; that extreme heat can actually ‘set’ any remaining oil-based stains back into the plastic. Instead, run a standard wash cycle with your normal detergent. The surfactants in the detergent are designed to grab onto the vegetable oil you just applied and carry it down the drain. If the stain is particularly deep-seated, you might need to repeat the oil application once more, but for most ‘spaghetti night’ disasters, a single soak and wash will restore the plastic to its original color.
Check Your Spray Arms for Maximum Efficiency
While you are waiting for that cycle to finish, you should think about how the water is actually hitting those walls. If your machine isn’t getting enough mechanical force, the oil and pigment won’t be stripped away effectively. I always take a quick look at the nozzles. Using the 3-minute hack to clear your spray arm nozzles ensures that the water pressure is high enough to actually scrub the interior surfaces. When you look at the most popular dishwasher parts and how they improve performance, the spray arm is the unsung hero of stain removal. If the holes are clogged with hard water scale, the water just dribbles out, and the tomato-oil mixture will just sit there and re-harden on your tub walls. Make sure those arms are spinning freely and shooting water at full force before you call the job done.Once you’ve conquered those stubborn orange stains, you start to realize that the visual condition of your tub is only half the battle. Maintaining the long-term health of your machine requires looking past the surface and into the mechanics of how these appliances are actually built today. I’ve seen homeowners get absolutely furious when their brand-new, high-end unit leaks within the first week. They usually blame the manufacturer, but more often than not, the culprit is a hidden installation error. Many people assume that a warranty is a ‘get out of jail free’ card, but there is a major nuance here: most standard policies cover the component but not the labor. Understanding why your warranty covers parts but not the 150 service trip fee is the first harsh lesson you learn when a DIY job goes sideways and you have to call for help.
The Myth of the Bulletproof Warranty
It is a common belief that if a part fails, you are fully protected. However, if that failure is linked to how you hooked up the machine, you are on your own. I once saw a professional-grade control board fry in under twenty minutes because a tiny piece of copper debris from the old plumbing lines got lodged in the inlet valve. This is the critical reason to flush your water lines before hooking up a new machine. If you skip this, you aren’t just being efficient; you are gambling with a five-hundred-dollar motherboard. A study by Consumer Reports actually highlights that nearly 15% of newly installed dishwashers experience some form of ‘infant mortality’ failure, often exacerbated by poor initial setup. While we often focus on the most popular dishwasher parts and how they improve performance, the basic intake connection is where most systems are most vulnerable.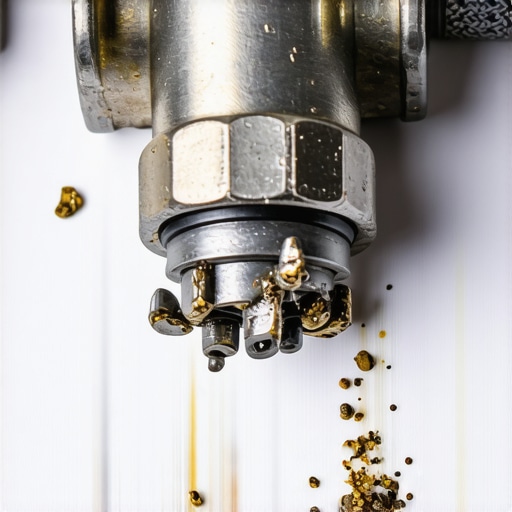
Stop Reusing Your Old Water Supply Lines
This is the biggest ‘oops’ factor I encounter. People think that because the old brass fitting looks clean, it’s fine to reuse. It isn’t. Metal fatigue and worn-out threads are invisible until the pressure spikes and your kitchen floor becomes a swimming pool. When you are looking at essential parts for troubleshooting dishwasher installation issues, the supply line should be at the top of your list for mandatory replacement. Reusing old parts is the quickest way to find yourself dealing with insurance after a major dishwasher flood. I always recommend spending the extra twenty dollars on a new burst-proof hose; it is the cheapest insurance policy you will ever buy.
Can a DIY installation actually void my protection plan?
The short answer is yes, if the manufacturer can prove the failure was caused by your work rather than a defect. This is why keeping meticulous records is vital. You need to know why your warranty claim fails without an authorized receipt and why even a simple mistake—like using the wrong bracket—can give a technician enough reason to deny coverage. If you are ever in doubt, learning how to spot a fake replacement part before it fries your control board is a skill that will save you from accidentally using non-certified components that void your contract. Have you ever fallen into this trap or had a warranty claim denied for a weird reason? Let me know in the comments.
The Two Tools That Saved My Kitchen Floors
I’ve realized over the years that being a ‘dishwasher whisperer’ isn’t about some secret intuition; it’s about having the right gear on hand. Most homeowners reach for a plunger when the water stops moving, but I always reach for my shop vac. I’ve found that why a shop vac is the best way to clear a clog is because it creates a localized vacuum seal that pulls debris backwards, away from the pump’s delicate impeller, rather than shoving it deeper into the system. It’s saved me from a full teardown of the motor housing at least three times in the last year alone. If you aren’t using suction to clear your lines, you’re working twice as hard for half the result.
Why I Trust a Multimeter Over My Own Gut Feeling
When the display goes dark or the heat cycle fails, don’t just guess it’s the expensive control board. Learning how to test your thermal fuse with a basic multimeter is a literal game changer for any DIYer. I used to spend eighty bucks on a service call only for the technician to spend thirty seconds checking a five-dollar fuse. Now, I do it myself in five minutes. This level of self-sufficiency is exactly how you start how to diagnose dishwasher parts during warranty periods, so you can tell the service company exactly what is wrong before they even step through your front door. It puts the power back in your hands and ensures they bring the right parts the first time. 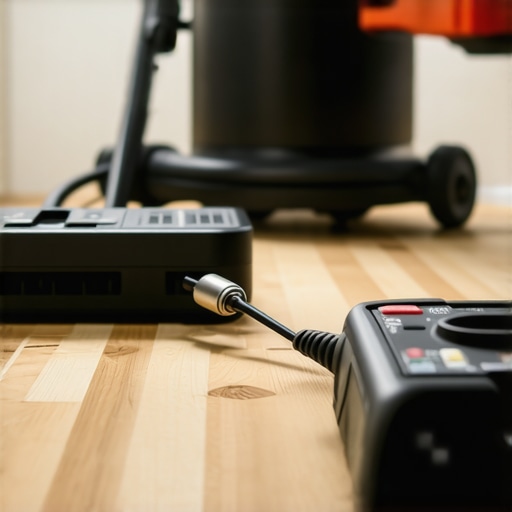
Smart Sensors are No Longer Just for Tech Geeks
Looking ahead, I see the entire appliance industry moving toward total predictive maintenance. We are already seeing the massive benefits of the 20 dollar smart sensor that detects leaks before your kitchen floods, and soon these will be integrated into every mid-range unit. I predict that in less than five years, your dishwasher will proactively email you a link to order a specific solenoid before it actually reaches its failure point. This shift will inevitably change the complete list of dishwasher parts covered by warranty as software-driven health monitoring becomes just as important as the physical hardware.
How do I maintain my dishwasher’s performance over the next decade?
It really comes down to two things: consistent inspection and proactive timing. You have to know when to replace dishwasher parts for optimal performance rather than waiting for a catastrophic failure that ruins your cabinetry. According to technical documentation from the Association of Home Appliance Manufacturers (AHAM), performing a monthly descale cycle and ensuring your intake water temperature is at least 120 degrees Fahrenheit can extend the life of your motor and pump seals by up to 30%. I personally set a recurring calendar reminder to check my drainage setup, because the fact that why your warranty policy doesnt cover improper drainage loops is a harsh lesson you don’t want to learn via a denied insurance claim. Even if you think your installation is perfect, understanding why your professional installer insists on a new water valve is usually because those tiny internal springs lose tension over years of use, leading to slow leaks. My challenge to you this week? Grab a cheap multimeter and test your door latch sensor just to get comfortable with the tool—it’s the single best way to demystify the machine sitting in your kitchen.
Hard-Won Lessons from My Kitchen Disasters
After years of wrestling with appliances, I have realized that the mechanical repair is only half the battle. The first and most vital lesson is that documentation is your best friend. I now keep a dedicated folder for every appliance, because why your warranty claim fails without an authorized receipt is usually a matter of missing paperwork rather than a broken part. Secondly, always respect the ‘parts versus labor’ divide. It is often worth it to swap a component yourself, but if you are dealing with a complex control board, ensure you are selecting the right parts for dishwasher installation to avoid a mismatch that could fry your system. Finally, never underestimate the power of a quick monthly inspection. Catching a small leak early is the difference between a five-minute fix and a complete kitchen renovation.
The Essential Toolkit for Every DIY Owner
If you want to move from being a frustrated owner to a confident technician, you need a few specific tools. I never start a job without my digital multimeter; it is the only way to accurately verify how to test your thermal fuse with a basic multimeter without guessing. I also swear by a high-quality shop vac for clearing lines and a telescoping mirror to see behind the unit without pulling it out. These tools, combined with a reliable source for OEM components, transform the way you interact with your machine. I personally trust local appliance parts warehouses over generic online marketplaces to ensure that every seal and valve I install meets the original factory specifications.
Take Control of Your Kitchen Today
Maintenance is not just about fixing things when they break; it is about extending the life of your home and protecting your investment. By taking the time to remove those tomato stains and understanding the nuances of your parts, dishwasher, warranty, and installation, you are saving yourself thousands of dollars over the next decade. Don’t wait for a flood to start paying attention to your machine. Start with the small things, like checking your filters or knowing when to replace dishwasher parts for optimal performance. You have the knowledge and the tools—now it is time to use them. Have you ever discovered a ‘secret’ trick for keeping your dishwasher running like new? Let me know in the comments below!
Related Posts

How to Optimize Your Rack Loading for Maximum Cleaning
Ever opened your dishwasher after a cycle and wondered, "Why…
Why the quick wash cycle is leaving grit on your plates
Yesterday, I opened my dishwasher after a quick cycle and…

The Most Ignored Maintenance Step for Hard Water Regions
It was a morning like any other, and I reached…