It was a frustrating morning when I noticed my dishwasher leak during a routine cycle. The culprit? A plastic connector that had cracked under pressure — a mistake I made early on in my DIY journey. That lightbulb moment taught me a tough lesson: plastic isn’t always the right choice for lasting, reliable dishwasher hookups. Today, we’re diving into how ditching plastic in favor of durable brass couplers can save you headaches, warranties, and money in the long run.
Why Choosing the Right Fittings Matters So Much in 2026
Think about it: your dishwasher is one of the most used appliances in your home, and its proper installation impacts everything from water efficiency to warranty coverage. With new regulations and increased scrutiny on quality standards for appliances, the decision to upgrade your fittings isn’t just about avoiding leaks — it’s about protecting your investment. Using the right parts now can mean fewer repairs, fewer warranty claims denied, and a smoother setup overall.
Is Saving a Few Bucks Worth Risking Your Warranty?
Many DIYers start with cheap plastic connectors, thinking they’re saving money. But here’s the truth: early mistakes, like reusing junk parts or opting for generic fittings, can void your warranty and lead to costly water damage. According to industry experts, high-quality brass couplers are resistant to corrosion and pressure fluctuations, making them ideal for long-term performance. I admit, I made a mistake early on by ignoring this advice, and it cost me dearly — both in repairs and warranty hassles. If you want to avoid similar pitfalls, it’s worth getting familiar with the best practices on selecting installation parts. For more insights, check out [this guide](https://appliancedoctorz.com/how-to-diagnose-dishwasher-parts-during-warranty-periods).
As we move into today’s practical steps, I’ll show you exactly how to upgrade your fittings to brass and why this small change can make a big difference for your 2026 install. Ready? Let’s get into it.
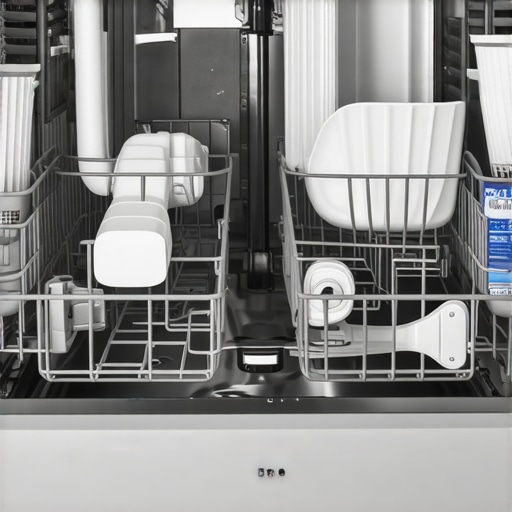
Remove Old Plastic Connectors Carefully
Start by turning off the water supply and unplugging the dishwasher. Use a wrench to loosen the existing plastic fittings, ensuring you hold the pipe steady to prevent damage. Remember, plastic connectors are brittle and prone to cracking under pressure, much like the one I damaged during my first DIY attempt. Carefully detach the connectors, noting how the fittings connect to the water inlet and drain hoses. This step sets the stage for installing durable brass parts that resist corrosion and pressure fluctuations.
Select the Right Brass Fittings and Prepare
Choose high-quality brass couplers designed specifically for dishwashers—look for ones rated for your home’s water pressure and compatible with your hose sizes. Check [this guide](https://appliancedoctorz.com/top-tips-for-selecting-the-right-parts-for-dishwasher-installation) to ensure you’re picking the best parts. Prepare your workspace with clean towels and a bucket to catch any residual water. Confirm that your new fittings come with appropriate washers or O-rings; these tiny components are vital for preventing leaks and maintaining the integrity of your connection.
Apply Teflon Tape Effectively
Wrap Teflon tape clockwise around the male threads of your brass fittings—this creates a tight seal and prevents leaks. Don’t skip this step; even high-quality fittings can leak if not properly sealed. As I learned from my messy first repair, improper sealing leads to water spraying everywhere and risking warranty denial. Wind the tape smoothly, overlapping slightly on each rotation. This simple step ensures a leak-proof connection, protecting your warranty coverage, as discussed in [warranty essentials](https://appliancedoctorz.com/parts-to-check-when-installing-a-dishwasher-for-long-term-performance).
Screw Fittings Into Place with Precision
Hand-tighten the brass fittings initially, then use a wrench to secure them snugly—avoid over-tightening, which can strip threads or crack the fittings. Think of this process as screwing in a tight bolt; firm but gentle. I once overtightened and damaged the brass, forcing a re-do that delayed my project by hours. Use a cloth to grip the fittings and prevent slipping. Once secure, double-check that the connections are firm but not overly tight. Proper fitting installation minimizes risks of leaks or water damage, crucial for maintaining your warranty eligibility and appliance performance.
Reconnect and Test Your Setup
Reattach the water supply hoses to your freshly installed brass fittings. Turn on the water supply gradually to prevent sudden pressure surges. Watch for leaks around the fittings—if you see any, tighten slightly more or reapply Teflon tape as needed. Run your dishwasher through a complete cycle to verify that no leaks occur and that everything functions smoothly. This step mirrors the process I followed when replacing my fittings: a clear test to ensure everything is sealed tight, and I can confidently say it saved me from future warranty issues. For extended maintenance tips, see [effective troubleshooting](https://appliancedoctorz.com/understanding-dishwasher-parts-a-key-to-effective-maintenance).Even seasoned DIY enthusiasts often fall prey to misconceptions about dishwasher components and the critical role they play in warranty protection. One prevalent myth is that generic or cheap parts don’t impact your warranty; in reality, using non-compliant fittings or outdated hoses can void coverage entirely. For example, many assume that reusing old water supply lines won’t cause issues, but experts warn that aged parts increase leak risk and can lead to warranty denials, as detailed in [this guide](https://appliancedoctorz.com/why-old-water-supply-parts-ruin-your-2026-dishwasher-install). A common mistake is neglecting the importance of proper installation techniques—over-tightening fittings or skipping Teflon tape may seem minor but can cause leaks or damage, jeopardizing your warranty.
One nuanced point often overlooked is the specific testing and certification of parts according to manufacturer standards. Not all brass fittings are created equal; choosing components that meet the original equipment manufacturer’s specifications ensures durability and warranty compliance. A surprising pitfall is the belief that the location of a fitting doesn’t matter—incorrect positioning can cause stress on hoses or improper drainage, leading to early failure. According to appliance experts, understanding the intricate role each part plays in your dishwasher’s operation can prevent costly mistakes that void warranties.
For those seeking a deeper dive, examining [the complete list of dishwasher parts covered by warranty](https://appliancedoctorz.com/the-complete-list-of-dishwasher-parts-covered-by-warranty) can shed light on critical components often forgotten during installation. Remember, the devil is in the details: selecting the right parts, installing them correctly, and understanding the manufacturer’s guidelines are key to safeguarding your warranty. Have you ever fallen into this trap? Let me know in the comments.When it comes to ensuring your dishwasher remains leak-free and functions optimally for years, having the right tools makes all the difference. I’ve personally found that investing in quality equipment not only streamlines the installation process but also helps maintain your setup over time. One essential tool I always keep handy is a digital torque wrench, which allows precise tightening of fittings—over-tightening can crack brass components, while under-tightening leaves you vulnerable to leaks. For sealing threaded connections effectively, I swear by a high-quality Teflon tape dispenser; it makes wrapping tape consistently and neatly a breeze, ensuring a reliable seal. Additionally, a digital pressure gauge is invaluable for verifying your household water pressure before installation; excessive pressure can stress fittings and lead to early failure.
For ongoing maintenance, I recommend using a multi-meter with a microamp setting to regularly check the operation of electronic sensors in modern dishwashers. These sensors directly impact warranty coverage, and identifying faults early can save you on costly repairs or replacements. Also, keep a set of color-coded, high-quality screwdrivers—especially Phillips and flat-heads—to prevent stripping screws during adjustments or repairs.
Looking ahead, I predict that smart diagnostic tools and apps will become standard for DIYers. Imagine being able to connect a sensor to your smartphone, analyzing water flow and pressure in real-time, and receiving tailored maintenance advice. This trend will empower homeowners to troubleshoot common issues and even perform minor repairs confidently.
**How do I maintain dishwasher components over time?** Regular inspections, part replacements when signs of wear appear, and proper cleaning of filters and spray arms are crucial. For parts that often wear out, like inlet valves or filters, refer to guides like [when to replace dishwasher parts for optimal performance](https://appliancedoctorz.com/when-to-replace-dishwasher-parts-for-optimal-performance) to stay ahead of potential problems.
Finally, I’ve learned the importance of keeping detailed records of your parts and repairs. Take high-resolution photos during each maintenance session, especially of serial numbers and installation dates; this documentation can be a lifesaver when dealing with warranty claims or future troubleshooting. Try using a dedicated app or cloud storage solution to organize these records—it’s an advanced step that pays off in long-term serviceability. Remember, the right tools combined with diligent maintenance can extend the life of your dishwasher and protect your warranty coverage. For comprehensive guidance, visiting [the complete list of dishwasher parts covered by warranty](https://appliancedoctorz.com/the-complete-list-of-dishwasher-parts-covered-by-warranty) is also highly recommended.
The Hardest Lesson I Learned About parts,installation,dishwasher,warranty
Switching from plastic to brass fittings was a game-changer in my DIY journey, but the biggest insight came from realizing I almost jeopardized my warranty by dismissing quality standards. I once thought that replacing parts quickly and cheaply would save money, but I learned that the hidden costs of leaks and warranty issues far outweighed initial savings. It’s a reminder that patience and attention to detail are crucial when working with sensitive appliances like dishwashers.
3 Myths About parts,installation,dishwasher,warranty That Held Me Back
I used to believe that generic fittings were just as good as branded ones, but industry truths quickly dispelled that myth—only certified brass fittings built for pressure and corrosion resistance truly safeguard your warranty. Also, I thought reusing old hoses was safe, but these often fail prematurely and void warranties. Lastly, I underestimated the importance of applying proper Teflon tape; a small oversight here can lead to significant leaks.
What Experts Won’t Tell You About parts,installation,dishwasher,warranty
Many overlook the importance of verifying each part’s compliance with manufacturer standards—using non-certified components might seem convenient but can cause early failure and void your warranty. I’ve learned that taking the time to select the right fittings, seal thoroughly, and tighten correctly prevents leaks and keeps your coverage intact. The real expert move? Document every repair step with photos and receipts—these are your best allies during warranty claims.
My Essential Toolkit for parts,installation,dishwasher,warranty
Investing in a high-quality digital torque wrench ensures fittings are snug without cracking brass components, which can be a costly mistake. A reliable Teflon tape dispenser makes sealing threads effortless and efficient, preventing leaks. A digital pressure gauge helps confirm optimal household water pressure is maintained, avoiding stress on fittings. Plus, keeping a set of high-quality screwdrivers ensures precise adjustments without damaging parts. These tools combined create a fortress protecting your warranty and peace of mind in every installation.
Where to Go from Here
Now that you know the significance of quality fittings and meticulous installation, the journey toward a leak-proof, warranty-secure dishwasher begins with informed choices. Regularly inspect hoses, replace worn parts proactively, and keep detailed records of every repair—these habits extend your dishwasher’s lifespan and safeguard your warranty coverage. For deeper insight, explore the full list of parts covered by warranty to avoid overlooked pitfalls that could cost you in the future.
Your Turn to Try
Protecting your dishwasher warranty isn’t just about choosing the right parts—it’s about building a confident DIY mindset that values quality and precision. Have you ever faced a leak or warranty challenge during installation? Share your story below and let’s learn from each other’s experiences to ensure every repair is a success story.
Related Posts
5 Critical Dishwasher Parts to Replace Before They Leak in 2026
It was a cold Tuesday morning when I heard that…
![5 Signs Your 2026 Dishwasher Parts Are Actually Fakes [Warning]](https://appliancedoctorz.com/wp-content/uploads/2026/02/5-Signs-Your-2026-Dishwasher-Parts-Are-Actually-Fakes-Warning.jpeg)
5 Signs Your 2026 Dishwasher Parts Are Actually Fakes [Warning]
Ever turned on my dishwasher only to hear strange noises…
6 Small Parts That Save Your Dishwasher From a 2026 Flood
One morning, I woke up to a flooded kitchen. My…