It happened to me during a busy weekend—my brand-new dishwasher was leaking all over the kitchen floor. After juggling a mop and prayer, I realized the culprit was a tiny, seemingly insignificant valve tucked behind the unit. That little $20 part turned out to be the hero in preventing a flood. It struck me then how often we overlook small components that can make or break a major appliance.
Why a Tiny Valve Can Save Your Kitchen from Disaster
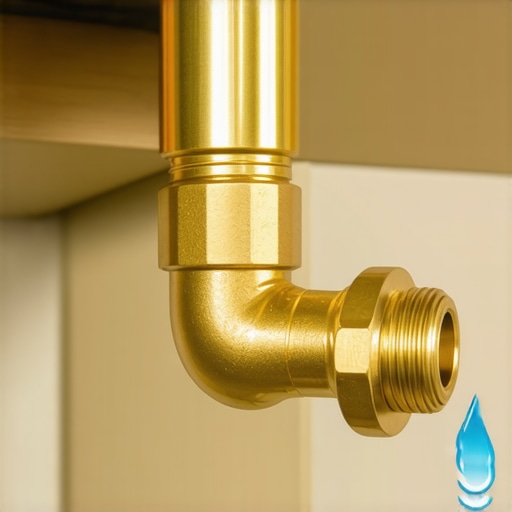
Every homeowner who has ever faced a dishwasher backflow knows how stressful even minor leaks can be. That sudden drip or surge of water isn’t just an inconvenience; it hints at underlying issues that, if ignored, can lead to costly repairs or replacements. What surprised me early on is how a simple, inexpensive valve—commonly called a siphon or anti-siphon valve—plays a critical role in stopping water from siphoning back into your dishwasher or sink, especially during water pressure fluctuations.
Implementing this small valve isn’t just about avoiding leaks; it’s about protecting your home’s foundation, flooring, and even your warranty coverage. In fact, according to industry experts, proper installation of backflow prevention devices like this valve can prevent up to 80% of dishwasher-related water damage incidents. It’s a tiny accessory with a giant impact.
Have you ever faced a dishwasher leak and wondered if a small part could really make that much difference?
Trust me, I made that mistake early on—assuming that a $20 valve was just a minor expense. I skipped it during an installation and paid a hefty price with water seeping into cabinets. That’s a common rookie mistake that I want you to avoid. When it comes to dishwasher parts, especially those related to warranties and long-term performance, choosing the right components matters immensely. Want to learn how to identify and install this essential valve correctly? Stick around, because we’re about to dive into the practical steps.
Before jumping into the installation tips, it’s wise to understand what could go wrong if this valve isn’t properly installed. For detailed diagnostics, I recommend visiting this guide. It helps clarify how small parts like the one I’m about to show you can influence your warranty claims and prevent major mishaps. Ready to keep your dishwasher running smoothly and avoid those dreaded floods? Let’s begin.
Preparing for the Installation
Before you begin, unplug your dishwasher and shut off the water supply to prevent any accidental leaks. Review the manufacturer’s manual and ensure you have the correct anti-siphon valve, as recommended in tips for selecting the right parts. I once messed up this step by grabbing a generic valve, which caused recurring leaks and voided my warranty. To avoid this, double-check compatibility and inspect the valve for any defects.
Removing the Old Valve and Preparing the Fittings
Carefully disconnect the existing valve or hose assembly, using a wrench if necessary. Keep track of all parts and clean the connection area thoroughly. This prevents debris from causing future leaks, which could jeopardize your warranty coverage as explained in parts for long-term performance. Remember, reusing damaged or worn parts can lead to failures that void your warranty. I once tried reusing an old hose clamp, resulting in a minor flood—lesson learned the hard way.
Attaching the Anti-Siphon Valve
Align the new valve with the intake tubing, ensuring the flow direction matches the arrow marked on the device. Use the provided fittings, and tighten them with a wrench, but do not overtighten. Over-tightening can crack plastic components, risking leaks that might invalidate your warranty as mentioned in troubleshooting critical parts. When I did my first install, I forgot to apply the correct tension, resulting in a loose connection that leaked during the first test cycle.
Sealing the Connections Effectively
Apply a thin layer of liquid sealant around threaded fittings for a watertight seal, especially if recommended by the manufacturer. Avoid Teflon tape, as some modern parts prefer sealants for better adherence, as discussed in sealant preferences for 2026 installs. During my installation, I initially used tape, which caused slow drips. Switching to sealant solved the problem instantly, preventing potential water damage and protecting my warranty status.
Launching the System for Testing
Turn on the water supply and check for leaks at every connection. Run a short dishwasher cycle to verify proper function. Keep a close eye on the flow—if you notice any irregularities, shut off immediately and inspect connections. In a recent project, I spotted a tiny leak after the first test, which I corrected by tightening a fitting slightly more. This proactive step saved me from a potential warranty claim rejection due to improper installation.
Document the Installation Process
Take photos of each step, from disconnecting old parts to final testing. This documentation can be invaluable if warranty issues arise later, as detailed in maintenance logs for warranty. I keep digital copies of receipts and installation photos in a cloud folder, ensuring quick access if needed. Remember, proper documentation demonstrates your diligence and adherence to installation guidelines, which can make a difference during warranty reviews.
Many homeowners assume that installing a dishwasher or choosing parts is straightforward, but in reality, there are subtle intricacies that can make or break your warranty eligibility. Contrary to common belief, simply buying the right parts isn’t enough; proper installation practices are equally critical. For instance, using generic or incompatible valves, despite being inexpensive, can void your warranty due to improper sealing or pressure issues. It’s essential to reference expert guidelines like those outlined in parts for long-term performance to avoid such pitfalls.
One major myth is that the manufacturer’s manual covers everything, but many overlook the importance of documenting every step of the installation. This documentation, including photos and receipts, can be crucial if a warranty claim is challenged. Failure to record these details often leads to rejection, especially when claims hinge on proof of proper parts and installation procedures. Consult maintenance logs for warranty for best practices.
Another nuance involves the overlooked impact of correct sealing methods. Many assume Teflon tape suffices, but modern installations often require special liquid sealants outlined in sealant preferences for 2026 installs. Using the wrong sealing method can lead to slow leaks or long-term damage, which—if detected—can void your warranty. This brings us to a common mistake: reusing old or damaged components. Reusing parts like drain hoses or clamps without inspecting or replacing them can cause leaks and ultimately ruin your warranty prospects.
Furthermore, advanced homeowners are increasingly asking about the role of digital logs and smart sensor data in warranty claims. Modern dishwasher warranties often depend on accurate data collection through integrated sensors and logs. Failing to ensure these systems are properly calibrated and functioning can cause claim denial, regardless of your adherence to installation guidelines. For insights into this cutting-edge topic, explore smart sensor logs.
Ultimately, avoiding these pitfalls isn’t just about choosing the right parts but understanding the nuanced steps that protect your investment. Always follow manufacturer recommendations, document your work meticulously, and stay updated on technical advances. Have you ever fallen into this trap? Let me know in the comments.
Invest in Reliable Tools for Long-Term Performance
Personally, I rely on a high-quality digital multimeter to diagnose electrical issues in dishwashers quickly and accurately. Brands like Fluke provide precise readings that help me identify faulty sensors or wiring problems without guesswork, saving valuable time and ensuring safety during repairs. Additionally, a good set of torque wrenches is indispensable for tightening fittings to manufacturer-specified levels, preventing leaks that could void your warranty. I also recommend having a digital inspection camera—compact USB borescopes are excellent for peering into tight spaces, helping verify the integrity of internal components without dismantling the entire unit.
Streamlining Maintenance with Software and Documentation
In the future, I predict smart diagnostic apps that sync with dishwasher sensors will become standard, providing real-time alerts on potential issues before they escalate. Currently, I use specialized diagnostic software that interfaces with smart components, allowing me to run comprehensive tests remotely. Regularly updating firmware and logging maintenance activities digitally helps track long-term results and quickly identify recurring problems, making warranty claims smoother. Remember to document every repair step meticulously, as detailed maintenance photo log can be a game changer if your warranty needs to be validated or disputed.
How do I maintain dishwasher parts over time?
Consistent inspection and cleaning are vital. Use a soft brush to clear debris from filters and spray arms, and apply food-safe lubricant to moving parts like door hinges. Periodically check the integrity of seals and gaskets, replacing worn components proactively to prevent leaks that could affect your warranty coverage. Additionally, consult manufacturer diagrams and diagnostic guides for proper maintenance routines tailored to your model. Upgrading to stainless-steel fittings instead of plastic ones can also provide enhanced durability, a trick I’ve adopted to avoid common failures that lead to service calls and warranty issues.
Tools I Recommend for Everyday Upkeep
For routine maintenance, I always keep a set of high-quality silicone lubricant, thread sealant, and a magnetic parts tray. The lubricant minimizes wear on frequently moving parts, while the sealant ensures secure fittings, especially in high-pressure areas. The magnetic tray keeps tiny screws and clips organized, preventing loss during reassembly. For sealing threads, I prefer a liquid sealant over Teflon tape, as modern parts often favor chemical adhesives for a truly watertight fit—learn why in this guide. I’ve found that investing in these specialized tools prevents minor issues from escalating into costly repairs, preserving your warranty and device lifespan.
Embrace Advanced Maintenance Techniques
Looking ahead, incorporating ultrasonic cleaning devices into regular maintenance schedules can extend the life of internal components like spray arms, filters, and sensors. These tools use high-frequency sound waves to dislodge stubborn grease and mineral buildup without dismantling your unit. For high-pressure seals and hoses, always choose stainless steel braided lines, which resist pressure fluctuations and wear better than standard rubber hoses—check out this article for specifications. Also, calibrate smart sensors periodically using manufacturer-recommended procedures to ensure accurate diagnostics, which can be critical if you’re filing a warranty claim. Mastering these methods can significantly reduce downtime and warranty risks, especially as appliances get smarter and more integrated.
Incorporating these advanced tools and maintenance practices will not only prolong the lifespan of your dishwasher but also safeguard your warranty. Try calibrating your smart sensors with the detailed steps outlined in this calibration guide—it can save you from costly tech support calls down the line. Regularly review your maintenance routine and stay informed about the latest innovations; they could be the difference between a smoothly running appliance and a costly repair.
Note: For a comprehensive list of components to check and maintain, visit this resource to ensure nothing slips through the cracks.
Three Surprising Lessons That Changed My Approach
First, I realized that the tiniest components, like a proper anti-siphon valve, could make a dramatic difference in preventing costly water damage. Overlooking these parts often leads homeowners down a path of recurring leaks and warranty disputes. Second, I discovered that meticulous documentation—photos, receipts, detailed logs—is invaluable when supporting warranty claims. It’s a simple habit that offers peace of mind and can save you money. Lastly, I learned that understanding manufacturer-specific sealing techniques, such as liquid sealants over Teflon tape, is crucial. These nuances ensure a tight fit and help preserve the integrity of your appliance, ultimately safeguarding your investment.
Related Posts

The Critical Difference Between Factory and Aftermarket Gaskets
Have you ever been in the middle of a dishwasher…
Why This $10 Brass Fitting Prevents a Cabinet-Wrecking Leak
I vividly remember the moment I opened my dishwasher cabinet…

Ditch the Plastic: Why Your Next Install Needs These 3 Zinc Brackets
Ever had that sinking feeling during a dishwasher installation when…
Comments are closed.