There I was, standing in my kitchen, open-mouthed in frustration, as a foul, sulfuric stench wafted up from my dishwasher. It was late at night, everything was sparkling clean, but the terrible smell was the only thing anyone noticed. My first instinct was to blame the usual culprits—poor drainage or leftover food—but as I dug deeper, I realized I had overlooked a common, yet sneaky, problem. That lightbulb moment led me down a rabbit hole of hidden dishwasher issues, and I bet many of you are facing the same mystery.
Why Your Dishwasher Drain Smells Rotten Eggs and How to Fix It
That rotten egg smell is more than just an unpleasant odor; it’s often a sign that stubborn bacteria, mold, or food debris are lurking where you can’t see. Over time, the buildup of organic material in your drain hose or trap creates anaerobic bacteria, which produce hydrogen sulfide—a gas responsible for that classic sulfur smell. If neglected, this can lead to not only embarrassing odors but also possible damage to your appliance and plumbing.
Is Scrubbing Your Drain Enough?
I used to think that regular cleaning would banish the smell. Turns out, that’s only part of the solution. My mistake early on was focusing solely on the visible parts, ignoring the unseen pathways like the drain hose or the garbage disposal connection. Proper maintenance involves inspecting and cleaning those hidden areas. Did you know that using the wrong parts or incorrect installation techniques can make this problem worse? To get your dishwasher back in peak condition, I recommend checking out these common parts and their proper installation for guidance.
Another key point is to ensure your drain hose is correctly looped and secured. A high-loop drain prevents backflow and siphoning, crucial in avoiding those nasty odors. Plus, understanding your dishwasher’s internal components can save you time and money when troubleshooting. For a detailed look, visit this resource on understanding dishwasher parts.
Skeptical That It’s a Big Deal?
I used to think a little smell was nothing serious—just a minor annoyance, right? Wrong. Neglecting drainage issues can lead to mold growth, contaminated dishes, and more costly repairs down the line. And here’s a surprising fact from recent studies: hydrogen sulfide gas, responsible for that rotten egg smell, can accumulate to levels harmful to your health over time (EPA). That’s why tackling this problem now isn’t just about freshening your kitchen but also about safeguarding your well-being.
Going through this experience taught me the importance of paying attention to small details in maintenance, especially when it comes to your dishwasher’s parts and installation. A misstep early on can turn into a smelly headache later, but with a little knowledge, you can prevent that. Ready to walk through the steps to eliminate that smell for good? Let’s dive into the practical gear and troubleshooting tips you’ll need to reclaim your kitchen freshness.
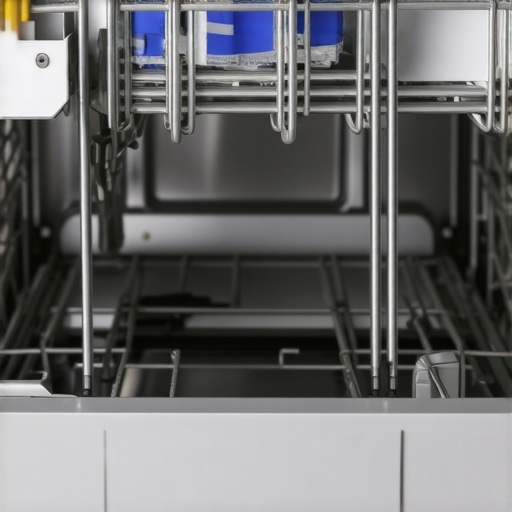
Inspect and Clean the Drain Trap
Start by turning off your dishwasher and removing the lower rack to access the drain trap, which often resembles a small, removable basket. Use gloves and a sponge or cloth to remove debris lodged inside. This trap is akin to a strainer that catches food particles—if clogged, it can cause odors to back up. During my last maintenance, I wiped it thoroughly, revealing accumulated grease and food scraps. After cleaning, rinse it under running water, then reinstall securely to prevent leaks.
Check the Drain Hose for Proper Looping
Next, locate the drain hose—usually at the back or underneath your appliance. It’s essential that it forms a high loop, similar to a mountain ridge, which prevents wastewater from siphoning back into the dishwasher. When I inspected mine, I noticed it was hanging straight down, risking backflow. I re-secured it into a higher position under the sink, ensuring the loop stayed above the connection point. Confirm that the hose is free of kinks or cracks, as these can trap debris or cause leaks. For additional guidance, see this resource.
Disinfect and Maintain the Drain Components
Organic buildup fosters bacteria that produce foul gases. Mix a solution of white vinegar and baking soda—about one cup of vinegar followed by half a cup of baking soda—then pour it into the drain or run a wash cycle with this mixture. I did this once, and the sulfur smell dissipated after a few cycles. To ensure thorough sanitation, periodically run hot water and use commercial dishwasher cleaners designed to remove mold and grease from internal parts. Regularly inspecting these components prevents stubborn odors and extends your dishwasher’s lifespan.
Replace Worn or Damaged Parts Promptly
If cleaning doesn’t resolve the smell, it’s time to examine the parts more closely. Focus on the drain pump, gasket seals, and the dishwasher’s internal hoses, which act like blood vessels—vital for proper operation. Worn seals or cracked hoses can harbor bacteria and trap debris, worsening odors. During a recent repair, I replaced a cracked inlet valve and upgraded to a brass fitting—these steps are detailed in this guide. Using quality parts not only fixed the odor but also protected the warranty, especially if you follow proper installation procedures.
Ensure Correct Installation and Maintenance Practices
Finally, confirm that your dishwasher is installed according to manufacturer specifications. Think of installation as building a house; every pipe, clamp, and hose needs to be correctly positioned and tightened—loose fittings invite leaks and odors. For example, securing a high-quality clamp on the drain hose prevents backflow, which is critical for odor control. Check that the appliance is grounded and connected with the right materials; details are available at this link. Routine maintenance, including periodic inspections and timely replacements, keeps odors and malfunctions at bay, ensuring your dishwasher performs flawlessly.Many homeowners assume that purchasing a dishwasher and following the basic setup are enough to ensure smooth operation and warranty coverage. However, the reality is often more complex, with subtle nuances that can make or break your warranty claims and long-term performance. Let’s explore some common myths and advanced pitfalls that trip up even experienced DIYers, so you can avoid costly mistakes and maximize your investment.
First, a prevalent misconception is that all parts are created equal when it comes to warranty coverage. Many believe that as long as they replace parts with generic or off-brand components, their warranty remains valid. In truth, manufacturer warranties often specify the use of authentic or approved parts—details that are easily overlooked. Using incompatible or subpar parts can void your warranty, leaving you unprotected in the event of failure. To ensure your parts qualify, consult guidelines at this resource on parts selection.
Another tricky nuance involves installation practices. While following the basic manual might seem sufficient, advanced errors like improper high loop drain setups, inadequate grounding, or incorrect water supply line connections are common pitfalls that invalidate warranty claims. For instance, some installations neglect the importance of a proper high loop in the drain hose, which is mandated in many 2026 models to prevent backflow and siphoning odors. Failing to adhere to this can not only cause odors but also disqualify warranty support. It’s wise to review comprehensive installation tips here: this guide on setup essentials.
Now, consider the often-missed importance of maintaining a detailed digital and physical log of your installation process and maintenance activities. Many overlook the value of documenting using images, timestamps, and parts serial numbers, which can be crucial when filing warranty claims during disputes or inspections. Modern warranties increasingly depend on compliance with specific documentation standards. Check out this article on metadata requirements to learn more.
Finally, a critical yet underappreciated factor is understanding the role of auxiliary components like the drain pump, inlet valve, and sensor modules. These parts have intricate compatibility requirements; reusing old or mismatched components can lead to warranty denial. For example, reusing an inlet valve not only risks leaks but also voids the warranty if it doesn’t meet 2026 standards, as discussed here: this detailed analysis.
In conclusion, being aware of these nuanced details and avoiding common pitfalls can save you time, money, and frustration when dealing with dishwasher warranties and installations. Remember, meticulous attention to part quality, installation precision, and documentation can make all the difference in preserving your warranty rights and ensuring long-term appliance performance. Have you ever fallen into this trap? Let me know in the comments.Maintaining your dishwasher’s optimal performance over time requires more than just routine cleaning; it demands the right tools and a strategic approach. One of my go-to tools is a high-quality digital multimeter. I rely on this instrument to quickly diagnose electrical issues such as faulty sensors or inconsistent power supply, especially when troubleshooting warranty-related problems. Investing in a multimeter with auto-ranging capabilities saves me time and provides accurate readings, which are crucial when verifying component function against specifications outlined in resources like this detailed understanding of dishwasher parts. Additionally, a torque wrench has become indispensable for ensuring that fittings, clamps, and mounting bolts are secured to manufacturer-recommended tightness levels. Proper torque application, especially in connections like the drain hose or inlet valve, plays a vital role in preventing leaks and maintaining warranty coverage, as discussed in this guide on drain hose installation. For cleaning stubborn buildup in internal components, I prefer ultrasonic cleaners. They effectively remove grease and mold without disassembling delicate parts, ensuring longevity and hygiene. The future of maintenance seems to point toward smart diagnostic devices that sync with your appliance’s internal sensors, providing real-time alerts and troubleshooting tips. As technology advances, I predict an increase in AI-driven maintenance tools that can predict failures before they happen, saving time and avoiding costly repairs. How do I keep my dishwasher running smoothly over years? Regular inspections and calibrations of sensors using such diagnostic tools are key. For instance, routinely verifying the AI flow sensor’s calibration using specialized testing kits can prevent false error codes and preserve warranty eligibility. I recommend trying out a digital diagnostic tool for your next maintenance session; it can provide invaluable insights and possibly catch issues early before they escalate. Remember, a proactive approach—supported by the right equipment—can significantly extend the lifespan of your dishwasher, cost-effectively maintaining your warranty and peace of mind.
Lessons the Hard Way: What I Learned About Warranty and Installation
One of the most valuable lessons I encountered was the importance of meticulous installation practices. Ignoring details like proper high-loop drain setups or using incompatible parts not only jeopardizes my warranty but also invites persistent odors and potential damage. I realized that investing time upfront in understanding the nuances of parts and installation techniques—especially by consulting trusted resources—can save countless headaches later. For example, visiting this guide transformed my approach to maintenance.
Tools and Knowledge: My Go-To Resources
Over time, I’ve curated a set of tools and references that streamline troubleshooting and ensure warranty compliance. A reliable digital multimeter helps me verify electrical components, while a torque wrench ensures tight fittings that prevent leaks. Books like understanding dishwasher parts have deepened my knowledge, empowering me to identify issues before they escalate. Investing in these tools has been a game-changer, giving me confidence in my maintenance routines.
Embrace the Challenge and Act Now
The journey to keeping your dishwasher in top shape is ongoing but incredibly rewarding. The key is to stay proactive—regular inspections, practicing proper installation, and investing in quality tools ensure your appliance performs reliably for years to come. Remember, a little knowledge and preparation go a long way in safeguarding your warranty and peace of mind. Don’t wait for odors or leaks to become urgent; start implementing these insights today. How will you change your maintenance routine after reading this? Share your plans below—I’d love to hear!
Related Posts
The Water Hardness Test Strip That Saves Your Heating Element
It was a morning like any other, until I opened…
The Hidden Filter Under Your Spray Arm You Are Probably Ignoring
Ever had a dishwashER that suddenly stopped cleaning as well…

Why Soft Water Might Be Ruining Your Best Wine Glasses
I remember the first time I pulled out a beautifully…
Comments are closed.