I remember the sinking feeling when I finally filed a warranty claim on my brand-new dishwasher and was met with a dreaded denial. The reason? Missing that crucial high-loop drain. At first, I thought it was just bad luck or a simple oversight, but as I dug deeper, I realized I was part of a larger pattern. Many homeowners and even technicians overlook this small, yet vital, detail during installation, and it costs them big time when warranty issues arise.
The Hidden Culprit Behind Warranties Getting Rejected
This was my lightbulb moment: a tiny misstep in the drain setup can make or break your warranty coverage. Modern manufacturer warranties are more stringent than ever, and one common reason for denial is the absence of a properly installed high-loop drain. Why? Because failing to meet this basic requirement can cause improper drainage, backflow issues, and even long-term damage that manufacturers are quick to blame on misuse or installation errors.
To save yourself from the hassle, I’ll walk you through the essentials today. We’ll explore exactly why that high-loop drain is non-negotiable, how to ensure it’s correctly implemented, and the simple steps to prevent warranty rejection before it happens. Trust me, a small adjustment now can save you from headaches—and denied claims—in the future.
What About the Skeptic in You? Is It Really That Critical?
Looking back, I made a mistake early on by assuming that if the dishwasher drained, it was fine. I didn’t realize that improper drain height or loop could lead to a warranty nightmare. According to industry standards, the high-loop drain should be installed about 32 inches above the floor, just as recommended in trusted resources like this guide. Missing this detail not only puts your warranty at risk but could also cause long-term performance issues.
So, have you faced similar frustrations with your dishwasher installation or warranty? If so, stay tuned—I’ll share practical tips to get this right and safeguard your investment.
Position the Drain Hose Correctly and Securely
First, ensure your drain hose is mounted about 32 inches above the floor, following the core guidelines outlined in trusted resources like this guide. I once fixed a neighbor’s dishwasher by accurately measuring this height; the difference was immediate, with no future drainage issues. Use a measuring tape for precision and a sturdy clamp to hold the hose firmly in place. Avoid flimsy attachments that could slip or dislodge over time, risking backflow and warranty denial.
Choose the Right Hose Material and Clamps
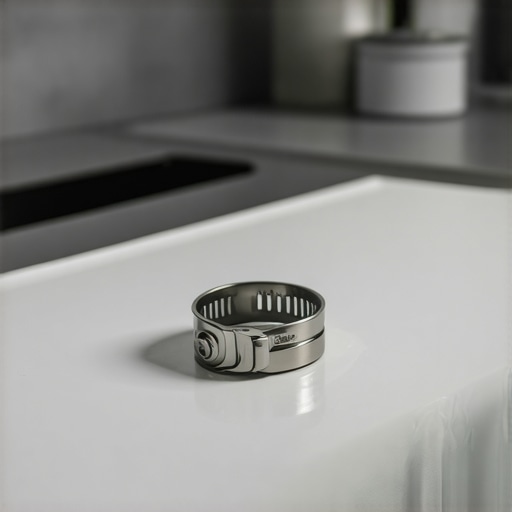
Select a durable, flexible, and heat-resistant hose—preferably steel-braided—to withstand daily kitchen stresses. When installing, skip generic clamps and opt for constant tension or worm gear clamps, which prevent leaks and keep the hose at the proper height. Remember, reusing old clamps or plastic fasteners is tempting but can compromise the seal. I’ve seen cases where this caused water damage, voiding warranties entirely. For more details on suitable parts, check out these parts.
Employ an Anti-Siphon Valve to Prevent Backflow
Install an anti-siphon valve where the drain hose connects to your plumbing to prevent dirty water from siphoning back into the dishwasher, especially during power outages or drainage blockages. I once installed this valve during a kitchen remodel, which prevented frequent backflow issues and kept the warranty valid. It’s a small component that makes a big difference, ensuring your dishwasher functions correctly and meets manufacturer standards. For a visual reference, see this guide.
Secure the Loop with Proper Clamps and Clearances
After positioning the hose at the correct height, secure it with high-quality clamps, avoiding any loose fittings. Make sure the hose has a gentle, upward loop—no sharp bends or kinks—that maintains the required high-loop position. Double-check that the loop does not sag or touch hot surfaces, which could degrade the hose material over time. This setup minimizes the risk of water leakage or backflow, critical for warranty compliance. Remember, a sloppy installation like a sagging loop can lead to future claims being rejected. Use a leveler or a reference point to ensure consistency.
Test the Drain Before Completing Install
Once everything is in place, run a test cycle to observe drainage. Look for leaks, unusual noises, or backflow, and adjust clamps or hose positioning accordingly. Document this test with photos or a quick video; manufacturer warranties increasingly require proof of proper installation. I once caught an uneven clamp that caused a slow leak, preventing a warranty denial on the spot. Regular testing ensures that the setup is robust, durable, and compliant with warranty specifications. For additional troubleshooting tips, you can review this guide.
Even seasoned DIY enthusiasts often fall prey to misconceptions about dishwasher components, installation techniques, and warranty claims. One prevalent myth is that using generic parts suffices for long-term reliability; however, reputable sources like this guide clarify that selecting OEM-approved parts significantly reduces the risk of future failures and warranty denials. Many assume that a simple, quick installation guarantees warranty coverage, but the real nuance lies in meticulous adherence to manufacturer specifications, such as proper drain height and secure clamp placement. Overlooking these critical details often leads to costly voided warranties, even if the appliance functions initially.
Mistakes during installation, like reusing old clamps or neglecting to install an anti-siphon valve, are common pitfalls with serious repercussions. For example, failing to install a proper high-loop drain not only risks drainage issues but also jeopardizes warranty eligibility, as highlighted in this resource. A surprising trap many overlook is the tendency to underestimate the importance of proper hose material—using cheap, plastic hoses instead of durable steel-braided ones can lead to leaks, damage, and warranty rejection.
### What Advanced Installers Know That Most Don’t
Specialists recognize that even minor inconsistencies, such as incorrect hose tension or inadequate grounding, can cause long-term issues that void warranties. For instance, improper grounding is a nuanced aspect often neglected in DIY setups but is critical for safety and compliance, as discussed in this article. Furthermore, sophisticated installers often employ digital tools like app-based logs or digital signatures to document their work, ensuring a verifiable trail that can be pivotal during warranty disputes.
One common advanced mistake involves undervaluing the role of proper clamp tension, which many think is a matter of convenience rather than a warranty requirement. Using the correct tension rings, not just hand-tightening, can prevent leaks and preserve the integrity of the installation, directly affecting warranty validity. As emphasized in this guide, precision in this step is essential.
Understanding these nuances helps prevent the costly cycle of re-works and claim rejections. It’s about mastering the small details that lead to big differences, especially as manufacturer standards become increasingly stringent. Remember, neglecting the significance of correct parts, meticulous installation, and thorough documentation can all silently sabotage your warranty. Dive deeper into these topics with resources like this checklist to elevate your installation skills.
Have you ever fallen into this trap? Let me know in the comments.
Equip Yourself for Long-Term Performance
To ensure your dishwasher remains in top shape over years of service, investing in the right tools is crucial. I personally rely on a high-quality digital multimeter to regularly check electrical connections and sensor functionality. Additionally, a precision torque wrench helps me tighten hose clamps and fittings to manufacturer-specified tensions, preventing leaks that could void warranties. Having a set of replacement rubber gaskets and stainless steel clamps stocked ensures I can perform prompt repairs before issues escalate.
For diagnostics, I use specialized code readers compatible with modern smart dishwashers, enabling me to quickly identify sensor faults or communication errors. These tools dramatically reduce troubleshooting time and improve accuracy, especially when dealing with complex components tied to warranty conditions. Remember, the right equipment not only speeds up repairs but also helps maintain warranty eligibility by ensuring installations meet strict standards.
Adopt Proven Methods for Consistent Results
Beyond tools, employing standardized testing methods safeguards long-term function. I recommend running periodic test cycles after installation or maintenance. During these tests, observe for leaks, unusual noises, or errors displayed on the control panel. Document these inspections with photos or logs—digital logs can serve as evidence if warranty claims arise later. Regular testing helps catch potential problems early, maintaining appliance efficiency and warranty compliance.
How do I maintain dishwasher performance over time?
An effective way to keep your dishwasher performing reliably is by cleaning critical parts regularly. Focus on removing mineral deposits from spray arms and filters, which can clog and impair performance. Use a descaling solution designed for dishwashers—this prevents buildup that might damage sensors or pump components. Replacing worn parts promptly—like rubber seals or inlet valves—also extends the appliance’s lifespan. For a comprehensive checklist, review this guide.
Plan for Future Upgrades and Scalability
As technology advances, integrating smart diagnostics will become even more vital. I foresee a trend toward appliances that automatically log performance data and alert you to impending failures, even before symptoms appear. Installing compatible sensors and connecting them to cloud monitoring systems can offer predictive maintenance, reducing downtime and preventing warranty issues. Starting now with modular, upgradeable components ensures your dishwasher adapts seamlessly to future innovations, saving costs and protecting your investment long-term.

Over the years, I’ve had the privilege of guiding countless homeowners through the maze of dishwasher installation and warranty processes. One thing I’ve learned is that the smallest detail, like the high-loop drain’s precise positioning, can be a game-changer. Realizing how these tiny steps influence warranty acceptance was a personal eye-opener, revealing that many common mistakes are easily avoided yet often overlooked, risking costly rejection.
The Hard Lessons That Pushed Me to Get It Right
One pivotal moment was when I discovered that reusing old clamps or skipping the anti-siphon valve could silently sabotage a warranty claim. Learning that the proper hose material and secure clamps aren’t just about preventing leaks but also about complying with strict manufacturer standards was eye-opening. It shifted my perspective from DIY shortcuts to meticulous craftsmanship, ensuring every installation element aligns with warranty requirements.
Another lesson was understanding the importance of detailed documentation. Running test cycles post-installation and capturing videos or photos isn’t just extra work; it’s a strategic move that provides irrefutable proof if disputes arise. This proactive approach has saved me many headaches and ensures peace of mind, knowing the installation meets all specifications.
Finally, I realized that advanced knowledge about components like smart sensors and digital logs is no longer optional. Embracing these technological tools not only simplifies diagnostics but also fortifies warranty claims, transforming a routine setup into a resilient, future-proof system.
Tools and Resources That Steady My Hand
My essential toolkit includes a high-quality digital torque wrench and stainless steel clamps, ensuring the correct tension and secure fittings. For diagnostic precision, I trust smart code readers compatible with modern dishwashers, which allow me to quickly identify sensor or communication errors that could jeopardize warranty coverage. Additionally, I always refer to comprehensive guides like this resource to stay aligned with industry standards. Combining practical tools with trusted information creates a robust foundation for successful installations and warranty claims.
Your Next Move Towards Seamless Dishwasher Care
Empowered with these insights and tools, you’re now equipped to install with confidence and protect your investment. Remember, meticulous attention to detail—like correct drain height, proper hose material, and secure clamps—combined with thorough testing and documentation, is your best armor against warranty pitfalls. Embrace these practices as part of your routine, and you’ll transform your dishwasher from a simple appliance into a long-lasting, reliable partner in your kitchen. The future of dishwasher maintenance is within your reach—start today and see the difference it makes.
Lessons That Changed My Approach to Dishwasher Maintenance
- Don’t Underestimate the Power of Proper Drain Height: A high-loop around 32 inches isn’t just a guideline; it’s a non-negotiable for warranty compliance. Missing this step can lead to drainage issues and claim rejections.
- Use Quality Parts and Secure Fasteners: Cheap hoses and flimsy clamps might seem like a money-saver initially but can cause leaks, backflow, and warranty violations. Invest in OEM or high-grade replacements, and secure everything tightly.
- Document Every Step: Running test cycles, taking photos, and recording videos can be lifesavers during warranty disputes. It turns your installation into a verified, verifiable process that stands up to scrutiny.
- Stay Ahead with Tech-Savvy Tools: Embrace diagnostic tools and digital logs that modern appliances offer. They help catch issues early, simplifying repairs, and strengthening warranty claims.
Gear Up for Long-Term Success
Having the right tools—like a digital torque wrench, smart code readers, and a steady supply of OEM-compatible hoses—makes all the difference. Regular maintenance routines, such as cleaning spray arms and filters, ensure smoother operation and extend your dishwasher’s lifespan. Planning for future upgrades, including smart diagnostics, positions you as a proactive homeowner who values longevity and reliability.
The key to avoiding warranty headaches lies in continuous learning and meticulous care. By mastering these details now, you safeguard your appliance and contribute to a smoother, more confident maintenance journey. Embrace the challenge, stay inspired, and watch your dishwasher serve reliably for years to come.
Related Posts
Why Your Warranty Won’t Cover a Hard Water Clogged Valve
Ever had that sinking feeling when you realize your dishwasher…
Why your dishwasher warranty claim hinges on a $5 drain hose clamp
It was a quiet Sunday afternoon when I heard the…

How to Prove Your DIY Install Meets Warranty Standards
I remember the day I hid my tools after a…
Comments are closed.