It was a morning like any other when I finally decided to replace my ancient dishwasher’s water supply line. As I loosened the old pipe, I realized I was about to reuse a component that had likely been there for decades. Instantly, a lightbulb went off in my head: I was risking a flood that would ruin my kitchen—and maybe more. That moment taught me a hard lesson: reusing old water supply lines is a gamble, and more often than not, it ends with water where it shouldn’t be.
The Hidden Dangers of Reusing Old Water Lines
Reusing old water supply hoses might seem like a simple, cost-saving shortcut, but it’s a dangerous game. Over the years, these hoses develop tiny cracks, weaken from corrosion, or become brittle—compromising their integrity. When subjected to the pressure of a new appliance, they can fail unexpectedly, leading to leaks or catastrophic floods. I learned this firsthand when a tiny crack in my reused line suddenly gave way, flooding my kitchen and causing expensive damage.
The promise of saving a few bucks can quickly turn into a nightmare. Instead, investing in high-quality, new parts not only safeguards your home but also ensures long-term peace of mind. Proper installation and choosing the right parts go hand-in-hand with avoiding disasters like water damage. For example, understanding which parts are covered under warranty can help you make informed decisions—like reviewing [dishwasher parts warranty basics](https://appliancedoctorz.com/guide-to-dishwasher-parts-warranty-what-you-need-to-know).
Are You Underestimating Your Old Water Line’s Age?
Early on, I ignored the signs—cracks I dismissed as superficial, thinking I was saving a few dollars. But behind the scenes, corrosion and deterioration had been silently weakening my line’s core. Trust me, I made the mistake of reusing an old hose without thorough inspection, and it cost me dearly.
Having learned my lesson, I now know the importance of inspecting each component meticulously. If you’re planning a dishwasher installation, make sure to check out [tips for selecting the best parts](https://appliancedoctorz.com/top-tips-for-selecting-the-right-parts-for-dishwasher-installation). Don’t let a small oversight turn into a flooded kitchen. In the next sections, I’ll guide you through simple steps to ensure your water supply lines are safe, new, and ready to stand up to years of service—without risking your home.
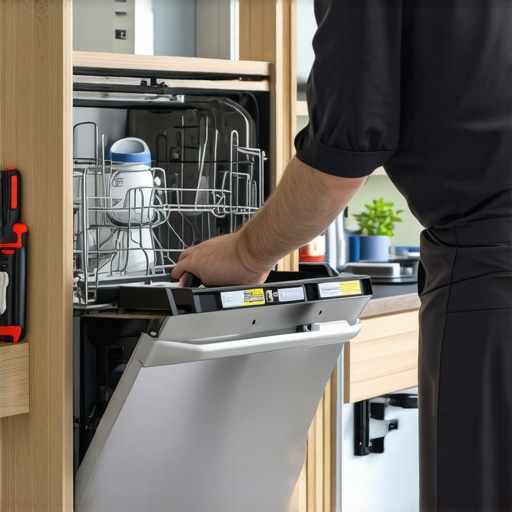
Inspect and Prepare Your Water Supply Line
Begin by assessing your existing water supply hose. Use a flashlight to check for cracks, corrosion, or brittleness, especially at the connectors. When I replaced my dishwasher, I discovered that my older hose had a small, almost invisible crack, which could have caused leaks over time. Always opt for a new dishwasher parts kit that includes the supply hose to ensure compatibility and quality.
Choose the Right Replacement Parts
Select high-quality, stainless steel braided hoses—these are more durable and resistant to kinking compared to vinyl or plastic hoses. Check the top tips for selecting parts to ensure your new hose meets your appliance’s specifications. Remember, using inferior parts can void warranties and lead to water damage.
Shut Off Water Supplies and Disconnect Old Hose
Turn off the water supply to your kitchen at the shutoff valve. Place a towel under the connection point to catch any residual water. Carefully loosen the old supply line using an adjustable wrench. Be prepared for a small spill—wear gloves to protect your hands. If the old hose is stubborn, apply some penetrating oil to the fittings and let it sit for a few minutes before attempting again.
Install the New Supply Line
Attach the replacement hose to the water inlet valve on your dishwasher first, tightening the connection with a wrench. Use a torque wrench set to manufacturer-recommended torque specifications to avoid over-tightening, which can strip threads or damage fittings. Connect the other end to the water shutoff valve, ensuring you tighten securely. Consider using a high-quality compression ring for a watertight seal.
Ensure Proper Loop and Support
Position the hose with a gentle high loop under the sink, making sure it does not kink or pinch. This prevents backflow and potential siphoning issues. Secure the hose using plastic brackets or clamps, avoiding anything that can crush or pinch the line. Proper support reduces stress on connections during operation, prolonging the lifespan of your install.
Test for Leaks and Proper Flow
Turn the water supply back on and check all connection points carefully for leaks. Run a short cycle on your dishwasher to observe the water pressure and look for any signs of dripping. If leaks are present, tighten fittings slightly more or replace washers if necessary. A well-installed line should be water-tight, silent, and free of vibrations.
Verify Warranty Coverage and Document Your Work
Post-installation, review your warranty policies—proper installation is often a key factor in claim acceptance. Use a digital camera or smartphone to document your installation process, capturing connection points and the overall setup. This can be invaluable if troubleshooting or warranty service becomes necessary later.
Regularly inspect your supply line, especially if you opted for an older hose with previous signs of wear. Replacing it proactively can save you from potential flooding and costly repairs down the line.
Many homeowners believe that installing a dishwasher is as simple as connecting a few hoses, but this oversimplification can lead to costly mistakes. **Contrary to popular belief, not all parts are created equal**—choosing generic or low-quality components might save money upfront but can compromise warranty coverage and long-term performance. For example, many assume that standard hoses are sufficient, yet **stainless steel braided hoses have become the industry standard for durability and safety**, as emphasized by appliance experts.
Why do so many overlook the importance of proper parts selection?
One common myth is that all replacement parts are interchangeable. In reality, using the wrong fittings or materials can lead to leaks or void your warranty, especially if the manufacturer specifies certain components. To avoid this pitfall, it’s crucial to consult your dishwasher’s manual or expert resources, such as [common dishwasher parts and their role in proper installation](https://appliancedoctorz.com/common-dishwasher-parts-and-their-role-in-proper-installation), ensuring compatibility and adherence to warranty conditions.
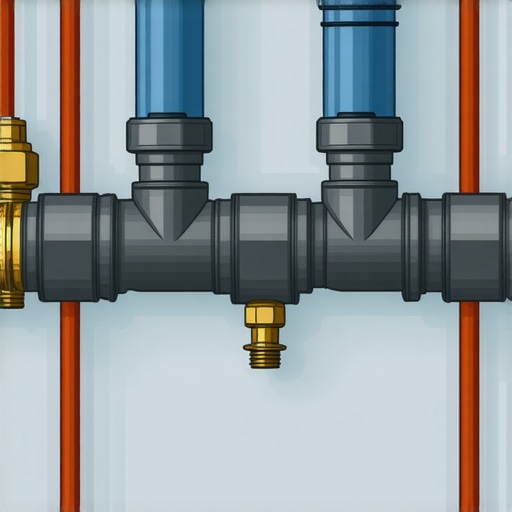
Another frequently overlooked nuance is the installation environment. Many installers neglect to verify the water inlet’s pressure and the drainage setup’s gravity factors, which can cause persistent leaks or water backup. As studies on plumbing stress, ensuring the correct water pressure and proper drain loops are essential for preventing backflow and siphoning issues. Additionally, **many users underestimate the critical role of correct electrical wiring**, which, if improperly grounded or fused, can lead to electrical failures or pose safety hazards. These details are often detailed in professional installation guides and are vital for preventing damage and guaranteeing warranty claims.
How can advanced installers avoid these hidden pitfalls?
Professional-grade installation involves meticulous inspection of all connections, from water inlet to drain and power supply. For instance, ensuring a high-loop drain line is recommended to prevent siphoning—something that novice installers often overlook. Further, securing proper grounding and using the specified materials—such as [the complete list of dishwasher parts covered by warranty](https://appliancedoctorz.com/the-complete-list-of-dishwasher-parts-covered-by-warranty)—are crucial steps that can safeguard your investment. **Textbook installation techniques** combined with an understanding of the subtleties—like the significance of torque specifications and anti-vibration measures—can make a significant difference in the durability and performance of your dishwasher. Therefore, don’t fall into the trap of assuming that a quick setup guarantees longevity. For a detailed walkthrough, revisit [tips for selecting the best parts](https://appliancedoctorz.com/top-tips-for-selecting-the-right-parts-for-dishwasher-installation) to optimize your installation.
Have you ever fallen into this trap? Let me know in the comments.
Maintaining your dishwasher’s performance over the long haul requires more than just regular use. Equipping yourself with the right tools ensures you can troubleshoot issues promptly and perform DIY repairs confidently. One indispensable item I rely on is a high-quality digital multimeter. I use it to check electrical components like the control board and sensors, ensuring they’re functioning correctly. My personal preference is the Fluke 117 — it’s precise, durable, and easy to read, which is crucial when diagnosing complex dishwasher electronics.
For hose inspections and fittings, I always keep a set of adjustable wrenches and a torque wrench. The torque wrench prevents over-tightening, which can damage delicate components like the water inlet valve. I prefer a model that offers both precision and comfort, like the Tekton 24335, to make tightening connections effortless and safe.
To tackle stubborn clamps and fittings, I equip myself with a stainless-steel hose clamp plier. This specialized tool allows for easy removal and installation of T-bolt and worm drive clamps, especially when replacing supply lines. I’ve found that quality tools reduce the chance of damaging fittings, which helps preserve warranties and ensures long-term performance.
Given the trend toward smart dishwashers, I incorporate a diagnostic scanner compatible with Wi-Fi modules. This device lets me access error logs directly from the appliance, streamlining troubleshooting. As smart appliances evolve, having a reliable diagnostic tool will become essential for proactive maintenance and avoiding costly repairs.
Looking ahead, I predict that the integration of AI-powered diagnostic apps will become standard. These apps will analyze sensor data and error logs in real-time, guiding even novice homeowners through complex repairs. To prepare, I recommend trying the current generation of diagnostic tools to familiarize yourself with smart diagnostics.
So, how do I maintain dishwasher performance over time? Regularly inspect components like the door seal and filtration system using specialized tools, and update your diagnostic software to stay ahead of potential issues. For instance, periodically checking the water inlet valve with your multimeter can prevent leaks and water wastage. Start by attaching your multimeter to the control board’s test points following manufacturer guidelines—it’s a simple step that saves money and prolongs your dishwasher’s lifespan. Remember, staying proactive with the right tools is key to keeping your dishwasher running efficiently for years to come. Give this tip a try today and see the difference it makes in your maintenance routine.
The Hardest Lesson I Learned About dishwasher,installation,warranty,parts
One of the most valuable lessons I discovered was never to underestimate the wear and tear on old hoses; what looks fine externally may be brittle inside, risking leaks and expensive damage. I also realized that rushing through basic steps like proper tightening and supporting the hose can compromise a long-term seal, leading to early failures. The importance of using high-quality, manufacturer-recommended parts became crystal clear after a costly flood—saving money upfront isn’t worth risking your home’s safety. Finally, I learned that documenting each step during installation not only streamlines future repairs but also safeguards your warranty claims—proof beats assumptions every time.
My Essential Toolbox for Dishwasher Parts and Maintenance
The tools I trust most include a precision multimeter like the Fluke 117, for verifying control board and sensor functions, and a clean set of adjustable wrenches combined with a torque wrench to tighten fittings correctly. For inspecting supply hoses, I keep a robust set of stainless-steel hose clamp pliers, ensuring a secure fit without damage. As appliances evolve, I also recommend a Wi-Fi diagnostic scanner for modern smart dishwashers, helping you troubleshoot remotely and confirm component health. All these tools have become indispensable in preventing minor issues from becoming major disasters, and I trust them because they’ve saved me time, stress, and money multiple times.
Your Next Step Toward Peace of Mind
Don’t let fear of DIY installation hold you back—knowledge and the right tools make all the difference. Embrace the process of inspecting, replacing, and supporting your dishwasher’s water lines with confidence, knowing you’ve minimized risks and extended your appliance’s lifespan. Remember, proper maintenance isn’t a one-time task, but an ongoing commitment; regular inspections and using quality parts will ensure your dishwasher continues to serve reliably for years to come. Take action today—your home and peace of mind deserve it.
Related Posts
The Gasket Trick That Stops Steam From Warping Your Cabinets
It was a cold morning when I noticed my kitchen…
How to Align a Dishwasher Toe-Kick for a Flush Custom Finish
It was a moment of frustration that finally made me…
Stop the Banging: Installing a Water Hammer Arrestor
It was a quiet Saturday morning when I suddenly heard…