
There is nothing more annoying than grabbing a supposedly clean fork for your morning eggs and feeling that cold, damp drip on your thumb. It is 7:00 AM, the dishwasher finished its cycle hours ago, and yet your silverware looks like it just finished a lap in the pool. It is frustrating. I have been there more times than I care to admit. In my early days as a homeowner, I actually called out a repair tech because I was convinced my heating element had literally melted into a useless puddle. I felt like a total amateur when he showed me that my machine was fine—I was just loading it like a teenager in a hurry. We have all been tempted to just jam the spoons in and hope for the best, but that soggy mess at the end of the cycle is often our own doing. Today, I am going to walk you through exactly why your cutlery is staying damp and how we can get your kitchen back to a place where you never have to reach for a dish towel after the ‘Finished’ light comes on. [image placeholder]
Stop Hand-Drying Your Spoons After Every Single Wash
To solve this, we have to look at how water behaves inside that stainless steel box. Most people think the dry cycle is just about raw heat, but it is actually a delicate dance of evaporation and airflow. When I first started tinkering with my own unit, I made the classic mistake of ignoring how common dishwasher parts like the vent and the rinse aid dispenser actually work together. If your spoons are ‘nesting’—you know, when they tuck into each other like they are trying to stay warm—the water gets trapped in a vacuum and simply cannot evaporate. It is a physics problem, not just a plumbing one. According to the American Council for an Energy-Efficient Economy, modern dishwashers have moved away from high-wattage heating elements to meet strict energy standards, which means they rely more on surface tension and residual heat to get things dry. This shift makes it even easier for your machine to stay wet inside even after the heat cycle finishes. You might also find that the third rack is not always the best place for silver, especially if the spray arms are blocked by a stray spatula. Have you ever opened your dishwasher only to find a literal puddle sitting in the middle of a coffee mug? Drop a comment and tell me if your silverware basket is your biggest kitchen enemy!
Is Rinse Aid Actually Worth the Extra Money?
I know what you are thinking. You see that little blue bottle at the grocery store and think it is just another marketing gimmick to squeeze a few more dollars out of your wallet. I was a skeptic too. I figured if the water was hot enough, it would dry on its own. But here is the neighborly truth: rinse aid is not actually about rinsing; it is about ‘sheeting.’ It breaks the surface tension of the water so it slides off your forks instead of forming those stubborn droplets. While some folks look for alternatives, I’ve learned the truth about using vinegar as a rinse aid is that it can actually eat away at your rubber seals over time. Stick to the stuff designed for the machine. If you are struggling with getting plastic tupperware dry every time alongside your silverware, that little dispenser is your best friend. In the next section, we are going to dive into the mechanical side of things, specifically how a simple vent check can save your sanity.
Ditch the Silverware Sandwich
If your spoons are coming out with a layer of grime or a pool of water in the bowl, you are likely a victim of ‘nesting.’ This happens when similar pieces of cutlery stack together so tightly that neither the water nor the hot air can get between them. Think of it like a deck of cards; if they are pressed together, you can’t dry the middle ones. I once hosted a holiday dinner and tried to save time by grouping all the dessert spoons in one compartment. Big mistake. I spent thirty minutes hand-drying forty sticky spoons because I violated the cardinal rule of spacing. To fix this, you must alternate handles up and handles down. This creates a staggered height that allows the spray arms to hit every surface. If you are using a basket, give it a little shake before you slide the rack in to ensure everything has its own ‘personal space.’ Learning the correct way to load a dishwasher for maximum water flow is the single fastest way to see an immediate improvement in drying performance. 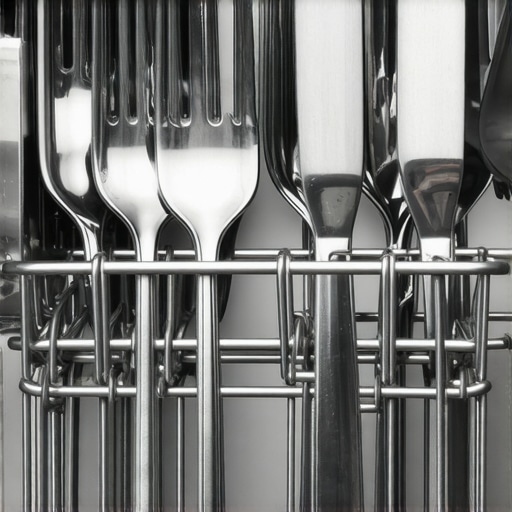
Keep the Steam Moving Out
A dishwasher is essentially a sauna, and just like a sauna, if you don’t have a way for the moisture to escape, it just turns back into rain. Most modern units have a dedicated vent—usually a small plastic assembly on the door or the side—that opens during the dry cycle. If this vent is clogged with food debris or a piece of plastic, the steam stays trapped, condenses on the ceiling, and drips right back onto your forks. I recommend checking the vent every few months as part of your routine. While you are at it, take a peek at your spray arms. I used to wonder why my top rack was always soggier than the bottom until I discovered a tiny piece of popcorn husk stuck in the nozzle. Cleaning a clogged spray arm with a toothpick is a five-minute job that restores the pressure needed to blast away the water droplets that usually cling to stainless steel.
Turn Up the Heat Before You Start
Many people don’t realize that the ‘hot’ part of the cycle starts at your kitchen sink. If your water heater is across the house, the first few gallons entering the dishwasher are cold. Cold water doesn’t evaporate; it just sits there. I make it a habit to run the hot water at my kitchen tap for thirty seconds before I hit the ‘Start’ button. This ensures the very first fill is scalding. This isn’t just about clean dishes; your warranty claim depends entirely on your water temperature in many cases because the internal heater can only do so much. If the water entering the tub is below 120°F, the machine has to work twice as hard to reach a drying temperature, and often, it simply times out before the silverware is dry. Understanding dishwasher parts a key to effective maintenance means knowing that your heating element is a helper, not a miracle worker. If you still see moisture, check for any tears in the door seal, as even a minor leak in air pressure can ruin the convection process.We often assume that because a professional handled the setup, our machine is invulnerable to warranty denials. However, I’ve seen countless homeowners get hit with a “denied” stamp because of how the unit was physically integrated into the kitchen. One of the most common oversights is the drain line. If you do not have a proper air gap or a high loop, dirty water from your sink can actually backwash into your “clean” silverware. This isn’t just gross; it causes lingering moisture and odors that no amount of rinse aid can fix. While people focus on the heating element, the critical importance of the high loop in your drain line cannot be overstated for keeping your cutlery sanitary and dry. Many installers who are in a rush will skip this step, and unfortunately, the manufacturer will not pay for a service call if the issue stems from poor plumbing geometry. 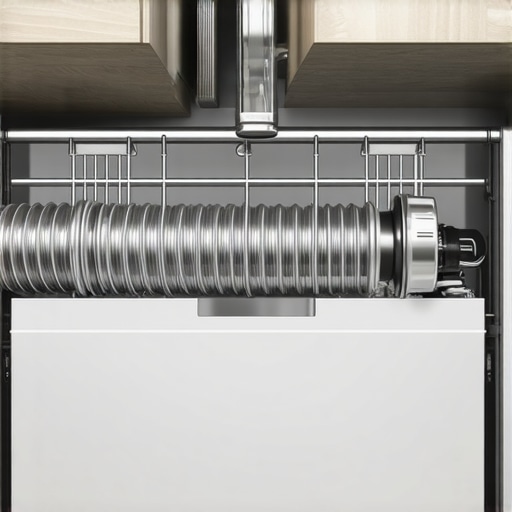
The Silent Motor Killer in Your Garbage Disposal
If you are installing a new dishwasher alongside a new garbage disposal, there is a literal “trap” waiting for you. Inside the disposal’s dishwasher inlet is a small plastic knockout plug. If you forget to remove it—or if your installer does—the dishwasher will try to drain, fail, and the pump will hum until the motor burns out. I once saw a homeowner go through three pumps in a single month before realizing the hidden drain plug that kills your motor during setup was still in place. It is a zero-dollar plastic piece that can cause a massive repair bill, and because it is an installation error, your warranty will not touch it. According to the Association of Home Appliance Manufacturers (AHAM), improper installation is one of the leading reasons for “out-of-box” failures that are not actually mechanical defects. If your machine is humming but not draining, check that plug first.
Will Aftermarket Parts Void My Whole Agreement?
This is a frequent question from DIYers looking to save money on repairs. The short answer is: not necessarily, but it makes things incredibly complicated. If you replace a plastic rack wheel with a generic part, your motor warranty is typically still valid. However, if you use a third-party water inlet valve and it leaks, causing floor damage, the manufacturer will likely deny any resulting claims. It is vital to know what happens to your coverage if you use third-party parts before you try to save a few dollars on a critical sensor or valve. I always recommend using OEM (Original Equipment Manufacturer) parts for anything that carries water or electricity. I have seen many budget-conscious owners use cheap plastic supply lines, but why professional installers refuse to use plastic water lines is simple: they are prone to bursting under the high-pressure surges of modern valves. Before you sign off on a repair or a new setup, take five minutes to learn how to diagnose dishwasher parts during warranty periods so you can speak the technician’s language. Have you ever fallen into this trap where a simple installation mistake cost you a fortune? Let me know in the comments. Knowing what your dishwasher warranty doesn’t cover and how to avoid fees is the best way to keep your kitchen running smoothly without breaking the bank.I used to think that owning a dishwasher was a ‘set it and forget it’ situation, but after my first flooded kitchen, I realized I needed a better toolkit. If you are serious about long-term results, you need a $20 digital multimeter. I use mine every time I suspect a heating element or a thermal fuse is on the fritz. Instead of guessing if a part is dead, I can know for sure by checking the electrical continuity. Learning how to test your water inlet valve for failure with a meter has saved me hundreds in ‘diagnostic fees’ from local repair shops. I also swear by a small telescopic mirror; it is the only way to see if your dishwasher is leaking from the very bottom without pulling the whole 150-pound beast out of the cabinetry. 
Stop Guessing and Start Measuring with These Tools
Beyond the multimeter, a dedicated basin wrench is my secret weapon for reaching the water supply line behind the kickplate. Most people try to use a standard crescent wrench and end up stripping the brass fittings, which is a fast track to a leak that your insurance might not cover. I have seen many DIY projects turn into disasters because the homeowner did not have the right grip. According to the National Kitchen & Bath Association (NKBA) G304.3 guidelines, accessibility to the water shut-off and drain connections is paramount for preventing catastrophic water damage during a component failure. If you cannot reach your shut-off in under five seconds, you are looking at a $5,000 floor repair instead of a $5 gasket swap.
The Boring Logbook That Saves Your Warranty
I know, keeping a paper trail is about as exciting as watching paint dry, but why your warranty claim fails without this specific maintenance log is a hard lesson many homeowners learn too late. I keep a small folder under the sink with every receipt and a quick note of when I ran a descaling cycle. I am a huge fan of the eco-friendly way to descale your machine with citric acid. It is significantly cheaper than those fancy commercial tabs and far more effective at removing the calcium scale that eventually kills your heating element.
How do I keep my dishwasher parts in peak condition for years?
The secret isn’t just cleaning the filter; it is about checking for wear before it becomes a total break. I keep a small stash of the replacement parts every dishwasher owner should keep on hand, like a spare door gasket and a set of rack wheels. These are high-friction items that will eventually fail. Looking ahead, I suspect we won’t even need to do this manually for much longer. We are already seeing high-end models where your smart dishwasher needs a firmware update to dry better, and soon, onboard AI will likely order its own replacement pump before the old one even starts to hum. For now, your best move is to be proactive. This weekend, I want you to pull out your bottom rack, clear the debris from the sump, and run a hot cycle with two tablespoons of citric acid. You will be shocked at how much quieter and drier your silverware comes out.
Hard Truths Learned From Five Years of DIY Repairs
After years of tinkering with various units, I have come to realize that modern appliances are far more sensitive than the ‘tanks’ our parents owned. High-efficiency standards mean tighter tolerances, and that requires a more hands-on approach. The biggest lightbulb moment for me was realizing that how to diagnose dishwasher parts during warranty periods is a skill every homeowner needs to save hundreds on service calls. I also learned that you shouldn’t be afraid to take charge of minor maintenance. There are many the parts you can swap yourself without voiding your protection, such as rack wheels or door gaskets, which keep the machine running like new. Finally, I’ve found that the $5 part that prevents your kitchen floor from rotting is worth its weight in gold; never skip replacing a worn-out seal or a cracked hose just because it seems like a small issue. [image placeholder]
The Gear That Separates Amateurs From Pros
To truly move beyond guesswork, you need a few specific items in your kitchen utility drawer. First, a high-quality citric acid powder is non-negotiable for anyone living in a hard water area to prevent scale buildup on the heating element. Second, I always recommend a simple digital multimeter; it is the only way to verify if a solenoid has actually failed. Third, I keep a dedicated ‘Appliance Journal’ where I log every filter cleaning and part replacement. This habit is the secret to maximizing your dishwashers warranty coverage today because it provides undeniable proof of care if a major component ever fails.
Take Back Your Mornings From Damp Cutlery
You don’t have to settle for a kitchen routine that ends with a damp dish towel and a sore back. By understanding the physics of airflow and keeping a close eye on your machine’s health, you can ensure your dishwasher parts perform exactly as they were engineered to. Whether you are learning how to fix a dishwasher that will not drain without calling a plumber or simply perfecting your loading pattern, every small step leads to a more efficient home. Your kitchen should work for you, not the other way around. Have you ever discovered a strange object at the bottom of your machine that was causing all your drying problems? Let me know in the comments below!
Related Posts
The Drain Pump Grumble: Fix It Before the Floor Floods
It was a typical Saturday morning when I finally heard…
Why a Clogged Air Gap Causes Water to Back Up into the Sink
I'll never forget the moment I opened my kitchen cabinet…
The One Part That Causes Your Dishwasher to Overfill Every Time
Ever stood by your dishwasher, hearing that dreaded gurgle and…