
It was 11:30 PM on a Tuesday, and I was staring at my dishwasher like it was a ticking time bomb. The cycle was over. The dishes were clean. But that low, rhythmic thrum of the drain pump just wouldn’t quit. It was sucking at air, desperate to remove water that wasn’t even there anymore. I did what any sleep-deprived homeowner does: I pressed every button twice, flipped the breaker, and prayed. Nothing. The ‘drain of doom’ continued.
The Night My Kitchen Sounded Like a Submarine
I’ve spent more time than I’d like to admit elbow-deep in greywater, and let me tell you, a dishwasher that won’t stop draining is one of the most frustrating ‘ghost in the machine’ glitches you can face. Early in my DIY journey, I made a massive mistake. I assumed the control board was fried. I spent $120 on a new part and three hours installing it, only to realize the issue was a tiny piece of plastic stuck under the float switch. It was a classic diagnostic error that cost me time and money I didn’t have to lose. The good news? You don’t have to be a master plumber to fix this. Most of the time, your machine is just confused or reacting to a safety sensor. We’re going to walk through the quickest ways to silence that pump and get your kitchen back to normal. Have you ever found yourself staring at your control panel, wondering if the machine has finally gained consciousness and decided to spite you? [image_placeholder_1]
Will a simple reset really save me from buying a new machine?
It’s easy to get cynical. We live in an era of ‘planned obsolescence,’ and the fear that a $20 sensor failure means you need a whole new $800 unit is very real. But here’s the thing: modern dishwashers have built-in flood protection. If the machine thinks it’s leaking, it will run the drain pump indefinitely to protect your floors. According to Consumer Reports, nearly 30% of dishwasher repairs are issues that homeowners could resolve themselves with basic troubleshooting. You might just need to reset your control board or check a few essential parts before calling it quits.
Checking for the Hidden Culprits
Before you go digging for your warranty paperwork, we need to look at the physical reasons your machine is stuck in a loop. Sometimes it’s as simple as a clog in your garbage disposal that’s tricking the sensors into thinking the tub is still full. It’s a messy job, but someone has to do it, and it’s much better than the alternative of letting that motor burn itself out.
Kill the Power Before You Do Anything Else
The very first thing you need to do is cut the electricity. Don’t just turn off the power button; either unplug the unit or flip the breaker. This forces the control board to drop its current command and gives the pump motor a chance to cool down. Think of it like rebooting a frozen laptop—sometimes the ‘brain’ just needs a hard restart to clear a logic loop. While the power is off, you can safely investigate the mechanical culprits without worrying about moving parts or electrical shorts.
Free the Stuck Float Switch
The float switch is your dishwasher’s flood gatekeeper. It’s usually a small plastic dome or cylinder in the bottom of the tub. As water rises, the float lifts; when it hits a certain height, it triggers a switch to stop the water flow. If it gets stuck in the ‘up’ position because of a stray toothpick or a build-up of old detergent, the machine thinks it’s overflowing and will run the drain pump forever to prevent a flood. I once spent an hour panicking over my Bosch unit until I found a single piece of broken glass wedged under the float. I popped it out, the float dropped, and the pump finally went silent. It was a classic $10 fix for a dishwasher that wont drain properly because a tiny obstruction was lying to the sensors. 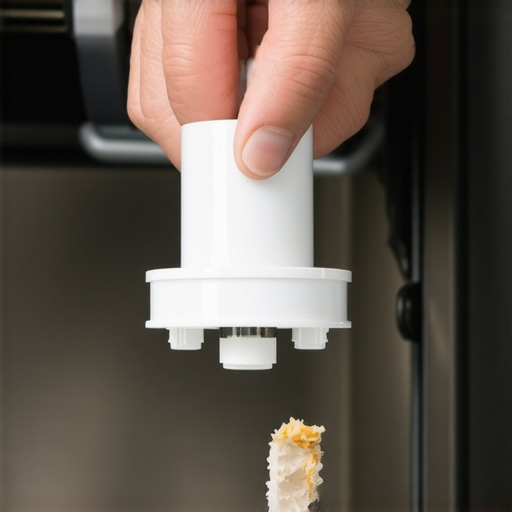
Dry Out the Anti-Flood Sensor in the Base Pan
Modern machines often have a hidden secondary floor called a base pan. Inside this pan sits a piece of Styrofoam connected to a microswitch. If a leak occurs, water pools in this pan, lifts the Styrofoam, and triggers an emergency drain cycle that cannot be overridden by the control panel. If your pump is running even with the door open, this is likely the cause. You’ll need to remove the kickplate (the panel at the very bottom) and check for water. If it’s wet down there, you don’t just have a pump problem; you have a leak. Use a sponge to soak up the water and a hairdryer on a cool setting to dry the sensor. This is one of those essential parts every dishwasher owner should know about because it can save your hardwood floors from total destruction.
Stop the Siphon Effect by Checking Your Hose
Sometimes the machine isn’t broken; it’s just a victim of physics. If your drain hose is installed incorrectly, dirty water from your sink can actually siphoning back into the dishwasher, or the machine can’t quite get enough leverage to push the water out, causing the sensor to keep the pump engaged. This often happens after a messy DIY dishwasher installation where the ‘high loop’ was ignored.
Verify Your High Loop Drain
Your drain hose should travel from the pump, loop up to the very top of the cabinet underside, and then down to the disposal or house drain. This ‘high loop’ prevents sink water from flowing backward. If you don’t have this, or if your drain line clog is actually in your garbage disposal, the dishwasher will struggle to empty itself completely. I’ve seen cases where a simple zip-tie to hold the hose higher solved a ‘broken’ pump issue in seconds. It is the main reason your installer insists on a high loop drain during the initial setup.
Reset the Digital Brain
If the physical parts are clear and dry, the control board might just be ‘confused’ by a power surge or a mid-cycle interruption. You can often clear this by holding the ‘Start’ or ‘Reset’ button for three to five seconds. If the display remains frozen, you may need to reset your dishwasher control board after a power cut by leaving it unplugged for a full ten minutes. This allows the capacitors to discharge completely, wiping any temporary error codes that are keeping the drain pump engaged.It is a common belief that the most expensive part is always the culprit when a machine malfunctions. But let’s get real: the nuance lies in the quality of the small stuff. Most homeowners rush to buy the cheapest component they can find on a third-party marketplace, thinking a plastic valve is just a plastic valve. This is where you fall into the ‘generic trap.’ While a $15 knock-off might stop the immediate noise, the difference between OEM and generic water inlet valves often comes down to the heat resistance of the internal seals. According to a study by the Association of Home Appliance Manufacturers (AHAM), non-certified parts fail at a rate significantly higher than manufacturer-approved components within the first year of use. This isn’t just about longevity; it is about protecting your home from the very flooding the drain pump is trying to prevent.
Why did my warranty claim get rejected even with the paperwork?
This is the ‘Oops’ factor that breaks my heart. You think you’re covered because you have that glossy brochure in your junk drawer, but your warranty claim fails without an authorized receipt from a certified installer. If you DIY the installation and accidentally cause a surge or a leak, the manufacturer will point to the ‘improper installation’ clause and walk away. It’s a bitter pill to swallow when you realize what your dishwasher warranty doesn’t cover could cost you more than the price of a brand-new unit. 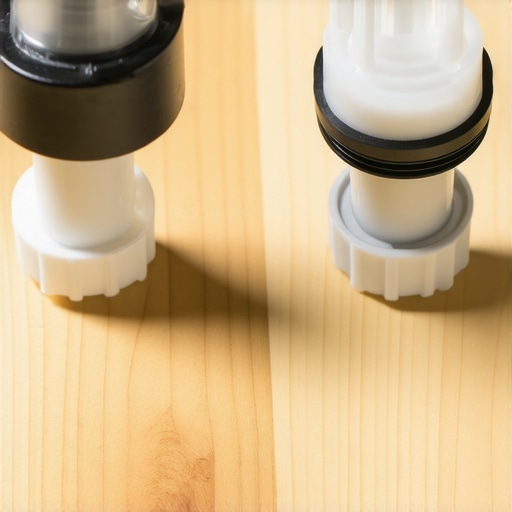
Stop assuming soft water is the ultimate savior
Here is a contrarian view: everyone tells you that hard water is the primary enemy of appliances. While that’s true for your heating element, soft water is ruining your dishwasher interior in a much more insidious way. In an environment with excessively soft water, the detergent has nothing to ‘attack’ but the glass and the metal tub itself. This causes permanent etching and can eventually lead to microscopic pinhole leaks in the stainless steel. It’s one of those essential parts of the chemical balance that most people ignore until they see white film that won’t wash off.
The installation mistake that professional pros hate to see
I’ve seen dozens of DIYers try to save $15 by reusing the old power cord or the old brass fittings from their previous machine. It seems logical, right? If it isn’t broken, don’t fix it. But there is a reason your professional installer refused your old cord. Metal fatigue and years of heat-cycling make those old connections a fire hazard or a point of failure. Using them is the fastest way to commit the mistake that voids your lifetime tub warranty. When you are elbow-deep in the motor housing, you have to decide: are you trying to save a few bucks today, or are you trying to keep this machine running for the next decade? Have you ever fallen into this trap of trying to outsmart the manual? Let me know in the comments below.The difference between a machine that lasts five years and one that hits the decade mark isn’t luck; it’s a specific set of tools and a weirdly obsessive cleaning schedule. I used to think a quick rinse was enough until I found out about the secondary screens.
Clean the Filter You Didn’t Know Existed
Most people know about the main basket in the tub, but there is a second, finer screen tucked away that catches the tiny silt-like particles. If you don’t use the best way to clean the hidden filter under the spray arm, that debris eventually works its way into the pump bearings. I’ve started pulling mine every three months. It’s disgusting, but it’s the only way to avoid replacing common dishwasher parts prematurely.
Keep a Multimeter in Your Kitchen Drawer
If you really want to stop guessing and start fixing, you need a basic digital multimeter. This is the single most important tool in my kit. Instead of blindly swapping parts when the heat fails, I use it to check continuity. Learning how to test your thermal fuse with a basic multimeter has saved me at least three service calls in the last five years. It’s about having data instead of a hunch. As noted in the InterNACHI Standards of Practice, the average service life of a residential dishwasher is approximately 9 to 12 years, but this assumes regular maintenance of internal strainers and seals. Without these checks, you’re essentially driving a car without ever changing the oil. 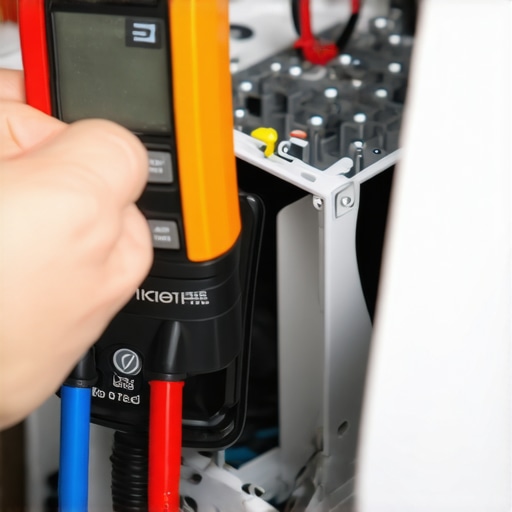
How do I maintain my dishwasher performance over time?
Consistency beats intensity every time. Beyond the filters, you have to look at the structural integrity. I’ve seen perfectly good motors burn out because the machine was slightly tilted, forcing the pump to work against gravity. This is why professional leveling prevents your door from leaking and keeps the internal components aligned. In the near future, I suspect we will see AI-driven sensors that notify your phone the second a bearing starts to vibrate out of spec, but for now, your ears and a spirit level are your best friends. Don’t forget to periodically check essential parts every dishwasher owner should know about, like the door gasket and spray arm nozzles, for any signs of hardening or mineral buildup.
The Future of Home Diagnostics
We are moving toward a world where your dishwasher will practically tell you which screw is loose. Many modern units already have data ports or Wi-Fi modules that allow you to update the firmware on your kitchen Wi-Fi module to improve efficiency. This isn’t just tech-bloat; it’s about refining the logic loops that prevent the very ‘drain of doom’ I mentioned earlier. If you’re feeling adventurous, I highly recommend trying a continuity test on your heating element or thermal fuse this weekend. It’s the best way to gain confidence in your machine’s internals and ensure you aren’t leaving money on the table by ignoring your warranty coverage benefits.
What My Most Expensive Repair Blunder Can Teach You
I once thought every rhythmic hum or flashing light was a sign that I needed a brand-new machine. I was wrong. The biggest lesson I learned is that diagnostic accuracy is worth more than the newest parts on the shelf. Before you pull the trigger on an expensive purchase, remember that how to diagnose dishwasher parts during warranty periods often comes down to checking the simplest mechanical blockages first. Also, keep your paper trail organized; I learned the hard way that why your warranty claim fails without an authorized receipt is a heartbreaking reality for DIYers who lose their proof of purchase during a crisis.
Gear That Belongs in Every Smart Kitchen
To truly stay ahead of the “drain of doom,” you need a small but mighty maintenance kit. I personally swear by three specific tools. First, a digital multimeter is your only way to find the most reliable way to test a thermal fuse without just guessing and wasting money. Second, a flexible inspection mirror helps you see behind the pump housing without pulling the whole unit out of the cabinet. Finally, keep a list of essential parts every dishwasher owner should know about bookmarked on your phone. Having that data on hand prevents panic swaps and saves you hundreds in unnecessary service calls.
[image_placeholder_5]
Reclaim Your Peace of Mind and Your Kitchen
The “drain of doom” doesn’t have to be the end of your night or your budget. By taking the time to understand how your sensors communicate and maximizing your dishwashers warranty coverage today, you transition from a frustrated homeowner to a confident master of your domain. Your dishwasher is a complex tool, but it is one you can absolutely control with a little patience and the right information. Have you ever managed to fix a major appliance issue with just a simple reset or a quick cleaning? I’d love to hear your success stories in the comments below!
Related Posts
Why Your Machine Smells Like Burning Plastic During the Dry Cycle
Ever opened your dishwasher at the end of a cycle…
The $10 Drain Solenoid That Often Mimics a Dead Pump
Ever opened my dishwasher and found that frustratingly silent machine…
Why Your Dishwasher Still Runs When the Door is Open
I stood there in my favorite wool socks, watching a…