
I’ll never forget the sound—a sickening thud followed by the splash of half-filled coffee mugs—when my brand-new dishwasher decided to lunge at me. I’d just finished a beautiful kitchen remodel with deep, charcoal granite slabs, and I thought I was a hero. Then I opened the heavy bottom rack, and the whole machine tipped forward like a sinking ship. It turns out, my installer skipped the most important part because he didn’t want to drill into the stone. I spent the next three hours panicking, convinced I’d have to live with a wobbly appliance forever.
Stop Your Machine From Tipping Into the Kitchen
If you’ve ever felt that heart-stopping moment where your unit leans out toward you, you know exactly why I’m writing this. Most people assume you just screw the unit into the underside of the counter, but with granite or quartz, that’s a one-way ticket to a cracked slab or a ruined drill bit. I made the mistake of trying to bridge the gap with some scrap wood and wood glue early on, and let’s just say it lasted exactly three cycles before the steam turned the glue into a sticky mess. Today, I’m going to show you the mounting bracket trick that changed everything for me. We are going to stop your dishwasher from moving when you open the door once and for all, without risking your expensive stone. According to data from the National Association of the Remodeling Industry (NARI), improper appliance anchoring is one of the top five common errors in DIY kitchen renovations.
Is a simple metal bracket really enough to hold a 100-pound machine?
You might be skeptical. I was too. I thought I needed some heavy-duty industrial adhesive or a complicated frame. But the beauty of the side-mount trick or a specialized granite grabber is that it uses physics, not just raw strength. Before you dive into a diy dishwasher installation step-by-step guide, you need to understand that granite requires a specific approach to avoid voiding your warranty coverage. Have you ever had your dishwasher nearly fall on your toes because of a loose bracket? I want to hear your horror stories. The fix is actually quite elegant, and it starts with realizing that the standard way isn’t the only way. If you’re ready to get that seamless dishwasher installation look without the shaky reality, let’s get into the specifics. You’ll want to make sure you’ve followed a solid kitchen preparation guide before we start the heavy lifting.
Switch to Side-Mounting to Save Your Stone
Most modern dishwashers are designed with a “Plan B” specifically for granite and quartz. Instead of looking up at your expensive slab, look at the sides of the dishwasher tub. You will usually find two small plastic plugs or caps. When you pop these off, they reveal holes that align perfectly with your cabinet side walls. This is the gold standard for selecting the right parts for dishwasher installation because it anchors the unit to the wood cabinetry rather than the stone. I remember the first time I tried this; I was terrified I’d drill right through the side of my beautiful oak cabinets. But the trick is to use short, specialized screws that bite into the wood without piercing the other side. 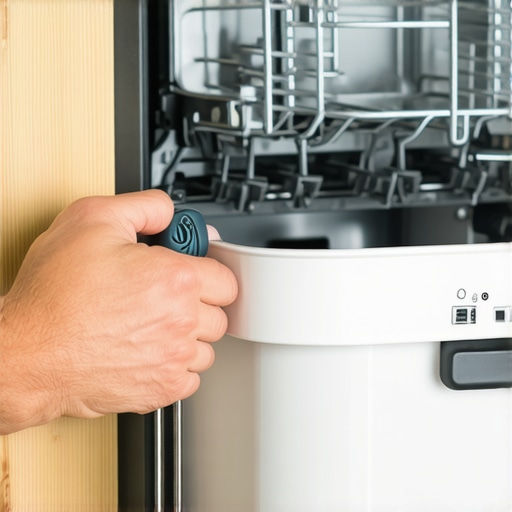
Look for the Hidden Tub Plugs
These plugs aren’t just for show. They protect the inner workings of the machine from moisture. When you use the side-mount method, you’re interacting with common dishwasher parts and their role in proper installation that many DIYers overlook. You simply slide the unit into the cavity, pull those plugs, and drive your screws into the neighboring cabinets. It is a much more stable connection than a single screw in the top.
The Granite Grabber Solution
If your machine is an older model or your cabinets are too far apart, you need a “Granite Grabber.” This is a thin metal strip that adheres to the underside of the stone with a high-strength adhesive, providing a metal lip you can actually screw into. It’s one of those essential parts every dishwasher owner should know about when dealing with heavy surfaces. I once tried to skip the Grabber and used double-sided mounting tape. It held for a week, but the first time I ran a high-heat cycle, the steam softened the tape and the machine nearly landed on my cat. Use the real hardware; your floor and your pets will thank you.
Level the Feet Before You Anchor the Top
Before you drive a single screw, the machine must be perfectly flat. If the unit is tilted forward, no amount of side-mounting will keep it steady. In fact, professional leveling prevents your door from leaking by ensuring the gasket seals evenly against the frame. I learned this the hard way during a late-night install. I was so focused on the anchoring that I left the back left leg half an inch too low. The result? A slow drip that warped my subfloor over a month because the seal couldn’t compress correctly.
Watch Out for the Rack Blockage Nightmare
This is my biggest warning: watch your screw depth. I once used screws that were just a quarter-inch too long. They felt secure, but I didn’t realize the screw head was protruding into the tub’s path inside the cabinet wall. Every time I tried to push the top rack in, it hit the screw with a sickening clunk. I spent an hour thinking I had a defective rack before I realized it was my own handiwork. This is the classic mounting screw mistake that blocks your top rack from closing, and it’s a nightmare to fix once the unit is fully packed in. If you run into issues, checking common dishwasher parts and how to replace them effectively can help you identify if you’ve accidentally damaged a rail or a gasket during the struggle.Wait, before you tighten that last screw, let’s talk about the ‘New Machine, Old Parts’ trap. I see so many DIYers—and even some lazy pros—try to save ten minutes by reusing the old copper water line or the existing power cord. It feels efficient, right? Wrong. In my experience, the biggest mistake is assuming that because a part worked yesterday, it will work today. This is exactly why your professional installer insists on a new water valve. Those old rubber gaskets have ‘taken a set’ to the old machine; once you disturb them, you are practically begging for a slow drip that ruins your subfloor or your expensive cabinetry.
Can I just reuse my old power cord to save twenty bucks?
It’s a tempting thought, especially after you’ve just dropped a grand on a whisper-quiet Bosch or Miele. But here’s the contrarian truth: that old cord is a fire hazard in sheep’s clothing. Over years of heat cycles, the internal insulation can become brittle. Moving the unit during an upgrade can cause micro-cracks you’ll never see until they arc. This is why your professional installer refused your old cord—not to upcharge you, but to keep your house safe. According to data from the National Fire Protection Association (NFPA), electrical failures remain a leading cause of home appliance fires, and a frayed or aged cord is a prime suspect. 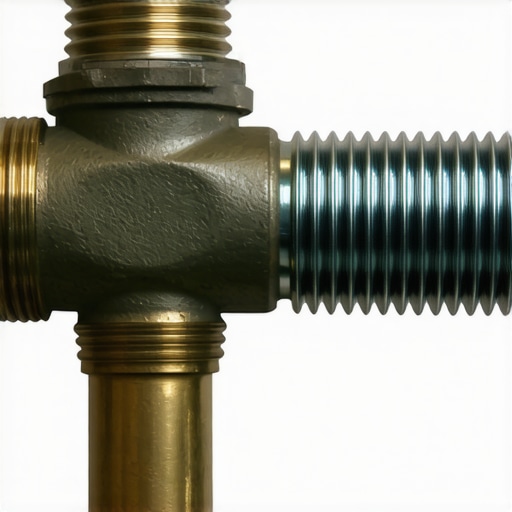 Beyond the safety risks, there’s the paperwork nightmare. Most people think a warranty is a ‘get out of jail free’ card for any mechanical failure. However, I’ve seen countless homeowners get their claims denied because they couldn’t produce a professional installation receipt or because they used non-OEM parts. It is vital to focus on maximizing your dishwashers warranty through proper parts selection. If you use a generic $5 hose from a bargain bin, you might save money today, but your warranty claim fails without an authorized receipt and the specific hardware required by the manufacturer. The ‘oops’ factor usually hits about two weeks later. You’ll notice a musty smell or a slightly damp spot on the ceiling below the kitchen. That’s usually the result of a slow leak from a reused brass fitting. This is why your installer refuses to reuse your old brass fittings; these parts are ‘one-and-done’ by design because the metal deforms to create the seal. If you’re tackling this yourself, don’t ignore the leak prevention step most professional installers charge extra for: the high-pressure line test. Have you ever tried to save a few dollars by reusing a part, only to have it backfire? I’ve been there, and the cleanup is always more expensive than the part. Let me know your close calls in the comments. If you’re still feeling stuck, checking out expert advice on dishwasher installation troubleshooting can save you from a very expensive headache.
Once you’ve successfully anchored your unit to those cabinets, you might think the job is done. But I’ve learned that the difference between a machine that lasts five years and one that hits the fifteen-year mark often comes down to the gear you used during the final ten minutes. I always keep a 1/4-inch nut driver and a high-quality torpedo level in my primary kit. Why? Because using a standard screwdriver on those leveling legs usually leads to stripped plastic or bruised knuckles. When you use the proper tool to use when tightening your water supply line, you ensure a snug fit without over-torquing the delicate brass or plastic inlet valve. I’ve seen too many DIYers use a massive pipe wrench and crack the housing before they even run their first load. It’s about finesse, not just brute force.
How do I maintain my dishwasher installation over time?
Maintenance isn’t just about cleaning out the filter once a year. I personally check my mounting screws and the door alignment every six months. Vibration is the silent killer of even the best seamless dishwasher installation in 2025. If those screws start to back out, your unit will shift, and suddenly you’re dealing with leaks because the door isn’t level. You should also make a habit of performing the one maintenance task that doubles the life of your gasket: wiping the rubber seal with a damp microfiber cloth to remove the abrasive grit that builds up from detergent. According to the ASPE (American Society of Plumbing Engineers) technical handbook, mineral buildup on seals is a leading cause of premature failure in high-efficiency appliances. If you notice the machine feels ‘soft’ when you pull the door, it’s time to check if your top rack feels loose or if the mounting brackets have shifted.
#IMAGE_PLACE_HOLDER_D#
Looking ahead, I predict we are moving toward a world where ‘smart’ isn’t just a buzzword for an app. We are already seeing smart sensors that detect leaks before your kitchen floods, but soon, machines will likely use AI to calibrate their own leveling legs based on floor settling. Until that happens, you are the primary technician. Spend some time understanding dishwasher parts as a key to effective maintenance. Don’t wait for a puddle to appear; proactively check your drain line for the dreaded ‘kink’ every time you pull the unit out for a deep clean. My advanced tip for today: go under your sink right now and verify you have a high loop drain. If that hose is sagging, your dishwasher is basically sucking back dirty sink water every night. Fix that one thing, and you’ll immediately see (and smell) the difference.
The Hard-Won Secrets of a Shaky Dishwasher Survivor
After years of tinkering, I’ve realized that factory settings are rarely the final word. First, never assume your floor is level just because it looks flat; even a tiny slope can cause the tub to warp over time. Second, I always perform a “dry run” with the racks completely empty and then fully loaded to check for clearance issues against the cabinet frame before driving the final side screws. Third, keep your installation receipt in a plastic baggie taped to the back of the kickplate. You will thank me later when you need to know what your dishwasher warranty doesn’t cover and have to prove the install date to a technician. Finally, always double-check the essential parts for troubleshooting dishwasher installation issues like the drain hose loop height before you push the unit back for the last time. A sagging hose is the number one cause of ‘mystery smells’ in a new kitchen.
The Minimalist Toolbag for a Perfect Fit
If you want to move beyond the basic kit, there are a few specific items I swear by for a professional result. I never start a job without a magnetic torpedo level—it’s small enough to fit inside the tub and ensures the door swings perfectly every time. I also highly recommend using a Granite Grabber adhesive system if you have stone counters; it’s the only way to avoid the heartbreak of a cracked slab or a loose machine. For those worried about long-term safety, I suggest adding a 15-dollar sensor that stops your smart dishwasher from overfilling. It is a tiny investment that provides massive peace of mind against water damage. Lastly, always keep the manufacturer’s specific list of parts to check when installing a dishwasher for long-term performance handy; those technical diagrams are often more accurate than generic online tutorials.
#IMAGE_PLACEHOLDER_E#
Step Into a More Efficient Kitchen Today
You don’t need to be a master plumber to achieve a seamless dishwasher installation in 2025. It simply takes patience and the willingness to treat your appliance like the precision machine it is. By choosing the right side-anchoring method and refusing to reuse old, brittle brass fittings, you’re not just installing a dishwasher—you’re protecting your home’s subfloor and your own sanity. You’ve got the tools and the knowledge, so go ahead and tighten that last bracket with total confidence. Have you ever finished an installation only to find a mysterious ‘extra’ screw on the floor? Let me know your funniest DIY mishaps in the comments below!
Related Posts
Why Your Drain Hose Needs a High Loop to Stop the Smell
I walked into my kitchen last Tuesday and thought a…
The Proper Way to Secure Your Machine to Stone Countertops
I'll never forget the morning I watched my new dishwasher…
Why This $12 Hammer Arrestor Is the Only Way to Stop Banging Pipes
It was midnight when I first realized my kitchen had…