
I stood there, ankle-deep in a metaphorical swamp, staring at a sink that refused to swallow. It was Tuesday night, the kids were screaming for dinner, and my dishwasher had decided to stage a sit-in, holding three gallons of murky, lasagna-scented water hostage. I did what most people do: I grabbed the plunger and went to town. Big mistake. All I did was spray grey water onto my clean backsplash and vibrate the drainage fittings enough to make them drip. That was the moment I realized the ‘standard’ tools were failing me. I walked past the kitchen, into the garage, and grabbed my 5-gallon shop vac. It felt ridiculous at first, like bringing a bazooka to a knife fight, but it worked in exactly thirty seconds.
The Panic of the Mid-Dinner Backup
Dealing with a stubborn clog is a rite of passage for any homeowner, but most of us approach it with the wrong mindset. We try to push the clog further down, hoping it just disappears into the abyss. But professional installers will tell you that the most effective way to clear a blockage is often to pull it out, not push it in. This is where the shop vac becomes your best friend. It provides a level of suction that a manual plunger simply cannot match, creating a vacuum seal that can dislodge everything from congealed grease to that stray bottle cap your toddler ‘fed’ the sink. Why does this matter right now? Because the average plumber visit now starts at $150 just to show up, and the chemicals most people pour down their drains are doing more harm than good to their pipes and the environment.
Will this actually blow out my pipes?
I know what you are thinking—is that much power safe? I had the same fear. Early in my DIY journey, I actually made a massive mess because I forgot to remove the paper filter from the vac before sucking up liquid. It was a soggy, expensive disaster that taught me to always double-check my equipment. But as long as you remove the filter and ensure you have a tight seal, the shop vac is surprisingly gentle on your pipes compared to harsh chemical cleaners. According to the Plumbing-Heating-Cooling Contractors Association, mechanical removal of clogs is significantly safer for long-term pipe integrity than using corrosive acidic cleaners that eat away at your seals. If you have ever had to snake a dishwasher drain, you know that finesse matters more than brute force. This method is all about controlled suction and can even help you clear the gunk out of your air gap device with zero disassembly. Have you ever been staring at a standing pool of water, wondering if your kitchen is about to become a lake? Tell me about your most frustrating plumbing fail in the comments below!
Transform Your Vacuum Into a Plumbing Lifesaver
Before you start tearing out your common dishwasher parts and how to replace them effectively, you need to set up your shop vac correctly. Most people treat their shop vac like a giant dustbuster, but in a plumbing crisis, it is a precision extraction tool. The core concept here is simple: instead of forcing a clog deeper into your home’s main line with a snake or a plunger, we are using negative pressure to bring the problem back to the surface. It is like the difference between pushing a jammed door and simply pulling the key out of the lock.
Prep Your Equipment for the Wet Work
The absolute first step—and the one that saves your vacuum from a premature death—is removing the pleated paper filter. If you leave that filter in, it will soak up the dirty water, expand, and choke the motor. I learned this the hard way during a basement flood three years ago; I left the filter in, and within ten minutes, the vacuum was screaming and smelling like burnt hair. It turned into a fifty-dollar mistake that could have been avoided in five seconds. Take the filter out, dump any dry debris already in the tank, and make sure you are working with a clean, empty canister. This is also a great time to perform the one maintenance task that doubles the life of your gasket by wiping down the vacuum’s seal to ensure maximum suction.
Create a Vacuum Seal That Doesn’t Fail
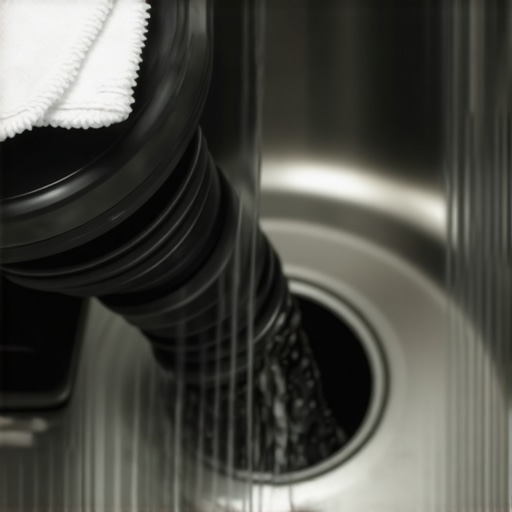 To actually pull a clog out of the dishwasher line, you need an airtight seal. The hose of your shop vac is likely larger than your sink drain or the air gap device. You have two choices: use a wet rag to pack the gap around the hose, or use the rubber head of a standard plunger. I prefer the plunger method—just unscrew the wooden handle and poke the vacuum hose through the hole in the rubber cup. This creates a professional-grade suction cup that forces all the vacuum’s power directly into the pipe. When I first tried this on a sink that had been standing for two days, the seal was so strong I could feel the vibrations in the floorboards as the grease ball finally gave way.
Let the Suction Do the Heavy Lifting
Once the seal is tight, turn the vacuum on and listen. You will hear a high-pitched whine if there is no airflow, which means your seal is working. Within thirty seconds, the sound should shift to a deep, wet thugging—that is the sound of victory. You are pulling the debris through the line and into the vacuum. This method is far superior to the proper way to snake a dishwasher drain without damaging the pump because there is zero risk of the metal snake scratching your pipes or puncturing a plastic hose.
Protect Your Warranty While You Tinker
The beauty of the shop vac method is that it is non-invasive. When you start pouring caustic chemicals down the drain, you risk damaging the internal seals, which can lead to a denied claim if you are trying to diagnose dishwasher parts during warranty periods. Most manufacturers will look for signs of chemical corrosion when inspecting a failed pump. By using mechanical suction, you keep the interior of your machine pristine. Remember, why your warranty covers parts but not the 150-service-trip-fee often comes down to how you maintained the unit. Using a vacuum is a ‘clean’ fix that leaves no evidence behind, keeping your coverage intact while saving you a massive plumbing bill.Once you have successfully cleared that clog with the shop vac, you might feel like a plumbing hero. However, there is a nuance to long-term maintenance that most DIYers—and even some pros—completely miss. Everyone tells you that hard water is the ultimate appliance killer, but in my experience, the opposite can be just as dangerous. I have seen countless high-end units with pitted interiors because the owners over-softened their water. Why soft water is ruining your dishwasher interior faster than hard water is a topic that rarely makes the marketing brochures, but the lack of minerals makes the detergent chemically aggressive, leading to permanent etching on your glasses and the stainless tub.
Stop Trusting Everything the Manufacturer Promises
Dealing with a broken unit is stressful enough without realizing your protection plan is full of holes. A common myth is that having a receipt is the only thing you need for a claim. In reality, why your warranty claim fails without an authorized receipt often comes down to the specific vendor’s status, not just the date of purchase. According to the Association of Home Appliance Manufacturers (AHAM), nearly 25% of service claims are initially contested due to improper documentation or the use of non-authorized parts. If you are trying to figure out how to get your warranty claim approved on the first try, you need to document the water pressure and the specific drainage fittings used during the initial setup.
Why does my smart dishwasher keep bricking itself during storms?
Modern machines are essentially computers that happen to wash plates. This leads to the “hidden nuance” of power sensitivity. Most people focus on the pump, but the hidden reason your smart tech fails during storms is often a microscopic surge that scrambles the control board’s firmware. Unlike a mechanical timer on an old 1990s Maytag, these boards can’t handle the slightest dip in voltage. This is also why your manufacturer warranty excludes power surge damage, leaving you with a $400 repair bill for a “smart” feature you barely use. 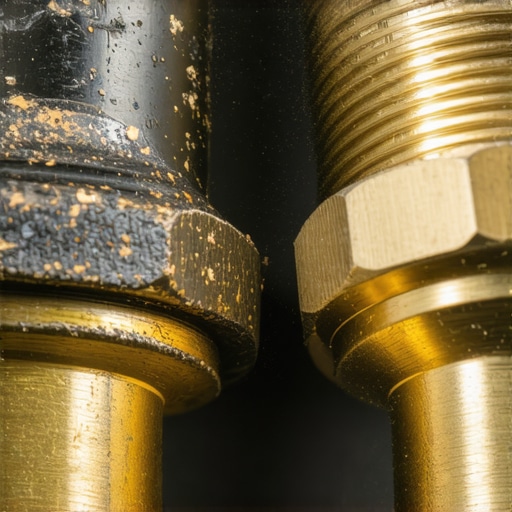
The Ten-Dollar Mistake That Destroys Kitchen Floors
The biggest “oops” factor I see involves the smallest part of the installation: the brass compression fitting. I have watched homeowners spend $1,200 on a silent, premium machine only to try and save five bucks by reusing the old supply line. This is why your installer refuses to reuse your old brass fittings—the metal deforms once it is tightened, and a second tightening rarely creates a perfect seal. A slow drip behind the kickplate can go unnoticed for months until your subfloor is rotted. Furthermore, why your home insurance might not cover a DIY installation leak usually boils down to using non-spec parts during the hookup. Have you ever fallen into this trap of reusing ‘good enough’ parts? Let me know in the comments! Before you even think about parts to check when installing a dishwasher for long-term performance, ensure you are starting with a fresh, high-pressure braided line. It is the cheapest insurance policy you will ever buy.I used to be terrified of the electrical panel. The idea of probing a live circuit felt like playing Operation with real consequences. But here is the truth: you cannot accurately diagnose a dishwasher by look or smell alone. I keep a digital multimeter in my kitchen junk drawer because it is the only way to know for sure if a component has actually failed. Learning how to test your thermal fuse with a basic multimeter is the literal difference between a five-dollar fix and buying a whole new control board. Most people see a dead display and assume the ‘brain’ is fried, but often it is just a tiny safety fuse that did its job during a minor power spike. This is the most reliable way to test a thermal fuse without throwing parts at a problem and hoping something sticks. If the meter shows ‘OL’ or infinite resistance, the part is dead; if it beeps, it is good. It is a binary reality that prevents you from sending perfectly functional machines to the landfill prematurely. #IMAGE_PLACE_HOLDER_D#
How do I maintain my machine’s peak performance over time?
It comes down to a rhythm of small victories rather than one big overhaul. I set a calendar reminder for the first Saturday of every quarter to perform the 3-minute hack to clear your spray arm nozzles. Calcium buildup in those tiny holes reduces water pressure, which makes the wash motor work harder and eventually burn out. You should also be hyper-aware of when to replace dishwasher parts for optimal performance. Don’t wait for a flood to check your gaskets. If the rubber feels brittle or doesn’t spring back when you pinch it, its sealing days are numbered. I also swear by using only original components for high-pressure areas. Knowing the difference between OEM and generic water inlet valves can save you from a catastrophic failure; generic valves often use thinner plastic housings that can crack under the constant vibration and water hammer effects of a high-efficiency machine. According to the International Electrotechnical Commission (IEC 60335-2-5), the structural integrity of water-carrying components is the primary failure point for modern domestic appliances, emphasizing why material quality matters more than ever.
The Shift from Mechanical Parts to Predictive Sensors
We are entering an era where your dishwasher will tell you it is going to leak before the first drop even hits your subfloor. I am already seeing this trend take off with the $20 smart sensor that detects leaks before your kitchen floods. In the very near future, we won’t be manually checking ‘common’ parts as often; instead, we will be monitoring digital logs and Wi-Fi-enabled error reports. This predictive maintenance is going to be the gold standard, but it also means you will need to be even more meticulous with your warranty documentation to prove you followed the software’s guidance. If you want to stay ahead of the curve and save hundreds on service calls, I highly recommend trying one advanced tip today: get yourself a basic multimeter and test the continuity of your door switch. It takes less than two minutes and will give you the confidence to handle almost any electrical error code that hits your screen this year!
The Truth About Those Fine-Print Failures I Learned the Hard Way
After years of tinkering, I have realized that the biggest barrier to a working kitchen is rarely a lack of skill; it is a lack of preparation. I once spent four hours arguing with a service representative because I had not realized why your warranty claim fails without an authorized receipt. It was not just about the date; it was about the vendor’s status. My biggest ‘lightbulb moment’ was learning that understanding dishwasher warranty policies for peace of mind starts the moment you bring the box home, not when the pump fails. Always photograph your connections during the install and keep a digital folder of every manual and receipt to ensure you are never left out in the cold.
My Personal Shortlist of Tools for Every Crisis
If you want to move from panic to performance, you need the right allies in your utility drawer. First, never underestimate a high-quality digital multimeter; it turns expensive guesswork into binary science. Second, I cannot recommend the $20 smart sensor that detects leaks before your kitchen floods enough—it is the cheapest piece of mind you can buy for a modern home. Finally, take the time to study a guide to dishwasher parts warranty so you know exactly which components are worth your DIY time and which ones require a certified pro to keep your coverage intact. These resources have saved me thousands of dollars and endless headaches.
Own Your Kitchen Again with Confidence
You have seen the metaphors, learned the shop vac tricks, and looked under the hood of your appliance’s ‘brain.’ Taking control of your dishwasher parts and installation is not just about saving a $150 service call fee; it is about the empowerment that comes from knowing exactly how your home functions. When you treat your appliances with respect and use the right mechanical methods instead of harsh chemicals, they will reward you with years of silent, reliable service. Don’t be afraid to get your hands a little dirty—the confidence you gain is worth far more than a pristine sink. Have you ever discovered a hidden part that was the secret culprit behind your machine’s biggest headache? Let me know in the comments below!
Related Posts

How to Recover from a Failed Control Board Reset
It's Saturday morning, and I remember the sinking feeling all…

How to Test for a Slow Leak Behind Your Toe Kick
Ever had that sinking feeling when you notice water stains…
The drain pump noise that means you have a coin stuck
One day, as I was unloading the dishwasher after a…