
I stood there in my pajamas, holding a soggy Tupperware lid, feeling completely defeated. I had just spent weeks perfecting my DIY dishwasher installation step-by-step guide, yet here I was, hand-drying a load that was supposed to be ready for the cupboard. It felt like a betrayal. Why did the most efficient setting on my expensive machine leave me with more work? I honestly thought I had a faulty unit. I even started looking up how to diagnose dishwasher parts during warranty periods because I was convinced the heating element had kicked the bucket. I almost paid a professional a massive fee just to tell me my machine was actually fine. Don’t make my mistake. Today, I’m going to show you why your machine isn’t broken—it’s just being “too” efficient—and how you can get a bone-dry finish without doubling your electric bill.
Your Dishwasher Isn’t Broken, It’s Just Being Greedy With Energy
The “Eco” cycle is a bit of a trickster. To meet strict modern standards, many manufacturers have moved away from the high-heat drying fans we grew up with. Instead, they rely on “condensation drying.” According to the American Council for an Energy-Efficient Economy (ACEEE), modern appliances are designed to squeeze every ounce of work out of a single watt, which often means the machine stops adding heat much earlier than you would expect. In Eco-mode, the water temperature is lower, and the final rinse doesn’t provide enough residual warmth to evaporate the moisture off your plastics. I learned the hard way that the eco-mode might be leaving grit on your plates if the temperature doesn’t stay high enough to break down detergents properly. I once spent $60 replacing a thermal fuse I didn’t need because I didn’t realize the cycle was simply designed to be cool. Have you ever felt like you’re working harder than your “smart” appliance just to get through the chores?
Is Eco-Mode Actually Worth the Extra Work?
It is the question I asked myself while shaking water off my dinner plates. If you have to spend ten minutes with a tea towel, are you really saving anything? The truth is, while Eco-mode is fantastic for your utility bill, it is often terrible for convenience. If you don’t understand how these dishwasher parts and their role in proper installation interact with the cycle software, you will stay frustrated. You might even be tempted to call for service, but remember that your warranty covers parts but not the $150 service trip fee just to have someone explain your settings to you. We are going to solve this by looking at a few simple habits that make these high-efficiency cycles actually work for your lifestyle.The first thing you have to accept is that your dishwasher is no longer a giant hair dryer for your plates; it is a steam chamber. If you don’t give that steam a place to go or a way to slide off the surfaces, it just settles back onto your mugs as cold puddles. I remember my first week with a high-efficiency European model. I was so convinced the lack of a visible heating coil at the bottom was a manufacturing defect that I almost tore the kickplate off to find the ‘missing’ part. I felt like a fool when I realized the machine was working perfectly, but I was failing the basic physics of the drying cycle.
Rinse Aid Is a Chemical Raincoat for Your Plates
Think of rinse aid not as a cleaning detergent, but as a surface-tension breaker. In modern machines that use condensation drying, the stainless steel walls cool down faster than the ceramic dishes, pulling the moisture toward the walls. But water loves to ‘clutch’ onto ceramic and plastic. Rinse aid makes the water ‘sheet’ off like a raincoat. When you ignore that little blinking light, you are basically asking for spots. In fact, why your dishes are coming out cloudy after every wash is often directly tied to the lack of a surfactant to help the water move. I spent three nights scrubbing white film off wine glasses before I realized my dispenser was just empty.
Run the Hot Water Before You Press Start
Most people do not realize that the dishwasher is often the last stop on a long plumbing line. If your kitchen sink is far from the water heater, the first few minutes of your ‘hot’ wash cycle are actually filled with tepid, room-temperature water sitting in the pipes. Before you go looking for essential parts every dishwasher owner should know about, try running the kitchen faucet until the water is steaming hot. This ensures the very first gallon entering the machine is at the optimal temperature to activate the detergent and keep the tub warm for the eventual drying phase. Debunking the cold water pre-rinse myth that wastes energy actually applies to the start of the cycle too—starting hot is the only way to ensure the condensation method works.
Check Your Drain Hose Loop for Better Performance
This is the most common installation error I see. If your drain hose is not elevated into a ‘high loop’ before it connects to the sink drain or disposal, dirty water from your sink can actually siphon back into the dishwasher. This leaves a pool of stinky, humid water at the bottom of the tub that prevents anything from truly drying. If the hose is flat against the floor, it is a common reason why your unit refuses to drain even after cleaning the filter. 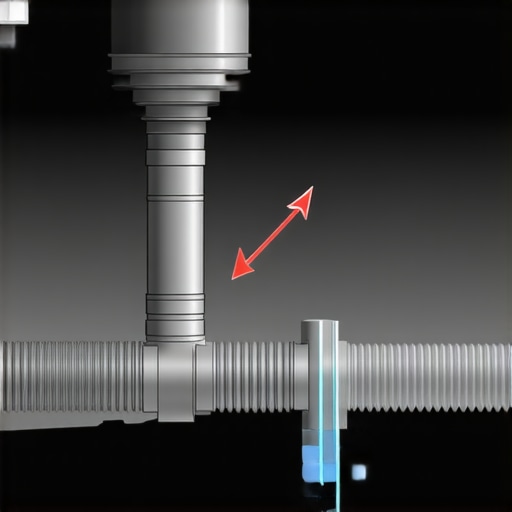 Keep in mind why your warranty policy doesnt cover improper drainage loops—this is considered an installation fault, not a part failure. Ensuring that hose is secured high under the counter is a five-minute fix that can transform your drying results overnight.
Master the Art of the Tilt
If you have ever pulled out the top rack and had a ‘cup-full’ of water splash all over your dry bottom rack, you know the frustration. The trick is to load anything with a concave bottom—like mugs or Tupperware—at a steep angle. This prevents water from pooling in the ‘wells’ of the containers. If you have a newer unit, the secret to loading your third rack for maximum drying is to ensure that silverware isn’t nesting together. When spoons nest, they trap moisture that never evaporates, keeping the humidity in the tub high for the entire load.Most homeowners assume that a manufacturer’s warranty is a foolproof safety net for the first twelve months, regardless of how the machine was set up. In my experience, that is a dangerous misconception. If you followed a DIY dishwasher installation step-by-step guide but overlooked a single manufacturer specification, like the exact gauge of the power wire, the company can legally deny your claim. I have seen consumers lose out on a $400 control board replacement simply because they didn’t use the branded power cord. You must understand what your dishwasher warranty doesn’t cover and how to avoid fees before the first technician even knocks on your door. The Association of Home Appliance Manufacturers (AHAM) highlights that a significant percentage of service requests for ‘faulty’ units are actually rejected because they stem from installation errors rather than part defects.
Stop Reusing Your Old Water Supply Valve
The single biggest ‘oops’ factor I encounter is the temptation to reuse the old brass elbow or water supply line. That old valve was crushed once to create a watertight seal; forcing it to perform that miracle a second time is asking for a slow, hidden leak that will rot your subflooring before you notice it. This is why your professional installer insists on a new water valve for every fresh unit. Reusing a $10 part is a gamble that risks maximizing your dishwashers warranty coverage today, as any water damage caused by old parts is considered negligent installation rather than a product failure. 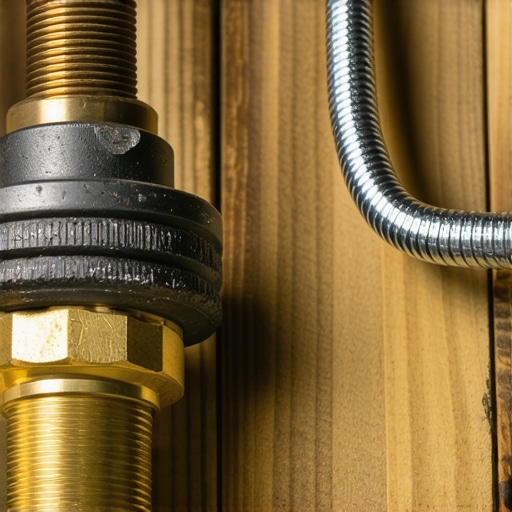
Why Does the Machine Still Leak When the Gaskets Are Brand New?
If your seals look perfect but you are still finding puddles, the problem might be invisible to the naked eye. The most elusive leaks often occur deep within the machine. You need to know how to find a hidden leak under the motor housing, where a tiny vibration can loosen a clamp over time. Furthermore, sometimes a leak isn’t a leak at all; it is ‘suds-lock.’ This happens when your detergent becomes too reactive, often why soft water is ruining your dishwasher interior faster than hard water by creating a foam explosion that pushes water out of the air vents. When selecting the right parts for dishwasher installation, never compromise on quality. If you are currently trying to figure out how to diagnose dishwasher parts during warranty periods, remember to document every step with photos to prove the fault wasn’t yours. Have you ever fallen into this trap or had a warranty claim denied for a silly reason? Let me know in the comments.
Once you move past the initial installation hurdles, the real work begins—keeping that expensive box of gears and spray arms running without a hitch. I used to think ‘maintenance’ meant just wiping the front with stainless steel cleaner, but I was wrong. My breakthrough came when I finally bought a basic multimeter. I used to be terrified of electrical components, but learning how to test your thermal fuse with a basic multimeter changed everything for me. Instead of guessing why the machine wouldn’t start, I could spend two minutes checking for continuity. It is the difference between a $10 part and a $200 service call. If you own a modern appliance, you need to understand essential parts every dishwasher owner should know about because it empowers you to speak the same language as the warranty department when things go south.
Why Your Shop Vac is More Than a Garage Accessory
Another tool I swear by isn’t even for plumbing—it is my wet/dry shop vac. When my unit stopped draining, I didn’t reach for a plunger or harsh chemicals that could eat my seals. I learned that why a shop vac is the best way to clear a clog involves creating a suction seal at the drain line to pull out the debris that filters miss. It is cleaner and infinitely more effective at protecting your pump.  For those looking for long-term reliability, the International Association of Plumbing and Mechanical Officials (IAPMO) notes in their technical standards that improper drainage venting is a leading cause of premature pump failure in residential units. Keeping that line clear isn’t just about preventing smells; it is about the mechanical survival of your motor.
How do I keep my dishwasher running like new for years?
Success is found in the small, boring habits that most people skip. Every month, I perform the one maintenance task that doubles the life of your gasket: wiping the seals with a damp microfiber cloth to remove hidden food acids that eat away at the rubber. I also make it a point to know when to replace dishwasher parts for optimal performance, like checking the spray arms if the nozzles start to widen from hard water wear. If your water is particularly stubborn, you might find the best way to clean a filter that is coated in grease is a soak in hot water and degreasing soap, rather than a wire brush that can tear the fine mesh. Consistency here means your machine works for a decade instead of five years.
The Future of Kitchen Diagnostics is Already Under Your Sink
Looking ahead, I predict we are moving toward a ‘predictive maintenance’ era where AI-driven sensors will be standard. Within the next few years, I expect more machines to come with built-in sensors that don’t just tell you something is broken, but alert you that a leak is starting before it even hits the floor. Until then, I highly recommend installing the $20 smart sensor that detects leaks before your kitchen floods. It is the cheapest insurance policy you will ever buy for your kitchen subflooring. My challenge to you: pick up a multimeter this weekend and test one component on any appliance in your home. Once you see that digital readout confirm a part is ‘good,’ that fear of the ‘black box’ under your counter will vanish forever.
The Costly Mistakes That Changed My Maintenance Strategy
Reflecting on years of appliance ownership, I’ve realized that being ‘handy’ isn’t just about turning a wrench; it’s about preparation. One of the biggest lightbulb moments for me was learning how to get your warranty claim approved on the first try by keeping a meticulous digital folder of installation photos and receipts before a technician ever arrives. I also learned the hard way that not all coverage is created equal; you must understand the difference between factory warranties and store protection plans before the manufacturer’s clock runs out. Finally, always verify your specs before clicking ‘buy’ on a component; knowing how to find your units hidden model number for replacement parts is the only way to ensure 100% compatibility for a long-term fix.
My Essential Toolkit for Appliance Longevity
If I could go back and give my younger self a starter kit, it would include a reliable digital multimeter, a pair of needle-nose pliers, and the $20 smart sensor that detects leaks before your kitchen floods. I also highly recommend bookmarking the technical service manuals from the Association of Home Appliance Manufacturers (AHAM), as they provide the ‘real’ mechanical specs that the shiny marketing brochures often skip over. #IMAGE_PLACEHOLDER_FINAL# These tools, paired with a solid DIY dishwasher installation step-by-step guide, turn a potential weekend disaster into a quick, manageable fix that protects your investment.
You Are Ready to Handle the Next Kitchen Emergency
You’ve moved past the phase of just crossing your fingers and hoping the machine works. By mastering the small details—from the high-loop drain to the chemical science of rinse aid—you are now maximizing your dishwashers warranty coverage today through sheer competence and proper installation. Don’t let a small leak or a strange beep rattle you; you have the diagnostic mindset to solve the problem before calling in the expensive pros. What is the one dishwasher ‘symptom’ that always makes you worry it’s time for a new machine? Let’s talk about it in the comments below.
Related Posts

The Best Eco-Friendly Alternatives to Traditional Rinse Aids
I vividly remember the moment I realized my dishwasher wasn't…
Why Phosphate-Free Detergents Leave That White Film
I remember the exact moment I realized something was off…

How to Clean a Moldy Door Gasket Without Using Harsh Bleach
It was a quiet Sunday afternoon when I opened my…