
I stood there, staring at my sleek new dishwasher, wondering if a stray sock had somehow wound up in the grinder. The stench was unmistakable: raw sewage. It wasn’t the plates, and it wasn’t the garbage disposal. It was the machine itself. I had spent months pridefully showing off my kitchen remodel, only to have the entire room smell like a locker room in July every time the drain pump kicked on. It was mortifying. I eventually realized that why your professional installer checks your sink drain for clogs first isn’t just a technicality—it is a survival tactic for your nose. Today, I am going to pull back the curtain on this foul mystery and show you how a few simple adjustments to your drainage setup can reclaim your kitchen’s dignity and keep those funky odors where they belong. [image-placeholder]
Stop the Backflow Before it Ruins Your Dinner
The most common reason for that sewer-like funk is actually physics, not a broken machine. When I first started tinkering with my own appliances, I made the classic rookie mistake of thinking a drain hose just needed to get from point A to point B. I even tried to rig a connection using improper fittings, but I quickly learned why you should never use a garden hose adapter for your water line or your drain setup. If your drain hose is lying flat on the cabinet floor, dirty sink water and food particles can actually flow back into your dishwasher. This stagnant soup sits in the bottom of the tub, hidden under the filters, and rots. According to the International Association of Certified Home Inspectors, an improperly vented or looped drain line allows sewer gases—which can include methane and hydrogen sulfide—to bypass your plumbing’s natural traps and enter your home. This is why understanding the benefit of using a high loop vs an air gap for drainage is absolutely vital for any homeowner.
Can a bad smell actually ruin my dishwasher for good?
It is easy to think that a smell is just a nuisance, but it is often a warning sign of bacterial buildup that can eat away at your components. I once ignored a slight musty scent for months, only to find that the gunk had compromised my door seal. Now, I tell everyone that the one maintenance task that doubles the life of your gasket is simply keeping the machine clear of organic debris that causes these odors. Have you ever opened your machine after a ‘clean’ cycle and been hit by a wall of swamp-smell? If so, the fix is usually much cheaper than a new unit, provided you act before the slime takes over the internal hoses. Let’s look at how to inspect your hose routing right now.
Fix the Sagging Hose to Stop the Backwash
To start your inspection, pull the dishwasher out just enough to see the drain hose or peek under your kitchen sink. If that hose sags toward the floor like a tired garden snake, you have found your culprit. You need to create a high loop, which is essentially an inverted U-shape where the hose arches higher than the sink’s drain entrance before connecting to the disposal or tailpiece. This simple gravity trick acts as a one-way street, preventing dirty sink water from siphoning back into your clean machine. I learned this the hard way during my first DIY attempt when I realized the benefit of using a high loop vs an air gap for drainage is that one requires a physical hole in your granite, while the other just needs a sturdy zip tie and a bit of common sense. If you ignore this step, you will eventually find that why your warranty policy doesnt cover improper drainage loops is because manufacturers view this as a basic installation error rather than a mechanical failure. 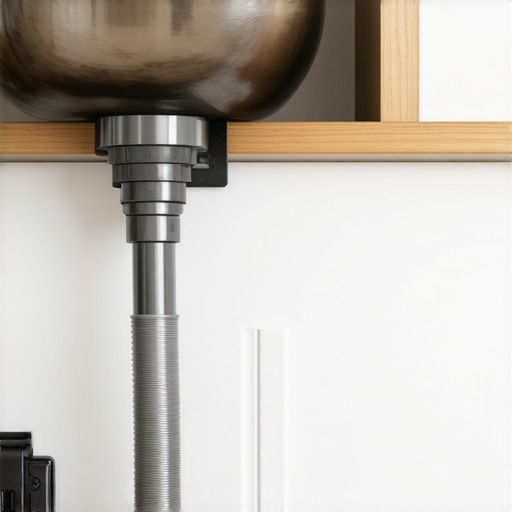
Scrub the Filter Until the Grease Vanishes
If your drainage routing looks perfect but the stench remains, the problem is likely living inside your filter assembly. I once pulled my filter out after a month of ‘light’ use only to find a layer of gray, gelatinous slime that looked like a biological hazard. It turns out that the best way to clean a filter that is coated in grease involves more than just a quick rinse under the tap; you need hot water, degreasing soap, and a soft-bristled brush to clear the mesh. While the filter is out, take a moment to look at common dishwasher parts and their role in proper installation because even a tiny piece of plastic wrap caught in the housing can prevent the pump from fully evacuating the water.
Use a Shop Vac for Stubborn Clogs
When you have standing water that refuses to move, do not reach for harsh chemical drain cleaners. I once tried to clear a blockage by poking a wire hanger down the drain—a move that almost punctured my expensive hose. Instead, I discovered why a shop vac is the best way to clear a clog without causing damage. By creating a tight seal with a wet/dry vac at the end of the drain hose, you can pull out the ‘stagnant soup’ and the debris causing the backup in seconds. It is a messy job, but it is far safer for your machine’s internal seals than any corrosive liquid.
Install New Components Every Time
One of the most expensive mistakes I ever made was trying to save fifteen dollars by reusing an old brass fitting from my previous machine. The threads were slightly worn, and it eventually developed a slow drip that I didn’t catch until the floorboards started to warp. This is exactly why your professional installer insists on a new water valve and fresh fittings. You should also take the time to evaluate parts to check when installing a dishwasher for long term performance, such as the hose clamps and the supply line. A tiny leak today is a mold colony tomorrow, and no amount of air freshener can fix a water-damaged subfloor.
Now that we have covered the basics of clogs and drain loops, let’s dig deeper into the world of professional installation and the paperwork that comes with it. Most homeowners believe that a manufacturer warranty is a safety net that catches everything for the first year. In my experience, that is one of the most expensive assumptions you can make. The truth is that why your warranty covers parts but not the 150 service trip fee is often the first painful lesson a new owner learns. You might get a ten-dollar sensor replaced for free, but you will still be on the hook for the technician’s travel time and labor. This is why understanding dishwasher warranty policies for peace of mind requires looking past the marketing and into the technical exclusions.
The Warranty Trap You Won’t See Coming
One of the biggest ‘oops’ factors I see is the disconnect between the machine and the room it sits in. You can buy the most advanced unit on the market, but why your kitchen flooring might void your installation guarantee is a nuance few consider. If your floor is unlevel or the subflooring is soft, the dishwasher will vibrate excessively, leading to micro-cracks in the plastic housing. According to the Association of Home Appliance Manufacturers (AHAM), over 25% of service calls for ‘leaks’ are actually caused by improper leveling or chassis stress from a bad installation environment, not a defect in the part itself. If a technician finds your cabinet opening is non-standard or your flooring is the culprit, they will likely deny the warranty claim on the spot.

Another subtle mistake that can drive you crazy is the mounting screw mistake that blocks your top rack from closing. It sounds like a minor annoyance, but if that screw is even a millimeter out of alignment, it forces the rack into a slight tilt. Over time, this warps the rails and causes the spray arm to misalign, leading to poor cleaning results. Instead of a free fix, you end up paying for a full rack assembly because the damage was caused by a physical installation error rather than a manufacturing defect.
Can I actually save money by choosing third-party replacement parts?
It is incredibly tempting to browse discount sites for a cheap motor or pump, but you must know how to spot a fake replacement part before it fries your control board. Counterfeit parts often lack the thermal fuses required to prevent overheating. If a third-party part causes a short circuit, you have essentially killed your machine’s ‘brain,’ and no manufacturer will cover that repair. This is exactly why professional installers refuse to use plastic supply elbows or unbranded internal hoses. They know that the risk of a high-pressure burst far outweighs the five dollars saved. Have you ever fallen into this trap of trying to save a few bucks on a part only to have it backfire? Let me know in the comments. To ensure your unit lasts, always verify parts to check when installing a dishwasher for long term performance to avoid these high-stakes headaches later.
To keep your machine from becoming a noisy, leaky mess, you need more than just a screwdriver. Over the years, I have narrowed down my ‘save-the-kitchen’ kit to three specific items. First, stop using basic channel locks on your brass fittings. I switched to a dedicated torque-limited wrench because the proper tool to use when tightening your water supply line prevents the microscopic hair-line fractures that lead to 2 AM floods. Second, if your machine suddenly goes dark, do not call a repairman until you learn how to test your thermal fuse with a basic multimeter. This five-minute check has saved me hundreds in service fees. Finally, I always keep a bottle of citric acid-based cleaner on hand. The Home Innovation Research Labs notes that mineral scaling in high-efficiency appliances can reduce flow by 30% in just two years. Using a professional-grade descaler is much more effective than vinegar for those of us living in hard-water zones. 
How do I keep my machine running like new for a decade?
Consistency is the boring secret to success. Most people wait for a leak to look under the kickplate, but understanding dishwasher parts a key to effective maintenance means doing a visual check every quarter. I personally perform the 3-minute hack to clear your spray arm nozzles every time I notice a single spot on my glasses. It is much easier to poke out a grain of rice with a toothpick now than to replace a seized pump later. You should also take a photo and learn how to find your units hidden model number for replacement parts today. When a part does eventually fail, you don’t want to be scrubbing the floor while trying to read a faded sticker. Looking forward, the industry is shifting toward ‘right-to-repair’ friendly designs, but they are also getting more complex. We are already seeing why your new machine requires a firmware update before the first wash to optimize water sensors. By 2025, expect top tips for seamless dishwasher installation in 2025 to include more about Wi-Fi signal strength than drain hose length. If you want to stay ahead of the curve, I challenge you to pull your filter today and give it the deep scrub I mentioned earlier; it is the single best thing you can do for your machine’s longevity.
The Costly Lessons No Manual Will Teach You
Reflecting on my early days as a DIY enthusiast, I realized that the hardest part isn’t the plumbing; it’s the paperwork and the hidden risks that come with modern appliances. For instance, I used to think a receipt was just for taxes, but I learned why your warranty claim fails without an authorized receipt the hard way when my control board fried during a power surge. It is also vital to realize that even if you follow every installation step perfectly, why your home insurance might not cover a diy installation leak is a policy detail that can cost you thousands in floor repairs if things go south. Finally, I’ve learned that maximizing your dishwashers warranty through proper parts selection is about staying within the manufacturer’s ecosystem to ensure you aren’t blamed for using unauthorized components if a mechanical failure occurs.
Tools and Rules That Save My Kitchen Daily
If you want to move beyond just surviving and actually thrive as a homeowner, you need a proactive toolkit that prioritizes prevention over repair. I never finish an install without the 20 smart sensor that detects leaks before your kitchen floods; it is essentially the cheapest insurance policy you can buy for your cabinetry. Beyond physical hardware, I recommend keeping a running list of essential parts every dishwasher owner should know about tucked inside your sink cabinet for quick reference. When things get complicated or a connection feels ‘off’, I always turn back to expert advice on dishwasher installation troubleshooting rather than guessing, because one wrong turn of a wrench can compromise the integrity of the entire system.
Reclaiming Your Peace of Mind One Load at a Time
You don’t have to be a master plumber to have a kitchen that smells fresh and runs quietly for years. It starts with the intention to do things right the first time and the patience to double-check your connections. By focusing on parts to check when installing a dishwasher for long term performance, you aren’t just fixing a machine; you are protecting your home’s value and your own daily sanity. You have the knowledge now—go ahead and turn that water back on with confidence. Have you ever had a DIY installation surprise you with a ‘mystery smell’ or a leak you didn’t expect? Let me know in the comments below!
Related Posts

The Reasons Behind Recurring Error Codes on Modern Units
I remember the exact moment my dishwasher decided to throw…
Why a Clogged Air Gap Causes Water to Back Up into the Sink
Ever had a sink flood unexpectedly, with water bubbling up…
Why Your Dishwasher Door Won’t Latch After a Floor Renovation
If you've recently finished a floor renovation and suddenly find…