
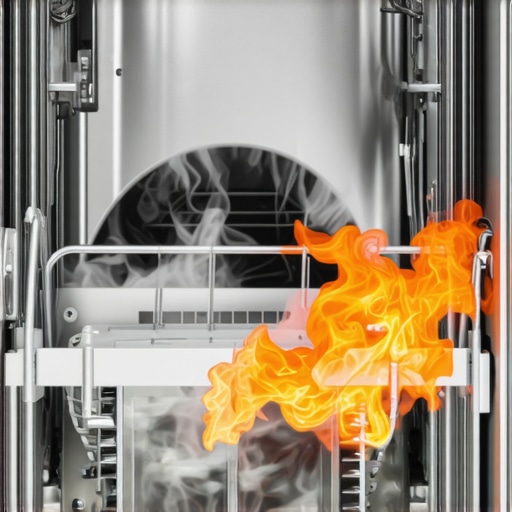
I still remember the smell of burnt toast that wasn’t actually toast—it was my expensive dishwasher trying to melt its own internals during a heavy-duty cycle. There I was, standing in a dark kitchen at 11 PM, staring at the circuit panel with a flashlight between my teeth, wondering why on earth the machine worked perfectly for the first forty minutes only to kill the power the second it started getting warm. It’s incredibly frustrating when your appliance acts like a moody teenager, refusing to finish the job just when things get intense. If you are tired of resetting that breaker every time the drying light comes on, you are in the right place. Today, we are going to dive deep into why that specific heat cycle is the “breaking point” for your electrical system and how you can diagnose the culprit before you start throwing money at a new machine.
The Heat Cycle Is the Ultimate Stress Test
Most people assume their dishwasher draws the same amount of power from start to finish, but that is a total myth. During the initial fill and wash, the motor is the primary worker. But when that heating element kicks in to raise the water temperature or dry your plates, the amperage spike is massive. If there is a microscopic crack in the heating element or a loose wire, that’s when the trouble starts. I learned this the hard way years ago when I assumed my breaker was “tired” and replaced it, only to find out a cheap, non-OEM part I’d installed months earlier was grounding out. It’s a classic example of why maximizing your dishwashers warranty through proper parts selection is so vital; those generic components just can’t handle the thermal expansion. According to experts at the International Association of Certified Home Inspectors, a dishwasher’s heating element can draw as much as 1,200 to 1,500 watts, making it one of the most power-hungry components in your kitchen.
Is my dishwasher actually a fire hazard now?
It’s the question that keeps you up at night when you see those sparks or hear that dreaded pop. While a tripping breaker is actually a safety feature doing its job—preventing a fire—it is a signal that something is fundamentally wrong. You shouldn’t ignore it. Before you panic, check the basics. For instance, why you should never use an extension cord for your dishwasher becomes very obvious during the heat cycle; the extra resistance can cause a meltdown. If your wiring is solid, the issue usually boils down to a faulty heating element or a compromised water inlet valve that’s leaking onto electrical terminals. Have you ever noticed a faint burning smell right before the power cuts out? Drop a comment below if you’ve seen that specific “smoke but no fire” scenario—it helps me know which specific diagnostic steps to walk you through next. To get started on the right foot, you might want to learn how to test your thermal fuse with a basic multimeter, as this is often the first line of defense that fails when things get too hot.
Pull the Unit and Test the Element First
To fix a breaker that only trips during the heat cycle, you have to get hands-on with the heating element. Think of this component as a giant toaster coil submerged in your wash water. If the outer protective coating develops a microscopic hairline fracture, the electricity will ‘leak’ into the water, causing a ground fault that kills your power instantly. To check this, you need to access the terminals under the machine. Once you have the unit pulled out, use the most reliable way to test a thermal fuse and the element itself by checking for continuity. If your multimeter shows ‘OL’ (Open Loop) or an infinite reading, the element is toast. I remember a specific job where the element looked brand new, but as soon as it got hot, the metal expanded just enough to expose a crack I couldn’t see with the naked eye. It was a classic case of common dishwasher parts and how to replace them effectively requiring a bit of patience and a good set of probes.
Stop the Drip Before it Hits the Wires
Sometimes the heating element is perfectly fine, but a slow leak is ‘raining’ on the electrical components. This often happens because of a failing water inlet valve. I once spent three hours chasing a ghost in a high-end unit, only to discover that a cheap, non-brand name valve was spraying a fine mist onto the main wiring harness whenever the water pressure peaked. This is exactly why you need to know how to find a hidden leak under the motor housing before you assume the circuit board is dead. 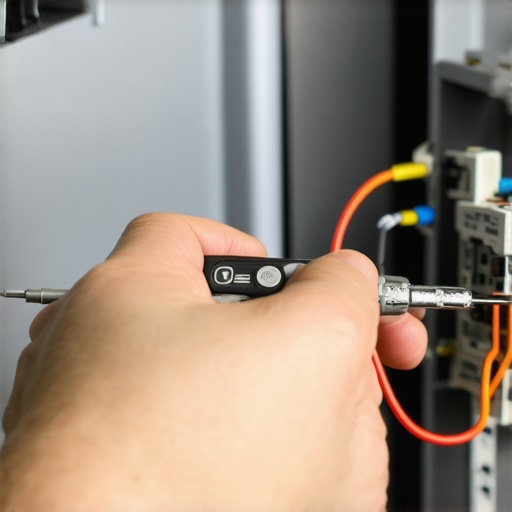 Check the plastic housing around the pump and the valve for any white, crusty calcium deposits—that’s your ‘smoking gun’ for a leak that has been shorting out your system. Even a tiny amount of moisture can bridge the gap between a live wire and the grounded chassis.
Don’t Let a $10 Valve Kill Your Control Board
If you do find a leak, resist the urge to buy the cheapest replacement you find online. I’ve seen ‘bargain’ valves fail in under a month, often causing a surge that fries the expensive smart sensors. Learning how to spot a fake replacement part before it fries your control board can save you hundreds in the long run. If the valve is dripping, it is best to learn how to replace a faulty water inlet valve in 15-minutes so you can get back to clean dishes without the fear of a kitchen fire. When you are under there, also look at the wiring harness for any melted insulation; a wire that has been rubbing against the vibrating frame of the dishwasher can easily ground out once the machine starts shaking during a high-heat drain cycle. Check every inch of the path where wires meet metal, as thermal expansion during the dry cycle can push a frayed wire right into the frame.Most homeowners I talk to want to believe the circuit breaker is just ‘getting old.’ It’s a comforting thought because replacing a $40 breaker is easier than pulling a dishwasher. But here is the hard truth: breakers are rarely the culprit. They are precision safety devices. If it trips during the high-heat phase, it is almost certainly detecting a ‘creeping’ ground fault. This is where thermal expansion becomes the villain. As the element heats up, the metal expands, and that tiny, invisible-to-the-eye crack opens up just enough to let electricity jump to the water. This isn’t just a part failure; it’s a physics problem. Even if you’ve been diligent, you might be accidentally setting yourself up for failure by skipping the nuances of a high-end setup. For example, the critical reason to flush your water lines before hooking up a new machine is often ignored by DIYers, leading to sediment buildup that causes the heating element to overheat prematurely.
Why does the trip happen only at the end of the cycle?
This is the most common advanced question I get. If the machine runs for 40 minutes and only pops the breaker during the dry cycle, it’s usually because the heat has reached its maximum ‘soak’ time. The Association of Home Appliance Manufacturers (AHAM) notes that modern high-efficiency units use intense heat pulses to maximize drying, which puts the highest stress on the internal insulation of your wires. If those wires have any degradation, the heat lowers the resistance of the insulation until—pop—the breaker goes. It is a sign that your machine is working at its limit, and ignoring it can lead to scorched internal harnesses.
The Paperwork Error That Voids Your Protection
Here is the contrarian take: your warranty isn’t as solid as you think. Most people assume that buying an OEM part guarantees coverage. In reality, why your warranty claim fails without an authorized receipt is a hard lesson many learn too late. Manufacturers aren’t just looking at the part; they are looking at the installation context. Even if you know your way around a multimeter, understanding dishwasher warranty policies for peace of mind requires knowing that a lack of a professional installation signature can be a ‘get out of jail free’ card for the manufacturer. This is why maximizing your dishwashers warranty coverage today is less about the hardware and more about the documentation you keep. Have you ever fallen into this trap where a simple DIY fix cost you your entire warranty? Let me know in the comments. I’ve seen homeowners make the mistake that voids your lifetime tub warranty just by using the wrong mounting screws or failing to document a repair. To avoid these headaches, focus on how to get your warranty claim approved on the first try by keeping a ‘dishwasher log’ of every part and service. Also, listen to the pros: why your professional installer refuses to reuse your old brass fittings isn’t a upsell; it’s a critical leak-prevention step that protects your floor and your long-term coverage.I still remember the smell of burnt toast that wasn’t actually toast—it was my expensive dishwasher trying to melt its own internals during a heavy-duty cycle. There I was, standing in a dark kitchen at 11 PM, staring at the circuit panel with a flashlight between my teeth, wondering why on earth the machine worked perfectly for the first forty minutes only to kill the power the second it started getting warm. It’s incredibly frustrating when your appliance acts like a moody teenager, refusing to finish the job just when things get intense. If you are tired of resetting that breaker every time the drying light comes on, you are in the right place. Today, we are going to dive deep into why that specific heat cycle is the “breaking point” for your electrical system and how you can diagnose the culprit before you start throwing money at a new machine.
The Heat Cycle Is the Ultimate Stress Test
Most people assume their dishwasher draws the same amount of power from start to finish, but that is a total myth. During the initial fill and wash, the motor is the primary worker. But when that heating element kicks in to raise the water temperature or dry your plates, the amperage spike is massive. If there is a microscopic crack in the heating element or a loose wire, that’s when the trouble starts. I learned this the hard way years ago when I assumed my breaker was “tired” and replaced it, only to find out a cheap, non-OEM part I’d installed months earlier was grounding out. It’s a classic example of why maximizing your dishwashers warranty through proper parts selection is so vital; those generic components just can’t handle the thermal expansion. According to experts at the International Association of Certified Home Inspectors, a dishwasher’s heating element can draw as much as 1,200 to 1,500 watts, making it one of the most power-hungry components in your kitchen.
Is my dishwasher actually a fire hazard now?
It’s the question that keeps you up at night when you see those sparks or hear that dreaded pop. While a tripping breaker is actually a safety feature doing its job—preventing a fire—it is a signal that something is fundamentally wrong. You shouldn’t ignore it. Before you panic, check the basics. For instance, why you should never use an extension cord for your dishwasher becomes very obvious during the heat cycle; the extra resistance can cause a meltdown. If your wiring is solid, the issue usually boils down to a faulty heating element or a compromised water inlet valve that’s leaking onto electrical terminals. Have you ever noticed a faint burning smell right before the power cuts out? Drop a comment below if you’ve seen that specific “smoke but no fire” scenario—it helps me know which specific diagnostic steps to walk you through next. To get started on the right foot, you might want to learn how to test your thermal fuse with a basic multimeter, as this is often the first line of defense that fails when things get too hot.
Pull the Unit and Test the Element First
To fix a breaker that only trips during the heat cycle, you have to get hands-on with the heating element. Think of this component as a giant toaster coil submerged in your wash water. If the outer protective coating develops a microscopic hairline fracture, the electricity will ‘leak’ into the water, causing a ground fault that kills your power instantly. To check this, you need to access the terminals under the machine. Once you have the unit pulled out, use the most reliable way to test a thermal fuse and the element itself by checking for continuity. If your multimeter shows ‘OL’ (Open Loop) or an infinite reading, the element is toast. I remember a specific job where the element looked brand new, but as soon as it got hot, the metal expanded just enough to expose a crack I couldn’t see with the naked eye. It was a classic case of common dishwasher parts and how to replace them effectively requiring a bit of patience and a good set of probes.
Stop the Drip Before it Hits the Wires
Sometimes the heating element is perfectly fine, but a slow leak is ‘raining’ on the electrical components. This often happens because of a failing water inlet valve. I once spent three hours chasing a ghost in a high-end unit, only to discover that a cheap, non-brand name valve was spraying a fine mist onto the main wiring harness whenever the water pressure peaked. This is exactly why you need to know how to find a hidden leak under the motor housing before you assume the circuit board is dead. Check the plastic housing around the pump and the valve for any white, crusty calcium deposits—that’s your ‘smoking gun’ for a leak that has been shorting out your system. Even a tiny amount of moisture can bridge the gap between a live wire and the grounded chassis.
Don’t Let a $10 Valve Kill Your Control Board
If you do find a leak, resist the urge to buy the cheapest replacement you find online. I’ve seen ‘bargain’ valves fail in under a month, often causing a surge that fries the expensive smart sensors. Learning how to spot a fake replacement part before it fries your control board can save you hundreds in the long run. If the valve is dripping, it is best to learn how to replace a faulty water inlet valve in 15-minutes so you can get back to clean dishes without the fear of a kitchen fire. When you are under there, also look at the wiring harness for any melted insulation; a wire that has been rubbing against the vibrating frame of the dishwasher can easily ground out once the machine starts shaking during a high-heat drain cycle. Check every inch of the path where wires meet metal, as thermal expansion during the dry cycle can push a frayed wire right into the frame.Most homeowners I talk to want to believe the circuit breaker is just ‘getting old.’ It’s a comforting thought because replacing a $40 breaker is easier than pulling a dishwasher. But here is the hard truth: breakers are rarely the culprit. They are precision safety devices. If it trips during the high-heat phase, it is almost certainly detecting a ‘creeping’ ground fault. This is where thermal expansion becomes the villain. As the element heats up, the metal expands, and that tiny, invisible-to-the-eye crack opens up just enough to let electricity jump to the water. This isn’t just a part failure; it’s a physics problem. Even if you’ve been diligent, you might be accidentally setting yourself up for failure by skipping the nuances of a high-end setup. For example, the critical reason to flush your water lines before hooking up a new machine is often ignored by DIYers, leading to sediment buildup that causes the heating element to overheat prematurely.
Why does the trip happen only at the end of the cycle?
This is the most common advanced question I get. If the machine runs for 40 minutes and only pops the breaker during the dry cycle, it’s usually because the heat has reached its maximum ‘soak’ time. The Association of Home Appliance Manufacturers (AHAM) notes that modern high-efficiency units use intense heat pulses to maximize drying, which puts the highest stress on the internal insulation of your wires. If those wires have any degradation, the heat lowers the resistance of the insulation until—pop—the breaker goes. It is a sign that your machine is working at its limit, and ignoring it can lead to scorched internal harnesses.
The Paperwork Error That Voids Your Protection
Here is the contrarian take: your warranty isn’t as solid as you think. Most people assume that buying an OEM part guarantees coverage. In reality, why your warranty claim fails without an authorized receipt is a hard lesson many learn too late. Manufacturers aren’t just looking at the part; they are looking at the installation context. Even if you know your way around a multimeter, understanding dishwasher warranty policies for peace of mind requires knowing that a lack of a professional installation signature can be a ‘get out of jail free’ card for the manufacturer. This is why maximizing your dishwashers warranty coverage today is less about the hardware and more about the documentation you keep. Have you ever fallen into this trap where a simple DIY fix cost you your entire warranty? Let me know in the comments. I’ve seen homeowners make the mistake that voids your lifetime tub warranty just by using the wrong mounting screws or failing to document a repair. To avoid these headaches, focus on how to get your warranty claim approved on the first try by keeping a ‘dishwasher log’ of every part and service. Also, listen to the pros: why your professional installer refuses to reuse your old brass fittings isn’t a upsell; it’s a critical leak-prevention step that protects your floor and your long-term coverage.I’ve realized over the years that having the right parts is only half the battle; you need a kit that stops the panic before it starts. For me, that means never reaching for a standard wrench when I can use the proper tool to use when tightening your water supply line. I’ve seen too many DIYers strip their plastic threads by over-torquing with a pair of pliers. If you’re serious about long-term safety, invest in the most durable braided steel hoses for long-term safety. These hoses are the unsung heroes that prevent that midnight flood scenario. I also keep a set of essential parts every dishwasher owner should know about in a small bin under the sink—things like a spare gasket and a few extra clips. It sounds overkill until you’re the only person on the block whose dishwasher isn’t leaking during Thanksgiving dinner.
How do I keep my dishwasher running like new for a decade?
The secret isn’t magic; it’s consistency. I always tell my friends that the one maintenance task that doubles the life of your gasket is simply wiping it down with a damp cloth once a month to remove the grit that acts like sandpaper. Also, stop being afraid of the long cycles. Contrary to popular belief, why the heavy cycle is actually better for your machine health comes down to internal temperature; higher heat actually helps dissolve the grease that would otherwise clog your drain lines. According to the Energy Star Residential Dishwasher Specification Version 7.0, modern units rely heavily on precision turbidity sensors to manage water usage. If those sensors are clouded by grease, your machine will run longer and hotter than necessary, eventually stressing the electrical components we’ve been discussing. 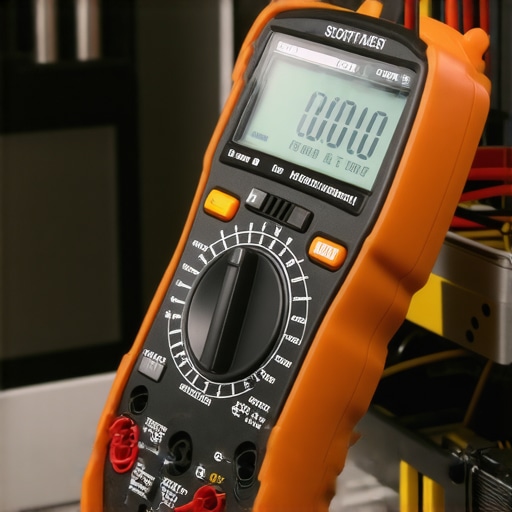
Predicting the End of the Repairman Era
Looking ahead, I predict we’re moving toward a world of predictive maintenance. We are already seeing the $15 sensor that stops your smart dishwasher from overfilling become standard, but soon, your machine will likely alert your phone that the heating element is losing resistance before it ever trips your breaker. Until that AI takes over, though, you’re the lead technician. I want you to go into your kitchen right now and try the 3-minute hack to clear your spray arm nozzles. It’s a simple win that improves cleaning performance immediately and reduces the strain on your pump motor. Keeping an eye on these small details is exactly how you master understanding dishwasher parts a key to effective maintenance.
Heat and Humidity Lessons I Had to Learn the Hard Way
Over the years, I’ve realized that the electricity isn’t the only thing moving during that intense heat cycle; it’s the humidity. One lightbulb moment for me was discovering that steam from a tiny door seal leak can actually find its way into the control board housing. It’s not a direct short, but a ‘ghost’ trip that only happens when the room gets humid. Another hard truth: every time you flip that tripped breaker back on without fixing the source, you’re slightly weakening the breaker’s internal mechanism. Eventually, the breaker will fail even if the dishwasher is fine. Finally, never underestimate the power of ‘thermal shock.’ If you notice common dishwasher parts and how to replace them effectively, you will see that the plastic brackets holding your spray arms can warp over time from excessive heat, leading to mechanical strain on the motor that eventually draws too much power.
The Toolbox That Keeps My Kitchen Flood-Free
If you want to move from frantic Googling to confident fixing, you need a few non-negotiables in your cabinet. First, a basic digital multimeter is your best friend—it turns guessing into knowing when testing for continuity in the element. Second, I cannot stress enough the importance of upgrading to the most durable braided steel hoses for long-term safety. The rubber ones are a ticking time bomb in a high-heat environment. I also keep a small stash of essential parts every dishwasher owner should know about, specifically spare door gaskets and thermal fuses. These are the low-cost components that fail first, and having them on hand transforms a potential weekend disaster into a quick ten-minute fix. #IMAGE_PLACE_HOLDER_E#
Stop Fearing the Flashlight and Take Control
Repairing your own appliance is about more than just saving a few hundred dollars on a service call; it’s about the peace of mind that comes from knowing exactly how your home works. When you take the time to focus on understanding dishwasher parts a key to effective maintenance, you stop being at the mercy of a blinking error light. You have the tools, the knowledge, and now the diagnostic steps to stop that breaker from tripping and get your kitchen back in order. Your dishwasher is a tool, and with a little patience, you are the master of it. Don’t let a small electrical hurdle stop you from maximizing your dishwashers warranty coverage today by staying proactive with your repairs. Did your breaker pop during the wash or only when the steam started rolling out? Tell me your story in the comments below!
Related Posts
Why a Clogged Air Gap Causes Water to Back Up into the Sink
Ever had a sink flood unexpectedly, with water bubbling up…
That High-Pitched Squeal: Why Your Circulation Pump is Failing
It was the middle of the night when I first…
Why Your New Dishwasher Smells Like Burning Plastic
It was a morning like any other—until I fired up…