
I remember the smell first. It wasn’t the fresh, lemony scent of a finished cycle. It was a swampy, sour odor wafting from my sink that made my eyes water. I had just finished a “successful” DIY install on a high-end dishwasher, feeling like a weekend warrior king. I thought I’d saved a fortune by skipping the pro. Then I opened the door. A pool of murky, gray sink water was sitting in the bottom of my brand-new tub. I’d made a rookie mistake with the drain line, and it nearly ruined my flooring before the manufacturer’s warranty even kicked in. My mistake was simple: I thought a “drain is a drain.” I didn’t realize that without a proper break in the line, my sink was essentially sharing its trash with my dinner plates. It was visceral, it was gross, and it was entirely avoidable.
Stop Sink Water from Ruining Your Kitchen
Back when I started tinkering with appliances, I assumed all you needed was a wrench and some luck. I was wrong. The battle between the high-loop and the air gap is about one thing: keeping your sink’s filth out of your clean dishes. If you’ve ever wondered why your installer insists on a high-loop drain, it’s because gravity is a cruel mistress. Without a proper physical barrier, every time you run your sink or the disposal, dirty water can be siphoned right back into your machine. This isn’t just about a bad smell; it’s about protecting the parts that make your dishwasher run effectively. I learned the hard way that cutting corners during dishwasher installation troubleshooting is a recipe for disaster. I once just tucked the hose behind the unit without securing it properly. Three weeks later, the hose sagged, the “loop” vanished, and my machine stopped draining. It’s a common headache, but today, I’m going to show you exactly how to choose the right setup so you never have to bail out a dishwasher with a coffee mug again. We’ll look at the necessary parts and how effective maintenance starts with the very first pipe you connect. Following top tips for dishwasher installation can save you from a very expensive service call.
Will a DIY drain setup actually void my expensive warranty?
It feels like a “hack,” doesn’t it? Just zip-tying a hose to the underside of a cabinet seems too simple to be effective. You might worry that a manufacturer will see your handiwork and laugh you out of the room when the pump eventually dies. But according to the International Association of Plumbing and Mechanical Officials (IAPMO), backflow is one of the leading causes of appliance-related health hazards in residential kitchens, and most plumbing codes actually require a specific backflow prevention method. Whether you use the high-loop or a physical air gap—that little chrome cylinder on your sink—depends on your local codes and your tolerance for “the whistle.” Some people hate the noise of an air gap, while others fear a high-loop might fail if the hose slips. If you already have an air gap, you might just need to learn how to clean the gunk out of your air gap to keep things flowing. Have you ever opened your machine only to find a puddle of dirty sink water waiting for you? It is the ultimate mood killer for a Sunday afternoon, and usually, it’s because someone skipped a five-cent zip tie or a ten-dollar part. We are going to make sure that doesn’t happen to you.
Get the High-Loop Right the First Time
To start, the high-loop is your simplest line of defense. Think of it like a roller coaster; the water needs enough momentum to get over the peak, but gravity prevents it from coming back up. You need to pull the drain hose as high as possible under the sink cabinet—literally touching the underside of the countertop—and secure it with a heavy-duty zip tie or a specialized mounting bracket. If you skip this, you are inviting sink sludge into your wash cycle. I once tried to ‘wing it’ by just draping the hose over a plumbing pipe. Three weeks later, the hose slipped, sagged, and I spent my Saturday morning mopping up gray water. That’s why top tips for seamless dishwasher installation in 2025 always emphasize a mechanical anchor. Using a sturdy clamp ensures the hose stays at that peak height, protecting the common dishwasher parts and their role in proper installation from unnecessary wear. 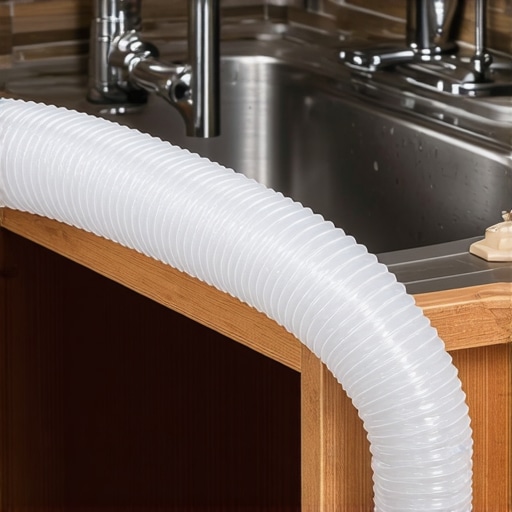
Avoid the Siphon Effect with a Proper Air Gap
If your local code requires an air gap, don’t try to bypass it. This little chrome cylinder acts as a physical break. If the drain clogs, the water spills onto the sink instead of back into the dishwasher. Installation is straightforward: you run the hose from the dishwasher to the small leg of the air gap, and a larger hose from the big leg down to the garbage disposal. I’ve seen DIYers mix these up, leading to a geyser in their kitchen. Always check that the ‘knockout’ plug in your disposal has been removed first. If you leave that plastic plug in, your machine will never drain, and you’ll find yourself searching for essential parts for troubleshooting dishwasher installation issues before you’ve even run the first load.
Why Your Warranty Depends on Your Hose Choice
Most people don’t realize that using the wrong connector can actually jeopardize their coverage. Manufacturers are incredibly picky. If a technician arrives and sees a generic, non-reinforced hose, they might flag it as an ‘improper installation,’ which is a fast track to a denied claim. To keep your understanding dishwasher warranty policies for peace of mind intact, always use the hoses recommended by the brand. I once assisted a neighbor who used a cheap, thin-walled hose that collapsed under the heat of the discharge water. The pump burned out trying to push through the restriction. Because it wasn’t an OEM part, the manufacturer refused to cover the motor replacement. This is a prime example of why your warranty claim for a door gasket was denied or why other mechanical failures aren’t covered when the setup is flawed.
Check for Clogs Before You Hook Up
Before you finalize any connection, take a look at the sink drain itself. It’s a step many skip, but it’s vital. There is a specific reason why your professional installer checks your sink drain for clogs first. If your sink is already draining slowly, adding the pressure of a dishwasher pump will only force that debris into your new machine’s check valve. I learned this the hard way during a kitchen remodel where construction debris had settled in the p-trap. The first time the dishwasher drained, the pressure blew the trap apart, flooding the new cabinetry. Always ensure the path is clear to protect the the complete list of dishwasher parts covered by warranty from being stressed by external plumbing issues.Most homeowners believe that if a part looks the same and fits the socket, it functions the same. This is a dangerous myth in the age of high-efficiency, sensor-driven appliances. Modern units are essentially computers that happen to wash plates, and the ‘close enough’ approach to repairs is a recipe for digital disaster. I have seen countless DIYers swap in a generic inlet valve only to have the machine throw a mystery error code two days later. The internal control board expects a very specific electrical signature; if it doesn’t get it, the system enters a fail-safe mode. This is why it is vital to learn how to spot a fake replacement part before it fries your control board. According to the Association of Home Appliance Manufacturers (AHAM), the integration of sophisticated sensors has made ‘universal’ parts nearly obsolete for any machine manufactured in the last five years.
Can a smart sensor actually detect a DIY installation error?
Surprisingly, yes. High-end models now feature internal data logs that record minute water pressure fluctuations and thermal spikes. If you failed to flush your lines or used an unapproved, non-reinforced hose, the machine’s log records a pattern that a savvy adjuster will use to prove improper setup. This hidden ‘black box’ is often why your warranty claim fails without an authorized receipt. It is not just about the physical leak; it is about the digital footprint left by a sub-par installation. Using common dishwasher parts and how to replace them effectively is only half the battle; the other half is ensuring the machine’s software accepts your handiwork. 
Your DIY Skills Cannot Replace a Professional Receipt
You might be the most meticulous amateur plumber in your neighborhood, but if you do not have a service invoice from a licensed technician, your efforts toward maximizing your dishwashers warranty coverage today might be dead on arrival. Manufacturers frequently use ‘lack of professional installation’ as a catch-all clause to deny claims on expensive components like motors or stainless steel tubs. It is one of the risks of skipping the professional installation receipt that few talk about until they are facing a $600 repair bill. To protect yourself, always understand what your dishwasher warranty does not cover and how to avoid fees before you even pick up a wrench. Knowing how to get your warranty claim approved on the first try involves documenting the environment just as much as the machine itself. Have you ever fallen into this trap of doing a perfect job only to be denied on a technicality? Let me know in the comments.Beyond just the paperwork, you need the right kit if you are going to handle your own maintenance. I never touch a new install without my digital multimeter and a dedicated torque-limiting wrench. Most people just crank down on the water line until it stops moving, but that is a disaster waiting to happen. Using the proper tool to use when tightening your water supply line ensures you do not crush the gasket or strip the threads. The Plumbing Manufacturers International (PMI) technical brief on high-performance connectors notes that over-tightening is actually the leading cause of stress-corrosion cracking in kitchen supply lines. I have seen lines burst months later because someone was too ‘helpful’ with a pair of pliers. 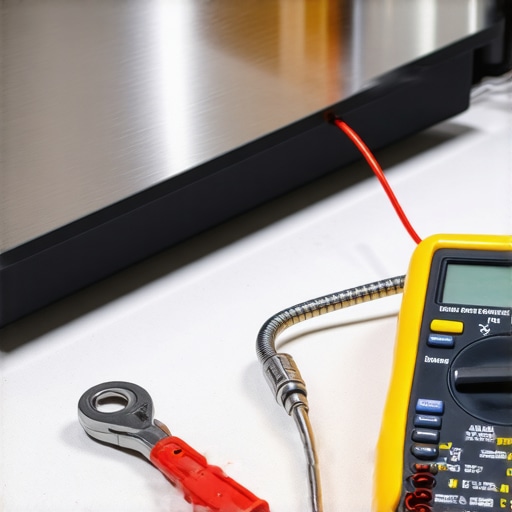
Trust a Multimeter Over Your Gut Feeling
When the machine will not start, do not just start ordering parts blindly. I always tell my readers to learn how to test your thermal fuse with a basic multimeter first. It takes thirty seconds and saves you from buying a two-hundred-dollar control board when a fifteen-dollar fuse was the real culprit. This kind of how to spot a failing wash motor before it siezes methodology is what separates the weekend warriors from the true masters of their domain. If you can verify the electrical continuity yourself, you are no longer at the mercy of a technician’s guesswork or a sales-focused repair quote.
How can I maintain my dishwasher’s performance over the years?
It truly comes down to consistency. Most people ignore their machine until it smells or stops completely. I recommend a monthly deep check where you inspect the spray arms and wipe down the door seals. Doing the one maintenance task that doubles the life of your gasket—which is literally just wiping it with a damp microfiber cloth to remove acidic food residue—will keep it supple for a decade. Also, pay close attention to the impact of hard water on your warranty eligibility; if your area has high mineral content, your internal valves will fail significantly faster, and the manufacturer might blame your local water quality rather than their own manufacturing.
The Future of Dishwasher Maintenance is Predictive
Looking ahead, we are moving toward an era where you will not have to guess when a part is failing. I predict that within the next five years, vibration-based AI sensors will be standard in most mid-range models, alerting your phone that a bearing in your pump is wearing out weeks before it actually fails. For now, you can mimic this high-tech future by installing the $20 smart sensor that detects leaks before your kitchen floods. It is a small investment that provides massive peace of mind against catastrophic water damage. Knowing when to replace dishwasher parts for optimal performance is about being proactive rather than reactive. My advice? Grab a basic multimeter this weekend and test your heating element while the machine is off—it is the absolute best way to get familiar with the guts of your machine before an actual emergency happens.
Lessons from the Trenches of a Flooded Kitchen
After years of helping homeowners fix avoidable disasters, I have realized that the line between a perfect setup and a ruined floor is thinner than a zip tie. One major lightbulb moment for me was discovering that most ‘broken’ units are simply victims of a dirty environment. When you take the time to diagnose dishwasher parts during warranty periods, you often find that the machine is working perfectly, but the installation is fighting against it. I also learned that the ‘click’ of a water connection is a lie; you have to physically tug every line to ensure a seal, or you will be mopping up at 2 AM. Most importantly, I discovered that the parts to check when installing a dishwasher for long-term performance include the often-overlooked drain loop and the tension of the door springs. If those are off, the whole system eventually fails.
The Toolkit That Actually Prevents Service Calls
You do not need a truck full of tools to keep your appliance running like new, but you do need a few specific items that the manuals often gloss over. First, I never work without a digital multimeter because the most reliable way to test a thermal fuse or heating element is through electrical continuity, not visual inspection. Second, stop using the cheap plastic inlet lines that come in the box. I always upgrade to the most durable braided steel hoses for long-term safety because they resist the pressure spikes that burst generic rubber lines. Finally, a simple $20 moisture alarm placed under the unit can save you $5,000 in flooring repairs by catching a slow drip before it rots the subfloor. These small investments provide a level of security that a standard warranty simply cannot match. #IMAGE_PLACEHOLDER_E#
Ready to Become Your Own Best Appliance Tech?
Taking ownership of your kitchen maintenance is about more than just saving money; it is about the peace of mind that comes from knowing every connection is tight and every sensor is clear. By paying attention to the common dishwasher parts and their role in proper installation, you move from being a frustrated owner to a confident home manager. Don’t be afraid to get your hands a little dirty today to ensure your dishes stay clean for the next decade. Have you ever discovered a hidden leak or a loose connection just in time? Let me know your close-call stories in the comments below.
Related Posts
The Proper Tool for Tightening Compression Fittings
It was a Friday afternoon, and I was staring at…
Why Your Drain Hose Needs a High-Loop to Prevent Sink Backflow
It was a typical Tuesday afternoon when I opened my…
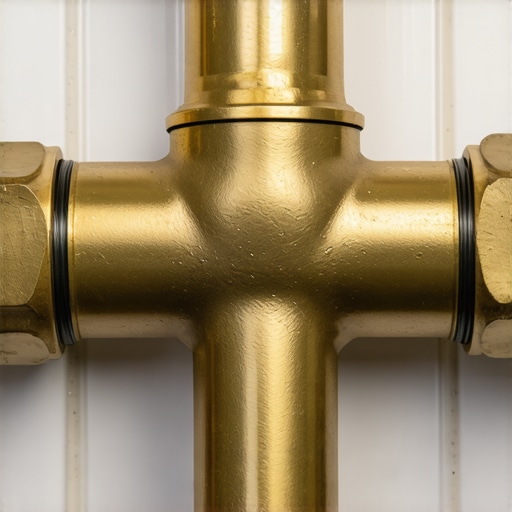
Why This $15 Brass Valve is Vital for a Leak-Proof Install
I remember the moment clearly—trying to install my dishwasher, everything…